# QML
# QML vs Qt Quick
- QML is a language: Qt Markup Language
- QML is the user interface to a C++ or Python (PySide2) application
- QML applications can use javascript and interface with the backend C++/Python.
- QML application has access to all Qt through bindings and connections.
Qt Quick is the standard library for all QML applications, providing the basic types for creating animating visual elements.
QML focuses on the user interface, rendering, and visual effects!
TIP
You should not try to write high end encryption or anything like that in QML, You should let that be handled in the back end where it belongs.
So the question becomes why would you use QML over Qt Widgets?
Qt Widgets is only a desktop, specifically Linux Mac Windows.
QML on the other hand runs on all of these things, so you can just build your app on Linux and it'll run on Mac, Windows, Android, IOS and even on a Raspberry Pi, although, you will have to tweak it for the different interfaces and screen sizes and things like that.
But if you use you know good layouts and things of that nature, it will scale seamlessly.
Limitations of QML
It's really hard to say because it depends on your specific use case.
Anything non graphical, for example a command line, is when you should not use QML
Anything graphical, my first go to would be QML.
# QML vs QtWidgets
| Qt Widgets | QML |
|---|---|
| Legacy | Newer |
| Long term support | Long term support |
| Tight desktop integration | Easy animations |
| Windows, Mac, Linux major desktops | States and transitions |
| Really attemps to look native | Separates GUI from implementation |
| Runs pretty much anywhere desktop, mobile, embedded |
Anything a QtWidgets application can do, a QML application can do slightly better.
Cross Platform
How to Write once build anywhere?
Build on target platforms - copy the code to the target platform and build it.
# Exploring Qt Creator
First, to know what you have or reinstall some components you can go to the Qt folder and run the MaintenanceTool.
# Qt Creator Kits
You have the same code but then you have different ways of compiling it.
These are called kits and builds.
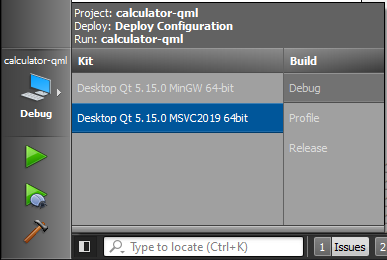
You can configure your kit by going to Tools --> Options --> Kits.
TIP
For multiple open projects, when you add an class the class maybe put in the other projects folder. That's why its better to work one at a time.
# First QML application
Remember QML is the language Qt Quick is the foundation. The actual components that we're going to use, to build that application.
So, go New Project --> Qt Quick application and choose:
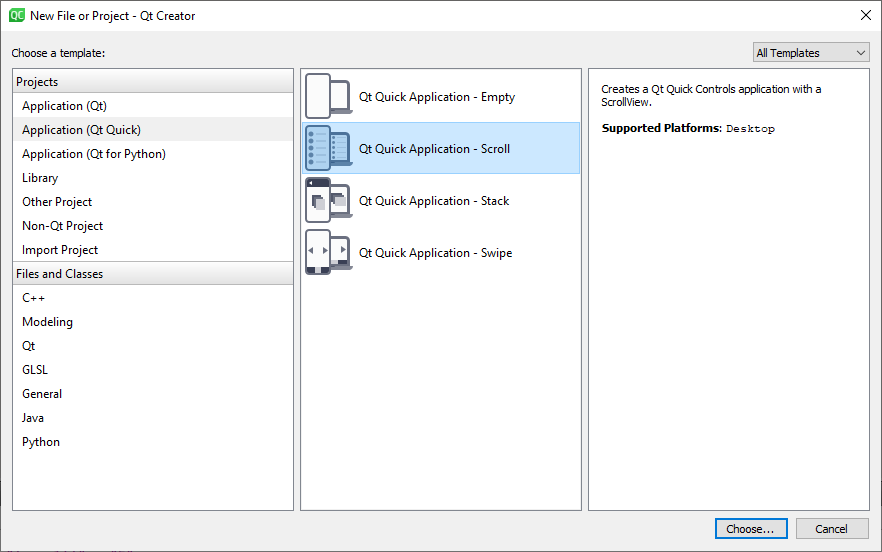
Now the difference between QML and Qt Quick is right here.
This is all QML, but these individual widgets or components those are Qt Quick.
import QtQuick 2.12
import QtQuick.Controls 2.5

ApplicationWindow {
    visible: true
    width: 640
    height: 480
    title: qsTr("Scroll")

    ScrollView {
        anchors.fill: parent

        ListView {
            width: parent.width
            model: 20
            delegate: ItemDelegate {
                text: "Item " + (index + 1)
                width: parent.width
            }
        }
    }
}
2
3
4
5
6
7
8
9
10
11
12
13
14
15
16
17
18
19
20
21
22
at the main.cpp we have:
#include <QGuiApplication>
#include <QQmlApplicationEngine>

int main(int argc, char *argv[])
{
    QCoreApplication::setAttribute(Qt::AA_EnableHighDpiScaling);

    QGuiApplication app(argc, argv);

    QQmlApplicationEngine engine;
    const QUrl url(QStringLiteral("qrc:/main.qml"));
    QObject::connect(&engine, &QQmlApplicationEngine::objectCreated,
                     &app, [url](QObject *obj, const QUrl &objUrl) {
        if (!obj && url == objUrl)
            QCoreApplication::exit(-1);
    }, Qt::QueuedConnection);
    engine.load(url);

    return app.exec();
}
2
3
4
5
6
7
8
9
10
11
12
13
14
15
16
17
18
19
20
Here We are just simply setting QCoreApplication::setAttribute(Qt::AA_EnableHighDpiScaling); that's for devices. Some devices enable that some don't.
They are specific for cell phones, really, actually shouldn't say specific for cell phones, but cell phones use that quite a bit.
Then, we're making a QGuiApplication app(argc, argv); and just starting out our event loop here return app.exec();
Then, we have a QQmlApplicationEngine engine; application engine, big long class name, But basically, this is the engine that's going to run the actual file, and you notice right off the bat this is in a resource const QUrl url(QStringLiteral("qrc:/main.qml"));.
Previous versions would actually have these QML files out on the hard drive, and you would have to distribute the binary and the QML file.
That's all a thing of the past.
Now, everything's compiled right in as a resource.
So, you just have to distribute your binary with the cute libraries, of course.
Then we have a QObject::connect Object.
Really what that's doing is just some safety checking.
Saying, hey, if it's not the right url and object then we're just going to exit with -1.
The magic really is the engine.load(url);
So we're just loading this into the engine, and what is getting load is the QML file.
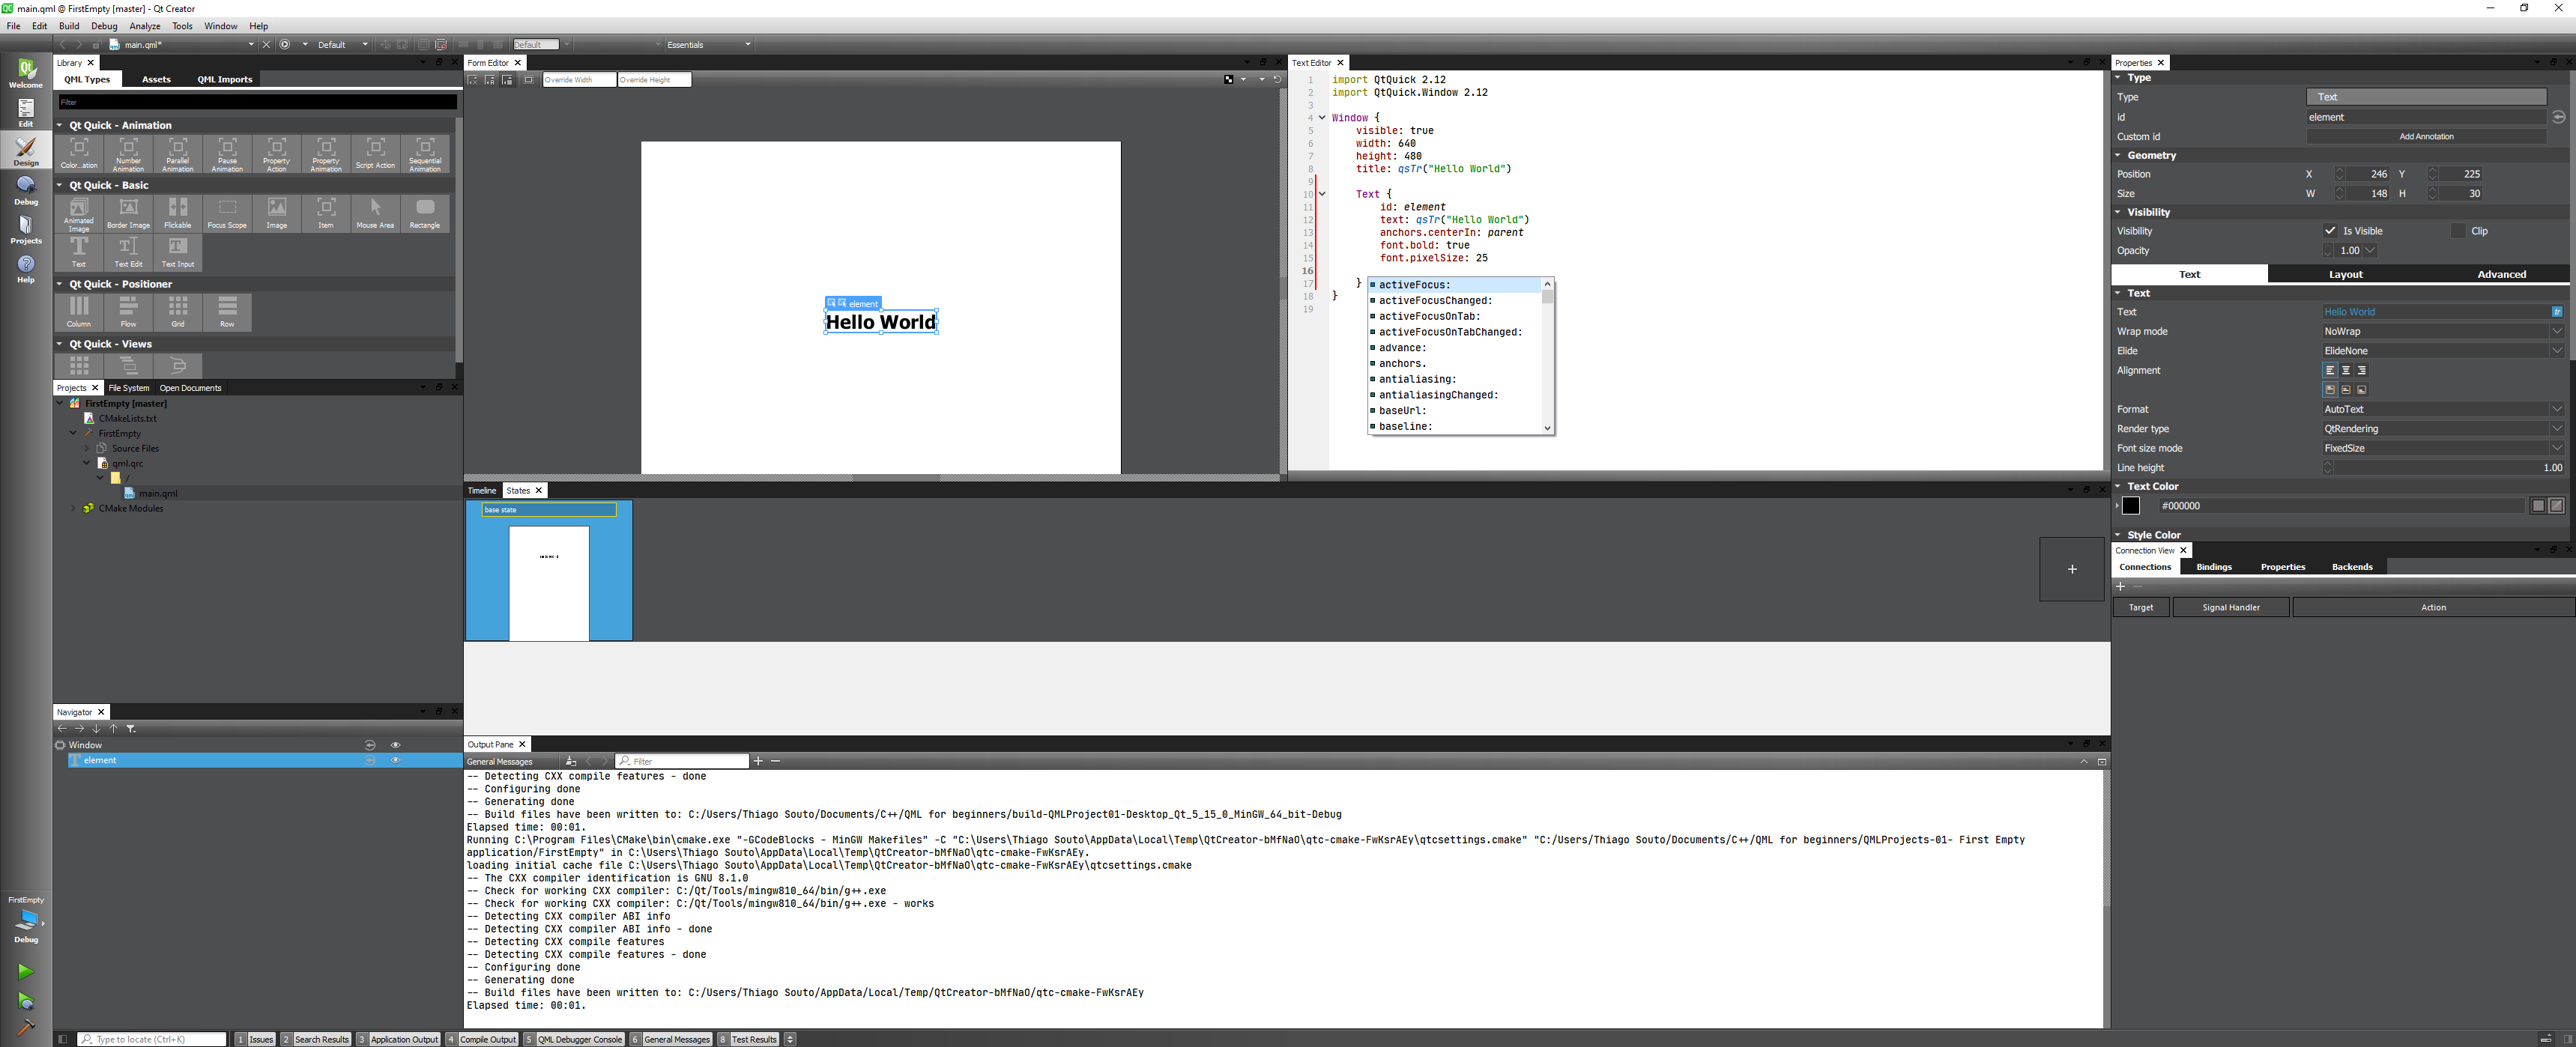
# Creating an empty Qt Quick application
This would be the "Hello World" of QML
TIP
CRTL + Space for intellisense
and if you select something and F1 you bring the integrated help file.
# Interesting questions
# Section 3: Diving into QML
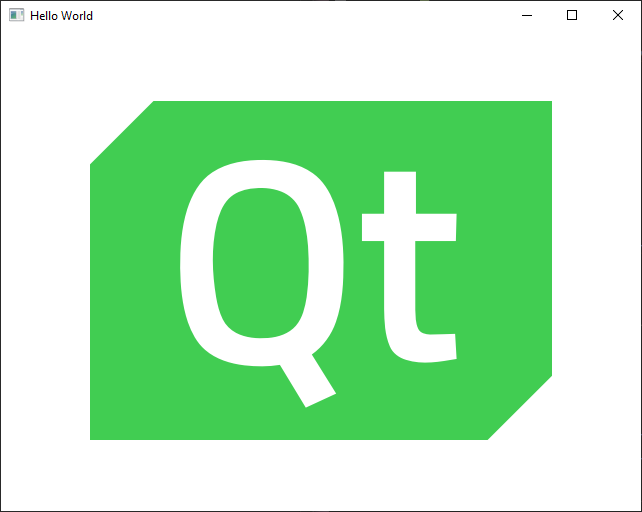
# First Program with an image
Image from the web:
import QtQuick 2.12
import QtQuick.Window 2.12

Window {
    width: 640
    height: 480
    visible: true
    title: qsTr("Hello World")

    Image {
        id: myimage
        source: "https://upload.wikimedia.org/wikipedia/commons/0/0b/Qt_logo_2016.svg"
        anchors.centerIn: parent
    }
}
2
3
4
5
6
7
8
9
10
11
12
13
14
15
TIP
Comments are like normal C++
//This is a comment!!!

/*
  This is a multi-line comment
  */
2
3
4
5
Image from the computer:
First we have to add the source to the qml.qrc. So right click on qml.qrc -> Open With -> Resource Editor.
Then right click on the image and copy URL.
import QtQuick 2.12
import QtQuick.Window 2.12

Window {
    width: 640
    height: 480
    visible: true
    title: qsTr("Hello World")

    //This is a comment!!!

    /*
      This is a multi-line comment
      */

    Image {
        id: myimage
        source: "qrc:/IMAGES/16-ShadersClass-02.png"
        anchors.centerIn: parent
    }
}
2
3
4
5
6
7
8
9
10
11
12
13
14
15
16
17
18
19
20
21
TIP
ID must be unique
Root Object - There can be only one
An image with a rectangle inside of it:
import QtQuick 2.12
import QtQuick.Window 2.12

Window {
    width: 640
    height: 480
    visible: true
    title: qsTr("Hello World")
    id: root

    Image {
        id: myimage
        source: "qrc:/IMAGES/16-ShadersClass-02.png"
        width: 150
        height: 100

        Rectangle {
            color: "red"
            width: parent.width
            height: parent.height
            opacity: 0.5 // 50%
        }
    }
}
2
3
4
5
6
7
8
9
10
11
12
13
14
15
16
17
18
19
20
21
22
23
24

Centering in the window:
import QtQuick 2.12
import QtQuick.Window 2.12

Window {
    width: 640
    height: 480
    visible: true
    title: qsTr("Hello World")
    id: root

    Image {
        id: myimage
        source: "qrc:/IMAGES/16-ShadersClass-02.png"
        width: 150
        height: 100
        anchors.centerIn: parent

        Rectangle {
            color: "red"
            width: parent.width
            height: parent.height
            opacity: 0.5 // 50%
        }
    }
}
2
3
4
5
6
7
8
9
10
11
12
13
14
15
16
17
18
19
20
21
22
23
24
25
The Top level object is the root object and there can be only one root object
TIP
Now let's talk about why can there only be one.
It's the way Q does memory management if you understand QT core, QT uses what's called a parent child hierarchy to manage memory.
So when the parent is destroyed all subsequent children are destroyed also.
So it only has to track one object.
if we come to the main.cpp file we can see that the engine is loading the url.
#include <QGuiApplication>
#include <QQmlApplicationEngine>

int main(int argc, char *argv[])
{
    QCoreApplication::setAttribute(Qt::AA_EnableHighDpiScaling);

    QGuiApplication app(argc, argv);

    QQmlApplicationEngine engine;
    const QUrl url(QStringLiteral("qrc:/main.qml"));
    QObject::connect(&engine, &QQmlApplicationEngine::objectCreated,
                     &app, [url](QObject *obj, const QUrl &objUrl) {
        if (!obj && url == objUrl)
            QCoreApplication::exit(-1);
    }, Qt::QueuedConnection);
    engine.load(url);

    return app.exec();
}
2
3
4
5
6
7
8
9
10
11
12
13
14
15
16
17
18
19
20
# QML objects vs QObjects
Creating a text input on the image
import QtQuick 2.12
import QtQuick.Window 2.12

Window {
    width: 640
    height: 480
    visible: true
    title: qsTr("Hello World")
    id: root

    Image {
        id: myimage
        source: "qrc:/IMAGES/16-ShadersClass-02.png"
        width: 150
        height: 100
        anchors.centerIn: parent
        opacity: 0.25
    }

    TextInput {
        id:myinput
        text: "Hello World"
        anchors.centerIn: parent
    }
}
2
3
4
5
6
7
8
9
10
11
12
13
14
15
16
17
18
19
20
21
22
23
24
25

Binding text with the input text
import QtQuick 2.12
import QtQuick.Window 2.12

Window {
    width: 640
    height: 480
    visible: true
    title: qsTr("Hello World")
    id: root

    Image {
        id: myimage
        source: "qrc:/IMAGES/16-ShadersClass-02.png"
        width: 150
        height: 100
        anchors.centerIn: parent
        opacity: 0.25
    }

    TextInput {
        id:myInput
        text: "Hello World"
        anchors.centerIn: parent
        font.pixelSize: 25
    }

    Text {
        id:myText
        text: myInput.text
        font.pixelSize: 25
    }
}
2
3
4
5
6
7
8
9
10
11
12
13
14
15
16
17
18
19
20
21
22
23
24
25
26
27
28
29
30
31
32
So we're gonna go to this text input and you can see it in real time changing up here so as we type that signal is emitted and it's going out to that slot and that's all happening because of property bindings.
There's a lot more that actually happens under the hood but I wanted you to be aware that that's kind of what's going on here.
# X, Y, Z positioning
import QtQuick 2.12
import QtQuick.Window 2.12

Window {
    width: 640
    height: 480
    visible: true
    title: qsTr("Hello World")
    id: root

    Image {
        id: myimage
        source: "qrc:/IMAGES/16-ShadersClass-02.png"
        width: 150
        height: 100
        x: 100
        y: 100
    }

    Rectangle {
        color: "red"
        width: 200
        height: 200
        x: 50
        y: 50
        opacity: 0.5
    }

    Rectangle {
        color: "blue"
        width: 200
        height: 200
        x: 150
        y: 150
        opacity: 0.5
    }
}
2
3
4
5
6
7
8
9
10
11
12
13
14
15
16
17
18
19
20
21
22
23
24
25
26
27
28
29
30
31
32
33
34
35
36
37

Using Z to position the layers
import QtQuick 2.12
import QtQuick.Window 2.12

Window {
    width: 640
    height: 480
    visible: true
    title: qsTr("Hello World")
    id: root

    Image {
        id: myimage
        source: "qrc:/IMAGES/16-ShadersClass-02.png"
        width: 150
        height: 100
        x: 100
        y: 100
        z: 4
    }

    Rectangle {
        color: "red"
        width: 200
        height: 200
        x: 50
        y: 50
        z: 2
        opacity: 0.5
    }

    Rectangle {
        color: "blue"
        width: 200
        height: 200
        x: 150
        y: 150
        z: 1
        opacity: 0.5
    }
}
2
3
4
5
6
7
8
9
10
11
12
13
14
15
16
17
18
19
20
21
22
23
24
25
26
27
28
29
30
31
32
33
34
35
36
37
38
39
40

TIP
The lower the Z the lower the position
If the Z is all the same, the last image on the stack stays on top.
import QtQuick 2.12
import QtQuick.Window 2.12

Window {
    width: 640
    height: 480
    visible: true
    title: qsTr("Hello World")
    id: root

    Rectangle {
        color: "red"
        width: 200
        height: 200
        x: 50
        y: 50
        z: 0
        opacity: 0.5
    }

    Rectangle {
        color: "blue"
        width: 200
        height: 200
        x: 150
        y: 150
        z: 0
        opacity: 0.5
    }

    Image {
        id: myimage
        source: "qrc:/IMAGES/16-ShadersClass-02.png"
        width: 150
        height: 100
        x: 100
        y: 100
        z: 0
    }
}
2
3
4
5
6
7
8
9
10
11
12
13
14
15
16
17
18
19
20
21
22
23
24
25
26
27
28
29
30
31
32
33
34
35
36
37
38
39
40
# Parent and child transformations
# Parent and children Relationships
Because the rectangle is a child of the image the location is related to the image and not to the window
import QtQuick 2.12
import QtQuick.Window 2.12

Window {
    width: 640
    height: 480
    visible: true
    title: qsTr("Hello World")
    id: root

    Image {
        id: myimage
        source: "qrc:/IMAGES/16-ShadersClass-02.png"
        width: 150
        height: 100
        x: 100
        y: 100
        z: 0

        Rectangle {
            color: "red"
            width: 50
            height: 50
            x: 0
            y: 0
            z: 0
            opacity: 0.5
        }
    }
}
2
3
4
5
6
7
8
9
10
11
12
13
14
15
16
17
18
19
20
21
22
23
24
25
26
27
28
29
30

Another example where the relationship between parent and child is used to position a rectangle in the bottom right corner.
import QtQuick 2.12
import QtQuick.Window 2.12

Window {
    width: 640
    height: 480
    visible: true
    title: qsTr("Hello World")
    id: root

    Image {
        id: myimage
        source: "qrc:/IMAGES/16-ShadersClass-02.png"
        width: 150
        height: 100
        x: 100
        y: 100
        z: 0

        Rectangle {
            color: "red"
            width: 50
            height: 50
            x: 0
            y: 0
            opacity: 0.5
        }

        Rectangle {
            color: "red"
            x: parent.width - width
            y: parent.height - height
            width: 50
            height: 50
            opacity: 0.5
        }
    }
}
2
3
4
5
6
7
8
9
10
11
12
13
14
15
16
17
18
19
20
21
22
23
24
25
26
27
28
29
30
31
32
33
34
35
36
37
38

An important thing to notice is that the parent will always be on the bottom layer no matter the z position. Although there are some ways to do that its not the rule.
import QtQuick 2.12
import QtQuick.Window 2.12

Window {
    width: 640
    height: 480
    visible: true
    title: qsTr("Hello World")
    id: root

    Image {
        id: myimage
        source: "qrc:/IMAGES/16-ShadersClass-02.png"
        width: 150
        height: 100
        x: 100
        y: 100
        z: 3

        Rectangle {
            color: "red"
            width: 50
            height: 50
            x: -25
            y: -25
            z: 1
            opacity: 0.5
        }

        Rectangle {
            color: "red"
            x: parent.width - width
            y: parent.height - height
            z: 0
            width: 50
            height: 50
            opacity: 0.5
        }
    }
}
2
3
4
5
6
7
8
9
10
11
12
13
14
15
16
17
18
19
20
21
22
23
24
25
26
27
28
29
30
31
32
33
34
35
36
37
38
39
40

TIP
Consider the parent as a table top and the children are layed on top of the table.
# Object interaction - TapHandler
This program will change the color of the rectangle between blue and red when its pressed.
import QtQuick 2.12
import QtQuick.Window 2.12

Window {
    width: 640
    height: 480
    visible: true
    title: qsTr("Hello World")

    Rectangle {
        anchors.centerIn: parent
        width: 100
        height: 100

        color: inputHandler.pressed ? "red" : "blue"

        TapHandler {
            id: inputHandler
        }
    }
}
2
3
4
5
6
7
8
9
10
11
12
13
14
15
16
17
18
19
20
21


Challenge: Code a program with 2 rectangles with independent TapHandle
import QtQuick 2.12
import QtQuick.Window 2.12

Window {
    width: 640
    height: 480
    visible: true
    title: qsTr("Hello World")

    Rectangle {
        anchors.centerIn: parent
        width: 100
        height: 100
        id: rect1

        color: inputHandler.pressed ? "red" : "blue"

        TapHandler {
            id: inputHandler
        }
    }

    Rectangle {
        anchors.right: rect1.left; anchors.rightMargin: 50
        anchors.bottom: rect1.bottom
        width: 100
        height: 100
        id: rect2

        color: inputHandler2.pressed ? "red" : "blue"

        TapHandler {
            id: inputHandler2
        }
    }
}
2
3
4
5
6
7
8
9
10
11
12
13
14
15
16
17
18
19
20
21
22
23
24
25
26
27
28
29
30
31
32
33
34
35
36


# Section 4: Basic types
# Item QML type
Item is the QML version of the QObject.
It defines anchors, it defines antiliasing, children, the children rectangle, clipping, data, on and on and on and on.
import QtQuick 2.12
import QtQuick.Window 2.12

Window {
    width: 640
    height: 480
    visible: true
    title: qsTr("Hello World")

    Item {
        id: myItem
        anchors.centerIn: parent
        width: 100
        height: 100

        Rectangle {
            color: "red"
            anchors.fill: parent
        }
    }
}
2
3
4
5
6
7
8
9
10
11
12
13
14
15
16
17
18
19
20
21

The power of the item component doesn't really come into play until you get a little bit more advanced; and that's why it's one of the most misunderstood terms.
They push this on you early because it is the base for all visual types, but it itself is non visual, and it makes no sense why this thing even exists.
It exists solely so that you can make your own components, and you can say I want to define my own custom object.
# Rectangle
Its an Item.
There is no circle
import QtQuick 2.12
import QtQuick.Window 2.12

Window {
    width: 640
    height: 480
    visible: true
    title: qsTr("Hello World")

    Rectangle {
        id: myItem
        anchors.centerIn: parent
        color: "red"
        width: 200
        height: 200
        visible: true //code just to exemplify that you can have an invisible one.

        border.color: "black"
        border.width: 5
    }
}
2
3
4
5
6
7
8
9
10
11
12
13
14
15
16
17
18
19
20
21

import QtQuick 2.12
import QtQuick.Window 2.12

Window {
    width: 640
    height: 480
    visible: true
    title: qsTr("Hello World")

    Rectangle {
        id: myItem
        anchors.centerIn: parent
        color: "red"
        width: 200
        height: 200
        visible: true //code just to exemplify that you can have an invisible one.

        border.color: "black"
        border.width: 5

        radius: 30
    }
}
2
3
4
5
6
7
8
9
10
11
12
13
14
15
16
17
18
19
20
21
22
23

import QtQuick 2.12
import QtQuick.Window 2.12

Window {
    width: 640
    height: 480
    visible: true
    title: qsTr("Hello World")

    Rectangle {
        id: myItem
        anchors.centerIn: parent
        color: "red"
        width: 200
        height: 200
        visible: true //code just to exemplify that you can have an invisible one.

        border.color: "black"
        border.width: 5

        radius: width
    }
}
2
3
4
5
6
7
8
9
10
11
12
13
14
15
16
17
18
19
20
21
22
23

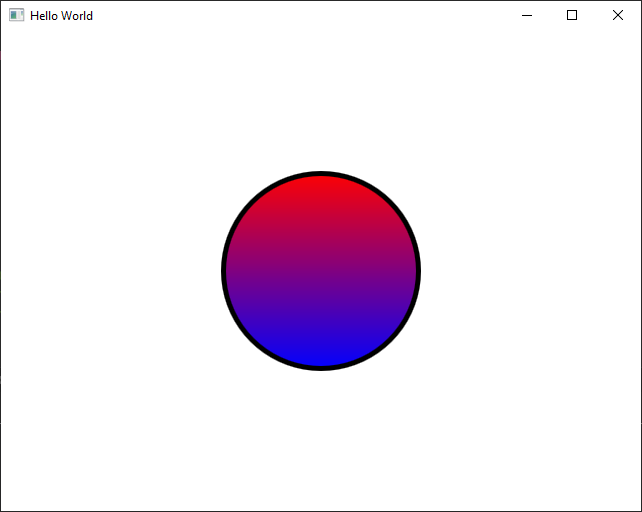
# Gradients
So what we're doing is we're saying the gradient property of the rectangle. We're going to create a new child called a gradient.
import QtQuick 2.12
import QtQuick.Window 2.12

Window {
    width: 640
    height: 480
    visible: true
    title: qsTr("Hello World")

    Rectangle {
        id: myItem
        anchors.centerIn: parent
        color: "red"
        width: 200
        height: 200
        visible: true //code just to exemplify that you can have an invisible one.

        border.color: "black"
        border.width: 5

        radius: width

        gradient: Gradient {
            GradientStop {position: 0.0; color: "red"}
            GradientStop {position: 1.0; color: "blue"}
        }
    }
}
2
3
4
5
6
7
8
9
10
11
12
13
14
15
16
17
18
19
20
21
22
23
24
25
26
27
28
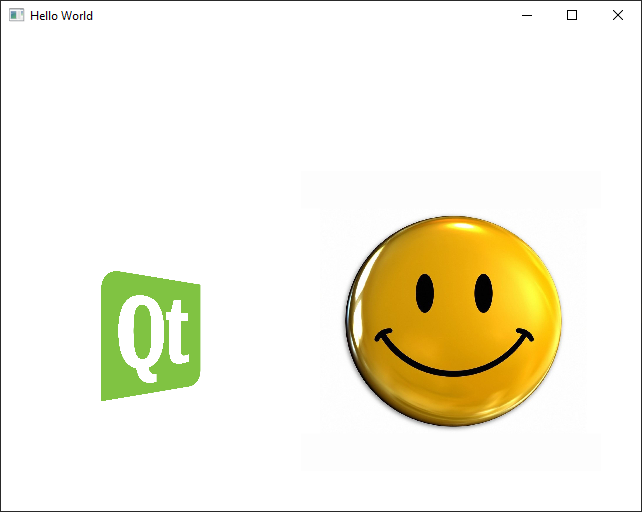
# Image QML Type
This thing is awesome.
You can actually build upon this and do like an animated image or an animated sprite so you can actually do animations very quickly.
WARNING
Image source with local or remote file there's something you need to be aware of.
First off this uses open geo meaning it's lightning quick.
One of the caveats being is that if you have a local file, that local file is preloaded when your application starts. So if you have a massive graphic it's going to try and load that application start which will kill your startup time. So buyer beware.
Don't load massive graphics into a program
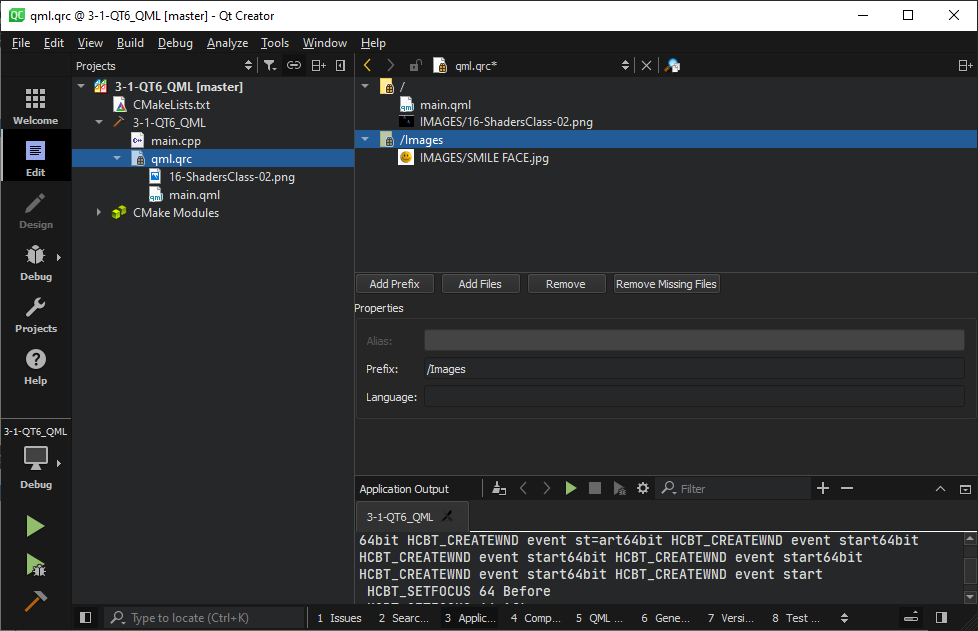
a .qrc file is a qT resource content file, meaning everything in this file gets compiled and baked right into the binary executable which includes our .qml file that we've been working with.
We're just gonna right click open with resource editor; and we're gonna add a prefix, prefix is just a fancy term for virtual directory. So we're gonna make a virtual directory called images.
import QtQuick 2.12
import QtQuick.Window 2.12
Window {
width: 640
height: 480
visible: true
title: qsTr("Hello World")
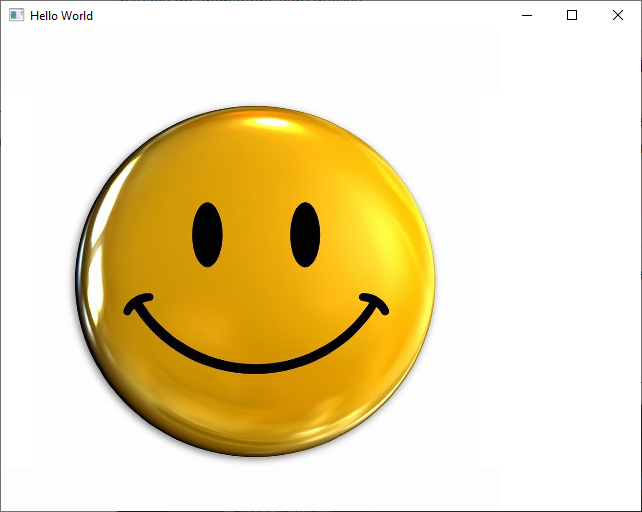
Image {
id: localImage
source: "Images/IMAGES/SMILE FACE.jpg"
width: 500
fillMode: Image.PreserveAspectFit
}
}
2
3
4
5
6
7
8
9
10
11
12
13
14
15
16
17
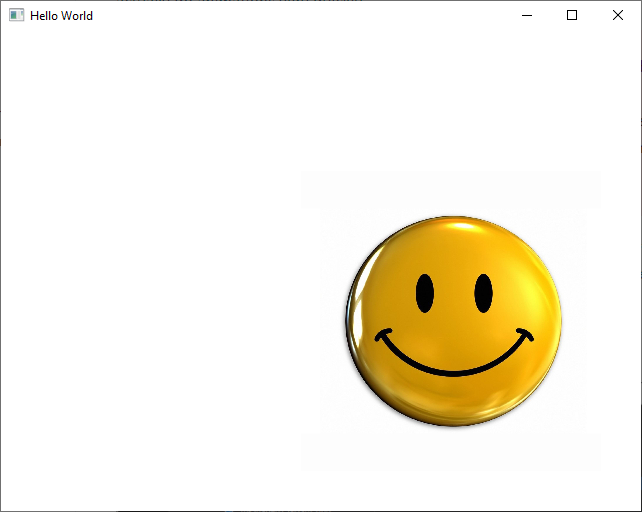
Now we want to try and position this and I'm gonna make what's called a property, which has a type a name and a value.
import QtQuick 2.12
import QtQuick.Window 2.12

Window {
    width: 640
    height: 480
    visible: true
    title: qsTr("Hello World")

    property var middle: height / 2

    Image {
        id: localImage
        source: "Images/IMAGES/SMILE FACE.jpg"

        width: 300
        fillMode: Image.PreserveAspectFit

        x: 300
        y: middle - 100
    }
}
2
3
4
5
6
7
8
9
10
11
12
13
14
15
16
17
18
19
20
21
22
TIP
You can refer to a web url.
import QtQuick 2.12
import QtQuick.Window 2.12

Window {
    width: 640
    height: 480
    visible: true
    title: qsTr("Hello World")

    property var middle: height / 2

    Image {
        id: localImage
        source: "Images/IMAGES/SMILE FACE.jpg"

        width: 300
        fillMode: Image.PreserveAspectFit

        x: 300
        y: middle - 100
    }

    Image {
        id: remoteImage
        source: "https://upload.wikimedia.org/wikipedia/commons/d/d3/Qt_logo_2015.svg"

        width: 100
        fillMode: Image.PreserveAspectFit

        x: 100
        y: middle

        onProgressChanged: console.log(remoteImage.progress)
        onStatusChanged: if(remoteImage.status == image.Ready) console.log("Remote image loaded")
    }
}
2
3
4
5
6
7
8
9
10
11
12
13
14
15
16
17
18
19
20
21
22
23
24
25
26
27
28
29
30
31
32
33
34
35
36
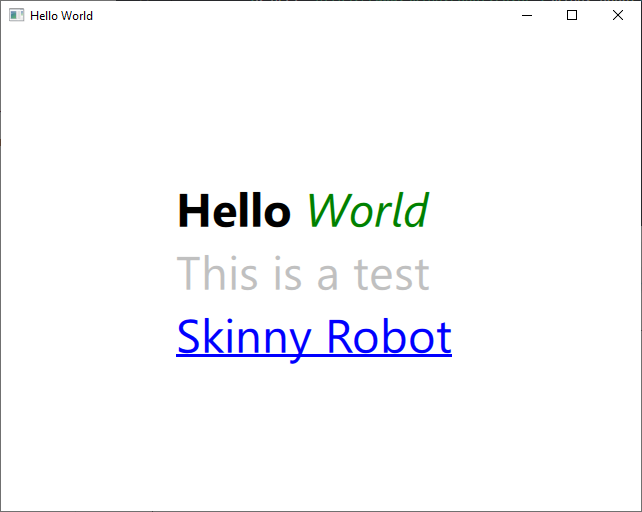
# Text
import QtQuick 2.12
import QtQuick.Window 2.12

Window {
    width: 640
    height: 480
    visible: true
    title: qsTr("Hello World")

    Text {
        id: myText
        text: qsTr("<html><b>Hello</b><i><font color='green'>World </font></i><html>")
        anchors.centerIn: parent
        font.pointSize: 35
        font.bold: true
        font.italic: false
    }
}
2
3
4
5
6
7
8
9
10
11
12
13
14
15
16
17
18
TIP
If the inline html is overridden by the QML font property sometimes it will not work.
We can also format the html on the code like this:
import QtQuick 2.12
import QtQuick.Window 2.12

Window {
    width: 640
    height: 480
    visible: true
    title: qsTr("Hello World")

    Text {
        id: myText
        text: qsTr("
        <html>
        <b>Hello</b>
        <i><font color='green'>World</font></i><br>
        <font color='#C0C0C0'>This is a test</font>
        <html>
        ")
        anchors.centerIn: parent
        font.pointSize: 35
        font.bold: true
        font.italic: false
    }
}
2
3
4
5
6
7
8
9
10
11
12
13
14
15
16
17
18
19
20
21
22
23
24
We can use a href from html:
import QtQuick 2.12
import QtQuick.Window 2.12

Window {
    width: 640
    height: 480
    visible: true
    title: qsTr("Hello World")

    Text {
        id: myText
        text: qsTr("
        <html>
        <b>Hello</b>
        <i><font color='green'>World</font></i><br>
        <font color='#C0C0C0'>This is a test</font><br>
        <a href='https://www.skinnyrobot.co.nz'>Skinny Robot</a>
        <html>
        ")
        onLinkActivated: Qt.openUrlExternally(link);
        anchors.centerIn: parent
        font.pointSize: 35
        font.bold: true
        font.italic: false
    }
}
2
3
4
5
6
7
8
9
10
11
12
13
14
15
16
17
18
19
20
21
22
23
24
25
26
TIP
Remember to use this onLinkActivated: Qt.openUrlExternally(link);, or it will not work
We can also play with some basic javascript, and change the text to bold and back on mouse hover.
import QtQuick 2.12
import QtQuick.Window 2.12

Window {
    width: 640
    height: 480
    visible: true
    title: qsTr("Hello World")

    Text {
        id: myText
        text: qsTr("
        <html>
        <b>Hello</b>
        <i><font color='green'>World</font></i><br>
        <font color='#C0C0C0'>This is a test</font><br>
        <a href='https://www.skinnyrobot.co.nz'>Skinny Robot</a>
        <html>
        ")
        onLinkHovered: {
            console.log("Hover: " + link)
            if(link) {
                myText.font.bold = true
            } else {
                myText.font.bold = false
            }
        }

        onLinkActivated: Qt.openUrlExternally(link);
        anchors.centerIn: parent
        font.pointSize: 35
        font.bold: true
        font.italic: false
    }
}
2
3
4
5
6
7
8
9
10
11
12
13
14
15
16
17
18
19
20
21
22
23
24
25
26
27
28
29
30
31
32
33
34
35
# Mouse Area
import QtQuick 2.12
import QtQuick.Window 2.12

Window {
    width: 640
    height: 480
    visible: true
    title: qsTr("Hello World")

    Rectangle {
        id: myItem
        color: "blue"
        width: 200
        height: 200
        anchors.centerIn: parent

        MouseArea {
            id: myMouse
            anchors.fill: parent
            acceptedButtons: Qt.LeftButton | Qt.RightButton
            hoverEnabled: true

            onClicked: {
                console.log("Clicked: " + mouse.button)
                if(mouse.button === Qt.LeftButton) parent.color = "green"
                if(mouse.button === Qt.RightButton) parent.color = "red"
            }

            onDoubleClicked: console.log("Double Clicked: " + mouse.button)
            onPositionChanged: console.log("Position X: " + mouseX + " Y: " + mouseY)
            onEntered: parent.color = "orange"
            onExited: parent.color = "blue"
        }
    }
}
2
3
4
5
6
7
8
9
10
11
12
13
14
15
16
17
18
19
20
21
22
23
24
25
26
27
28
29
30
31
32
33
34
35
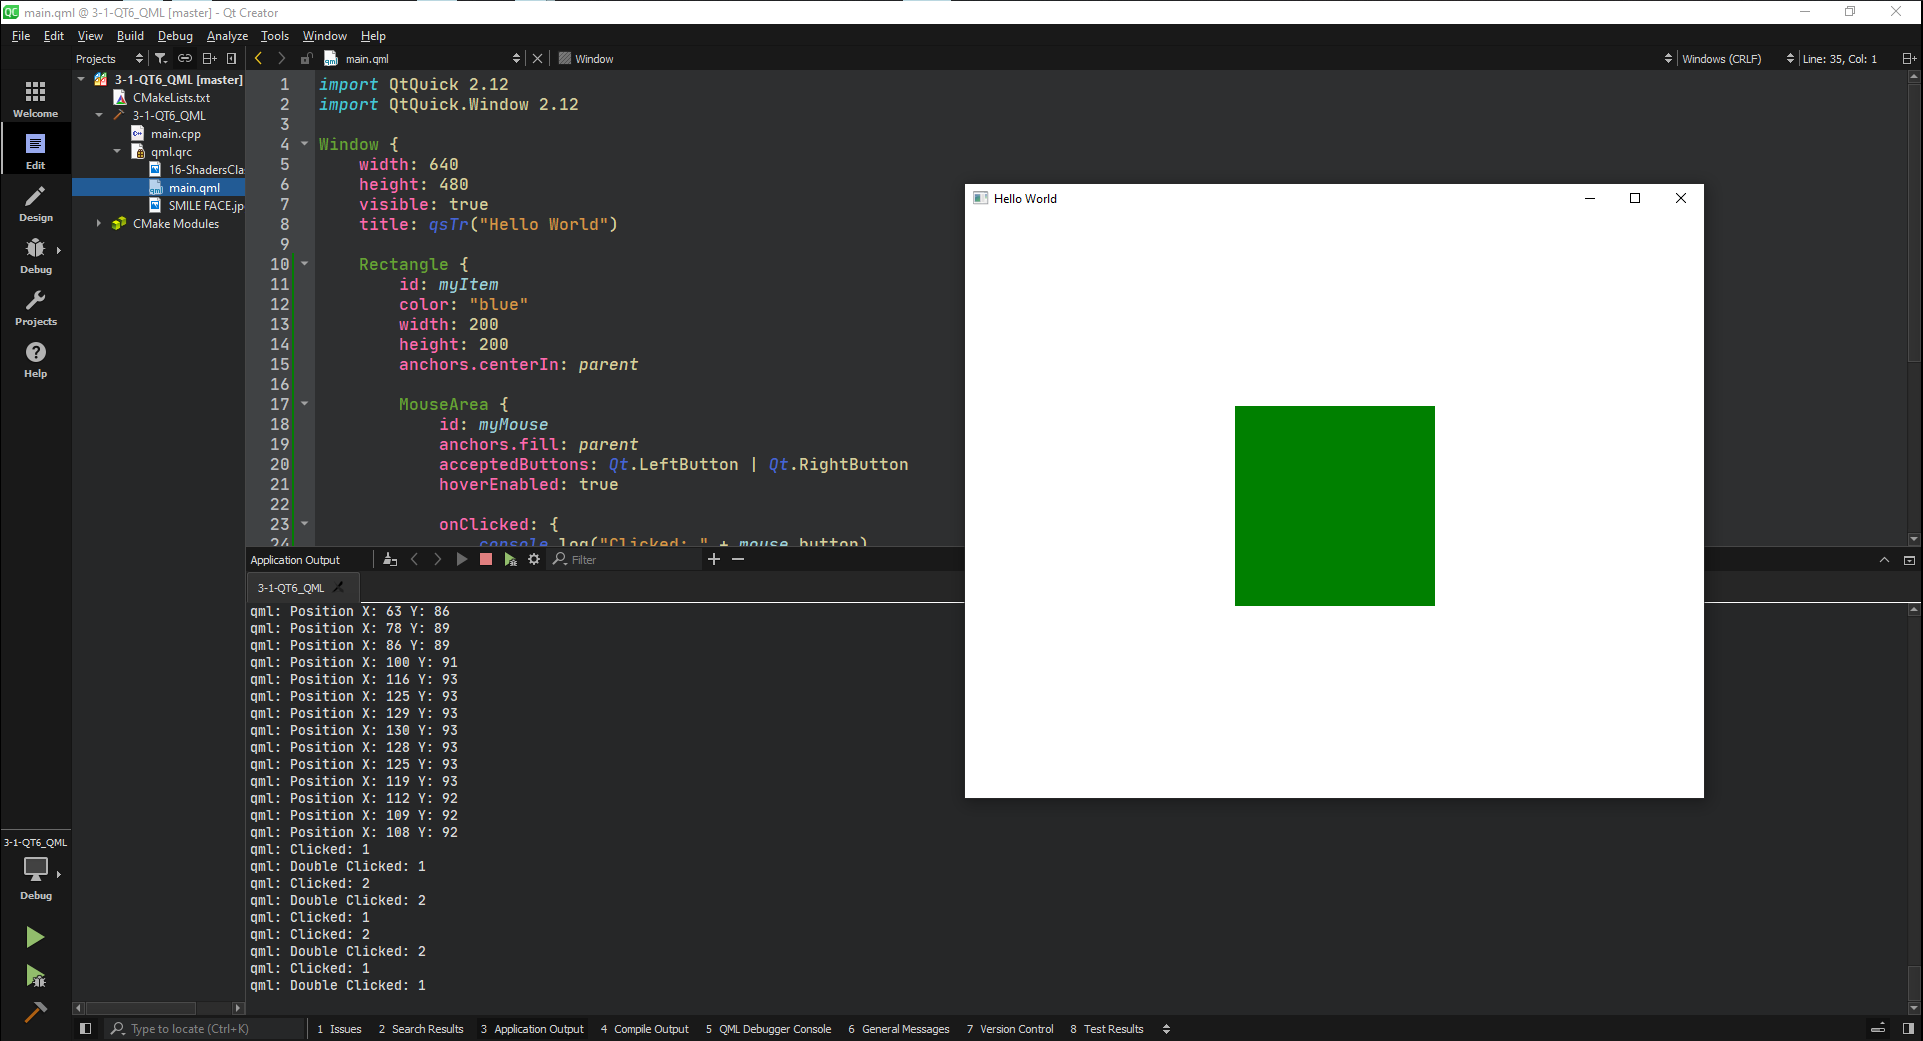
TIP
And let's just recap here is you have to acceptedButtons if you want anything more than a left button.
hoverEnabled has to be true, if you want to monitor position, onEntered or onExited.
Double click and click work by default, but again it's going to backbone on your accepted buttons and of course you have to have this fill some type of area.
You can either drop an anchor or you can do a width and height.
# Custom component
To create a custom component go to the resource file and Add New --> QT --> QML File --> Use CamelCase to name the file.
Check if it went well by checking the intellisense (Write the beginning of the component name) on the main.qml.
MyButton.qml
import QtQuick 2.0

Item {
    id: root
    width: 100
    height: 100
    property color color: "#C0C0C0"
    property color colorClicked: "green"
    property string title: "Click Me"


    Rectangle {
        id: myRec
        anchors.fill: parent
        color: root.color

        Text {
            id: display
            text: root.title
            anchors.centerIn: parent
        }

        MouseArea {
            id: mouseArea
            anchors.fill: parent
            onPressed: parent.color = root.colorClicked
            onReleased: parent.color = root.color
        }
    }
}
2
3
4
5
6
7
8
9
10
11
12
13
14
15
16
17
18
19
20
21
22
23
24
25
26
27
28
29
30
main.qml
import QtQuick 2.12
import QtQuick.Window 2.12

Window {
    width: 640
    height: 480
    visible: true
    title: qsTr("Hello World")

    property var middle: (height / 2) - 50

    MyButton {
        id: button1
        x: 100
        y: middle
        color: "red"
        colorClicked: "orange"
        title: "Button 1"

    }

    MyButton {
        id: button2
        x: (parent.width / 2) - (width / 2)
        y: middle
        color: "blue"
        colorClicked: "orange"
        title: "Button 2"

    }

    MyButton {
        id: button3
        x: parent.width - 200
        y: middle
        color: "green"
        colorClicked: "orange"
        title: "Button 3 <br> Testing"

    }

    MyButton {
        id: button4
        x: (parent.width / 2) - (width / 2)
        y: middle + 120
        width: 500
        height: 40
        color: "lightblue"
        colorClicked: "orange"
        title: "<b>Super</b> <i>Long</i> <u>Button</u>"
    }
}
2
3
4
5
6
7
8
9
10
11
12
13
14
15
16
17
18
19
20
21
22
23
24
25
26
27
28
29
30
31
32
33
34
35
36
37
38
39
40
41
42
43
44
45
46
47
48
49
50
51
52

# Section 5
# Object positioning using X, Y
TIP
Then anchors will always win the position settings.
When you set an anchors QML ignores any manual positioning
import QtQuick 2.12
import QtQuick.Window 2.12

Window {
    width: 640
    height: 480
    visible: true
    title: qsTr("Hello World")

    Rectangle {
        id: myShape
        width: 100
        height: 100
        color: "orange"

        function update() {
            console.log(x + " x " + y)
            label.text = Math.round(x) + " x " + Math.round(y)
        }

        x: 100
        y: 100
//        anchors.centerIn: parent

        Component.onCompleted: update()

        Text {
            id: label
            text: qsTr("text")
            anchors.centerIn: parent
        }

        MouseArea {
            anchors.fill: parent
        }
    }
}
2
3
4
5
6
7
8
9
10
11
12
13
14
15
16
17
18
19
20
21
22
23
24
25
26
27
28
29
30
31
32
33
34
35
36
37

and if we use the anchors the value will be wrong because the manual positioning will be ignored
import QtQuick 2.12
import QtQuick.Window 2.12

Window {
    width: 640
    height: 480
    visible: true
    title: qsTr("Hello World")

    Rectangle {
        id: myShape
        width: 100
        height: 100
        color: "orange"

        function update() {
            console.log(x + " x " + y)
            label.text = Math.round(x) + " x " + Math.round(y)
        }

        x: 100
        y: 100
        anchors.centerIn: parent

        Component.onCompleted: update()

        Text {
            id: label
            text: qsTr("text")
            anchors.centerIn: parent
        }

        MouseArea {
            anchors.fill: parent
        }
    }
}
2
3
4
5
6
7
8
9
10
11
12
13
14
15
16
17
18
19
20
21
22
23
24
25
26
27
28
29
30
31
32
33
34
35
36
37

Now let's update our rectangle position based on the mouse drag.
import QtQuick 2.12
import QtQuick.Window 2.12

Window {
    width: 640
    height: 480
    visible: true
    title: qsTr("Hello World")

    Rectangle {
        id: myShape
        width: 100
        height: 100
        color: "orange"

        function update() {
            console.log(x + " x " + y)
            label.text = Math.round(x) + " x " + Math.round(y)
        }

        x: 100
        y: 100

        onXChanged: update()
        onYChanged: update()
        // @disable-check M16
        Component.onCompleted: update()

        Text {
            id: label
            text: qsTr("text")
            anchors.centerIn: parent
        }

        MouseArea {
            anchors.fill: parent
            drag.target: parent
        }
    }
}
2
3
4
5
6
7
8
9
10
11
12
13
14
15
16
17
18
19
20
21
22
23
24
25
26
27
28
29
30
31
32
33
34
35
36
37
38
39
40

import QtQuick 2.12
import QtQuick.Window 2.12

Window {
    width: 640
    height: 480
    visible: true
    title: qsTr("Hello World")

    Rectangle {
        id: myShape
        width: 100
        height: 100
        color: "orange"

        function update() {
            console.log(x + " x " + y)
            label.text = Math.round(x) + " x " + Math.round(y)
        }

        x: 100
        y: 100

        onXChanged: update()
        onYChanged: update()
        // @disable-check M16
//        Component.onCompleted: update()

        Text {
            id: label
            text: qsTr("text")
            anchors.centerIn: parent
        }

        MouseArea {
            anchors.fill: parent
            drag.target: parent
        }
    }
}
2
3
4
5
6
7
8
9
10
11
12
13
14
15
16
17
18
19
20
21
22
23
24
25
26
27
28
29
30
31
32
33
34
35
36
37
38
39
40
TIP
// @disable-check M16, is a necessary comment for a bug in the type info that is generated for controls for use of QtCreator
Obs.: Component.onCompleted: update() is necessary in this case because we want the numbers to appear as soon as the component is loaded, otherwise it would be just the text.

# Object positioning using Z
This example will help us understand the z drag axis.
For this we will add a new QML file.
MyShape.qml
import QtQuick 2.0

Rectangle {
    width: 100
    height: 100
    color: "gray"

    MouseArea {
        anchors.fill: parent
        drag.target: parent
        onClicked: parent.z++
    }
}
2
3
4
5
6
7
8
9
10
11
12
13
on this component we are going to increment the z position when clicked.
import QtQuick 2.12
import QtQuick.Window 2.12

Window {
    width: 640
    height: 480
    visible: true
    title: qsTr("Hello World")

    MyShape {
        color: "red"
    }
}
2
3
4
5
6
7
8
9
10
11
12
13
So with this we have a red rectangle that can be dragged around.

Lastly, we are going to mess around with the initial positions se we can have it more organized on the begining of the program
import QtQuick 2.12
import QtQuick.Window 2.12

Window {
    width: 640
    height: 480
    visible: true
    title: qsTr("Hello World")

    property var midX: width / 2
    property var midY: height / 2

    MyShape {
        color: "red"
        x: midX - (width / 2)
        y: midY - (height / 2) - 30
    }

    MyShape {
        color: "green"
        x: midX - (width / 2) - 55
        y: midY - (height / 2) + 30
    }

    MyShape {
        color: "blue"
        x: midX - (width / 2) + 55
        y: midY - (height / 2) + 30
    }
}
2
3
4
5
6
7
8
9
10
11
12
13
14
15
16
17
18
19
20
21
22
23
24
25
26
27
28
29
30

# Column layout
Using the same custom component from last example we are going to create a column with three components stacked with a spacing of 2 between them.
import QtQuick 2.12
import QtQuick.Window 2.12

Window {
    width: 640
    height: 480
    visible: true
    title: qsTr("Hello World")

    Column {
        anchors.centerIn: parent
        spacing: 2
        MyShape { color: "red" }
        MyShape { color: "green" }
        MyShape { color: "blue" }
    }
}
2
3
4
5
6
7
8
9
10
11
12
13
14
15
16
17

Of course we can still move things around and play with the z position on click.

# Row layout
Self explanatory
import QtQuick 2.12
import QtQuick.Window 2.12

Window {
    width: 640
    height: 480
    visible: true
    title: qsTr("Hello World")

    Row {
        anchors.centerIn: parent
        spacing: 2
        MyShape { color: "red" }
        MyShape { color: "green" }
        MyShape { color: "blue" }
    }
}
2
3
4
5
6
7
8
9
10
11
12
13
14
15
16
17

# Grid Layout
If we don't specify the number of columns or row the grid auto arrange
import QtQuick 2.12
import QtQuick.Window 2.12

Window {
    width: 640
    height: 480
    visible: true
    title: qsTr("Hello World")

    Grid {
        anchors.centerIn: parent
        spacing: 2

        MyShape { color: "red" }
        MyShape { color: "green" }
        MyShape { color: "blue" }
        MyShape { color: "yellow" }
        MyShape { color: "brown" }
        MyShape { color: "purple" }
        MyShape { color: "black" }
        MyShape { color: "gray" }
        MyShape { color: "teal" }
        MyShape { color: "orange" }
    }
}
2
3
4
5
6
7
8
9
10
11
12
13
14
15
16
17
18
19
20
21
22
23
24
25

Although we can specify the rows and columns, the components will be stacked in order of creation.
import QtQuick 2.12
import QtQuick.Window 2.12

Window {
    width: 640
    height: 480
    visible: true
    title: qsTr("Hello World")

    Grid {
        anchors.centerIn: parent
        spacing: 2
        rows: 1
        columns: 1

        MyShape { color: "red" }
        MyShape { color: "green" }
        MyShape { color: "blue" }
        MyShape { color: "yellow" }
        MyShape { color: "brown" }
        MyShape { color: "purple" }
        MyShape { color: "black" }
        MyShape { color: "gray" }
        MyShape { color: "teal" }
        MyShape { color: "orange" }
    }
}
2
3
4
5
6
7
8
9
10
11
12
13
14
15
16
17
18
19
20
21
22
23
24
25
26
27
Notice that the last created is the orange.

But if we move them around we can see the other ones.

3 rows and 3 columns

TIP
The order can be a little frustrating because the program will try to guess the order you like, normally it goes from top to bottom left to right.
# Flow layout
import QtQuick 2.12
import QtQuick.Window 2.12

Window {
    width: 640
    height: 480
    visible: true
    title: qsTr("Hello World")

    Rectangle {
        color: "pink"
        anchors.centerIn: parent
        width: 300
        height: 400

        clip: false
    }

    Flow {
        anchors.centerIn: parent

        MyShape { color: "red" }
        MyShape { color: "green" }
        MyShape { color: "blue" }
        MyShape { color: "yellow" }
        MyShape { color: "brown" }
        MyShape { color: "purple" }
        MyShape { color: "black" }
        MyShape { color: "gray" }
        MyShape { color: "teal" }
        MyShape { color: "orange" }
    }
}
2
3
4
5
6
7
8
9
10
11
12
13
14
15
16
17
18
19
20
21
22
23
24
25
26
27
28
29
30
31
32
33

We can define a flow orientation like TopToBottom, or LeftToRight
import QtQuick 2.12
import QtQuick.Window 2.12

Window {
    width: 640
    height: 480
    visible: true
    title: qsTr("Hello World")

    Rectangle {
        color: "pink"
        anchors.centerIn: parent
        width: 300
        height: 400

        clip: false
    }

    Flow {
        anchors.centerIn: parent

        flow: Flow.TopToBottom

        MyShape { color: "red" }
        MyShape { color: "green" }
        MyShape { color: "blue" }
        MyShape { color: "yellow" }
        MyShape { color: "brown" }
        MyShape { color: "purple" }
        MyShape { color: "black" }
        MyShape { color: "gray" }
        MyShape { color: "teal" }
        MyShape { color: "orange" }
    }
}
2
3
4
5
6
7
8
9
10
11
12
13
14
15
16
17
18
19
20
21
22
23
24
25
26
27
28
29
30
31
32
33
34
35

And we can use the clip option to click the components inside the rectangle
import QtQuick 2.12
import QtQuick.Window 2.12

Window {
    width: 640
    height: 480
    visible: true
    title: qsTr("Hello World")

    Rectangle {
        color: "pink"
        anchors.centerIn: parent
        width: 300
        height: 400

        clip: true


        Flow {
            anchors.centerIn: parent

            flow: Flow.LeftToRight
            spacing: 5

            MyShape { color: "red" }
            MyShape { color: "green" }
            MyShape { color: "blue" }
            MyShape { color: "yellow" }
            MyShape { color: "brown" }
            MyShape { color: "purple" }
            MyShape { color: "black" }
            MyShape { color: "gray" }
            MyShape { color: "teal" }
            MyShape { color: "orange" }
        }
    }
}
2
3
4
5
6
7
8
9
10
11
12
13
14
15
16
17
18
19
20
21
22
23
24
25
26
27
28
29
30
31
32
33
34
35
36
37

# Anchors
First we are going to improve the MyShape component, by encapsulating it in an item.
import QtQuick 2.0


Item {
    id: root
    property color color: "gray"
    property string text: "title"

    width: 100
    height: 100

    Rectangle {
        color: root.color
        anchors.fill: parent

        property string text: ""
        Text {
            text: root.text
            anchors.centerIn: parent
        }

        MouseArea {
            anchors.fill: parent
            drag.target: root.parent
            onClicked: root.parent.z++
        }
    }
}
2
3
4
5
6
7
8
9
10
11
12
13
14
15
16
17
18
19
20
21
22
23
24
25
26
27
28
import QtQuick 2.12
import QtQuick.Window 2.12

Window {
    width: 640
    height: 480
    visible: true
    title: qsTr("Hello World")

    MyShape {
        id: shareCentral
        anchors.centerIn: parent
        text: "Hello"
    }
}
2
3
4
5
6
7
8
9
10
11
12
13
14
15

If we now set a rectangle inside the component but not use the anchors, it will be rendered inside the component but, sometimes, when you move the component the rectangle won't follow.
import QtQuick 2.12
import QtQuick.Window 2.12

Window {
    width: 640
    height: 480
    visible: true
    title: qsTr("Hello World")

    MyShape {
        id: shareCentral
        anchors.centerIn: parent
        text: "Hello"

        Rectangle {
            width: 25
            height: 25
            color: "pink"
        }
    }
}
2
3
4
5
6
7
8
9
10
11
12
13
14
15
16
17
18
19
20
21
And we can play arround with the anchors
import QtQuick 2.12
import QtQuick.Window 2.12

Window {
    width: 640
    height: 480
    visible: true
    title: qsTr("Hello World")

    MyShape {
        id: shareCentral
        anchors.centerIn: parent
        text: "Hello"

        Rectangle {
            width: 25
            height: 25
            color: "pink"
//            anchors.centerIn: parent
//            anchors.fill: parent
            anchors.right: parent.right
            anchors.bottom: parent.bottom
        }
    }
}
2
3
4
5
6
7
8
9
10
11
12
13
14
15
16
17
18
19
20
21
22
23
24
25

Making more MyShapes and anchoring them
import QtQuick 2.12
import QtQuick.Window 2.12

Window {
    width: 640
    height: 480
    visible: true
    title: qsTr("Hello World")

    MyShape {
        id: shapeCentral
        anchors.centerIn: parent
        text: "Center"

        Rectangle {
            width: 25
            height: 25
            color: "pink"
//            anchors.centerIn: parent
//            anchors.fill: parent
            anchors.right: parent.right
            anchors.bottom: parent.bottom
        }
    }

    MyShape {
        id: shapeTop
        text: "Top"
        color: "green"
        anchors.bottom: shapeCentral.top
        anchors.left: shapeCentral.left
    }

    MyShape {
        id: shapeBottom
        text: "Bottom"
        color: "blue"
        anchors.top: shapeCentral.bottom
        anchors.left: shapeCentral.left
    }

    MyShape {
        id: shapeLeft
        text: "Left"
        color: "red"
        anchors.right: shapeCentral.left
        anchors.bottom: shapeCentral.bottom
    }

    MyShape {
        id: shapeRight
        text: "Right"
        color: "yellow"
        anchors.left: shapeCentral.right
        anchors.bottom: shapeCentral.bottom
    }
}
2
3
4
5
6
7
8
9
10
11
12
13
14
15
16
17
18
19
20
21
22
23
24
25
26
27
28
29
30
31
32
33
34
35
36
37
38
39
40
41
42
43
44
45
46
47
48
49
50
51
52
53
54
55
56
57

And we can drag them all around together

# Margins
First remember that if there is no anchor there is no margin, and there is no anchor by default.
So, this:
import QtQuick 2.12
import QtQuick.Window 2.12

Window {
    width: 640
    height: 480
    visible: true
    title: qsTr("Hello World")

    Rectangle {
        anchors.centerIn: parent
        width: 300
        height: 400
        color: "red"

        Rectangle {
            width: 100
            height: 100
            color: "yellow"
            anchors.margins: 50
        }
    }
}
2
3
4
5
6
7
8
9
10
11
12
13
14
15
16
17
18
19
20
21
22
23
Results in this:

The margins will only be set for the anchors that are set
So in this case:
import QtQuick 2.12
import QtQuick.Window 2.12

Window {
    width: 640
    height: 480
    visible: true
    title: qsTr("Hello World")

    Rectangle {
        anchors.centerIn: parent
        width: 300
        height: 400
        color: "red"

        Rectangle {
            width: 100
            height: 100
            color: "yellow"
            anchors.margins: 50
            anchors.left: parent.left
        }
    }
}
2
3
4
5
6
7
8
9
10
11
12
13
14
15
16
17
18
19
20
21
22
23
24
There will be only left margin

import QtQuick 2.12
import QtQuick.Window 2.12

Window {
    width: 640
    height: 480
    visible: true
    title: qsTr("Hello World")

    Rectangle {
        anchors.centerIn: parent
        width: 300
        height: 400
        color: "red"

        Rectangle {
            width: 100
            height: 100
            color: "yellow"
            anchors.margins: 50
            anchors.left: parent.left
            anchors.bottom: parent.bottom
        }
    }
}
2
3
4
5
6
7
8
9
10
11
12
13
14
15
16
17
18
19
20
21
22
23
24
25

Also, we can set just one margin
import QtQuick 2.12
import QtQuick.Window 2.12

Window {
    width: 640
    height: 480
    visible: true
    title: qsTr("Hello World")

    Rectangle {
        anchors.centerIn: parent
        width: 300
        height: 400
        color: "red"

        Rectangle {
            width: 100
            height: 100
            color: "yellow"
            anchors.margins: 50
            anchors.left: parent.left
            anchors.bottom: parent.bottom
            anchors.leftMargin: 15
        }
    }
}
2
3
4
5
6
7
8
9
10
11
12
13
14
15
16
17
18
19
20
21
22
23
24
25
26

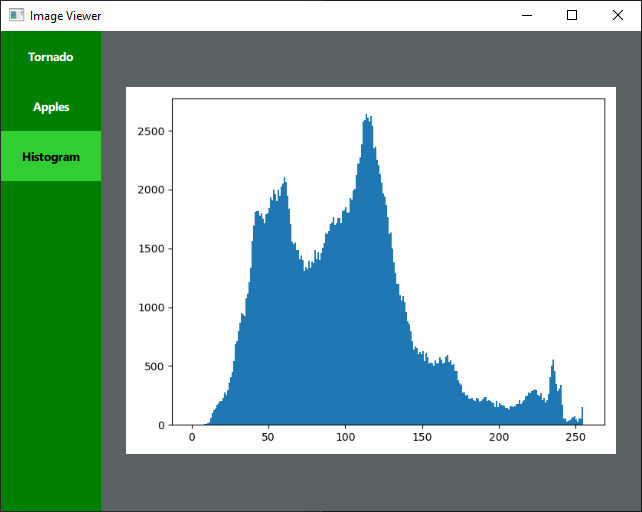
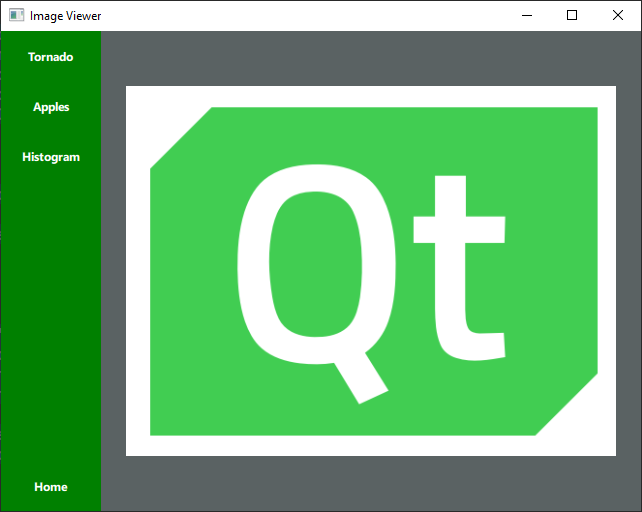
# Simple image viewer
First let's add the images and create a prefix
Now we create a new component called HoverButton
TIP
the alias type points to a child inside the stack that is being built.
Property alias basically points to another component, so they have all the properties for that component.
You use the alias property if you want to expose the child object, without having to make a property that points to every property of that child.
import QtQuick 2.0

Item {
    id: root
    property color color: "red"
    property color hoverColor: "pink"
    property color clickColor: "orange"
    property color textColor: "White"
    property color textHover: "Black"
    property alias title: display
    property alias area: mousearea

    Rectangle {
        height: root.height
        width: root.width
        color: root.color
        clip: true

        Text {
            id: display
            text: ""
            anchors.centerIn: parent
            color: root.textColor
            font.bold: true
        }

        MouseArea {
            id: mousearea
            anchors.fill: parent
            hoverEnabled: true

            onEntered: {
                parent.color = root.hoverColor
                display.color = root.textHover
            }

            onExited: {
                parent.color = root.color
                display.color = root.textColor
            }

            onPressed: parent.color = root.clickColor
            onReleased: parent.color = root.hoverColor
        }
    }
}
2
3
4
5
6
7
8
9
10
11
12
13
14
15
16
17
18
19
20
21
22
23
24
25
26
27
28
29
30
31
32
33
34
35
36
37
38
39
40
41
42
43
44
45
46
main.qml
import QtQuick 2.12
import QtQuick.Window 2.12

Window {
    width: 640
    height: 480
    visible: true
    title: qsTr("Image Viewer")
    id: root

    property color bgcolor: "#5A6263"
    property color buttoncolor: "green"
    property color hovercolor: "limegreen"
    property color clickcolor: "yellow"
    property var size: 100

    Rectangle {
        id: background
        color: root.buttoncolor
        width: 100
        height: parent.height

        Column {
            id: column
            anchors.fill: parent

            HoverButton {
                width: 100
                height: 50
                title.text: "Tornado"
                color: root.buttoncolor
                hoverColor: root.hovercolor
                clickColor: root.clickcolor

                area.onPressed: image.source = "qrc:/Images/IMAGES/Tornado.png"
            }

            HoverButton {
                width: 100
                height: 50
                title.text: "Apples"
                color: root.buttoncolor
                hoverColor: root.hovercolor
                clickColor: root.clickcolor

                area.onPressed: image.source = "qrc:/Images/IMAGES/k12.png"
            }

            HoverButton {
                width: 100
                height: 50
                title.text: "Histogram"
                color: root.buttoncolor
                hoverColor: root.hovercolor
                clickColor: root.clickcolor

                area.onPressed: image.source = "qrc:/Images/IMAGES/Histogram-Threshold.png"
            }
        }
    }

    Rectangle {
        id: rectangle
        color: root.bgcolor
        x: 100
        y: 0
        width: parent.width - x
        height: parent.height

        Image {
            id: image
            anchors.margins: 25
            anchors.fill: parent
            fillMode: Image.PreserveAspectFit
            source: "qrc:/Images/IMAGES/SMILE FACE.jpg"
        }
    }
}
2
3
4
5
6
7
8
9
10
11
12
13
14
15
16
17
18
19
20
21
22
23
24
25
26
27
28
29
30
31
32
33
34
35
36
37
38
39
40
41
42
43
44
45
46
47
48
49
50
51
52
53
54
55
56
57
58
59
60
61
62
63
64
65
66
67
68
69
70
71
72
73
74
75
76
77
78
Adding a home button:
import QtQuick 2.12
import QtQuick.Window 2.12

Window {
    width: 640
    height: 480
    visible: true
    title: qsTr("Image Viewer")
    id: root

    property color bgcolor: "#5A6263"
    property color buttoncolor: "green"
    property color hovercolor: "limegreen"
    property color clickcolor: "yellow"
    property var size: 100

    Rectangle {
        id: background
        color: root.buttoncolor
        width: 100
        height: parent.height

        HoverButton {
            width: 100
            height: 50
            title.text: "Home"
            color: root.buttoncolor
            hoverColor: root.hovercolor
            clickColor: root.clickcolor

            area.onPressed: image.source = "qrc:/IMAGES/qml.png"
            anchors.bottom: background.bottom
        }

        Column {
            id: column
            anchors.fill: parent

            HoverButton {
                width: 100
                height: 50
                title.text: "Tornado"
                color: root.buttoncolor
                hoverColor: root.hovercolor
                clickColor: root.clickcolor

                area.onPressed: image.source = "qrc:/Images/IMAGES/Tornado.png"
            }

            HoverButton {
                width: 100
                height: 50
                title.text: "Apples"
                color: root.buttoncolor
                hoverColor: root.hovercolor
                clickColor: root.clickcolor

                area.onPressed: image.source = "qrc:/Images/IMAGES/k12.png"
            }

            HoverButton {
                width: 100
                height: 50
                title.text: "Histogram"
                color: root.buttoncolor
                hoverColor: root.hovercolor
                clickColor: root.clickcolor

                area.onPressed: image.source = "qrc:/Images/IMAGES/Histogram-Threshold.png"
            }
        }
    }

    Rectangle {
        id: rectangle
        color: root.bgcolor
        x: 100
        y: 0
        width: parent.width - x
        height: parent.height

        Image {
            id: image
            anchors.margins: 25
            anchors.fill: parent
            fillMode: Image.PreserveAspectFit
            source: "qrc:/IMAGES/qml.png"
        }
    }
}
2
3
4
5
6
7
8
9
10
11
12
13
14
15
16
17
18
19
20
21
22
23
24
25
26
27
28
29
30
31
32
33
34
35
36
37
38
39
40
41
42
43
44
45
46
47
48
49
50
51
52
53
54
55
56
57
58
59
60
61
62
63
64
65
66
67
68
69
70
71
72
73
74
75
76
77
78
79
80
81
82
83
84
85
86
87
88
89
90
# Section 6 - Properties and animations
# Property and PropertyAnimation
Animating a square to cross the screen:
import QtQuick 2.12
import QtQuick.Window 2.12

Window {
    width: 640
    height: 480
    visible: true
    title: qsTr("Image Viewer")
    id: root

    Rectangle {
        id: myShape
        color: "red"
        width: 100
        height: 100
        x: 0
        y: (parent.height / 2) - (height / 2)

        PropertyAnimation {
            id: animationRight
            target: myShape
            property: "x"
            to: root.width - myShape.width
            duration: 500
        }

        PropertyAnimation {
            id: animationLeft
            target: myShape
            property: "x"
            to: 0
            duration: 500
        }

        MouseArea {
            anchors.fill: parent
            onClicked: {
                if(myShape.x === 0) {
                    animationRight.start()
                } else animationLeft.start()
            }
        }
    }
}
2
3
4
5
6
7
8
9
10
11
12
13
14
15
16
17
18
19
20
21
22
23
24
25
26
27
28
29
30
31
32
33
34
35
36
37
38
39
40
41
42
43
44


# Rotation and RotationAnimation
import QtQuick 2.12
import QtQuick.Window 2.12

Window {
    width: 640
    height: 480
    visible: true
    title: qsTr("Image Viewer")
    id: root

    Rectangle {
        id: myShape
        color: "red"
        width: 200
        height: 200
        anchors.centerIn: parent

        Text {
            id: title
            text: Math.round(parent.rotation)
            anchors.centerIn: parent
            font.bold: true
            font.pointSize: 65
        }

        RotationAnimation {
            id:animation
            target: myShape
            loops: Animation.Infinite
            from: myShape.rotation
            to: 360 //-360 is BAD
            direction: RotationAnimation.Clockwise
            duration: 20000
            running: true
        }
    }
}
2
3
4
5
6
7
8
9
10
11
12
13
14
15
16
17
18
19
20
21
22
23
24
25
26
27
28
29
30
31
32
33
34
35
36
37

TIP
The use of id like in myShape.rotation could be a problem if there is any spelling mistake. Be Aware.
Including a mouse area so we can pause the animation with a click:
import QtQuick 2.12
import QtQuick.Window 2.12

Window {
    width: 640
    height: 480
    visible: true
    title: qsTr("Image Viewer")
    id: root

    Rectangle {
        id: myShape
        color: "red"
        width: 200
        height: 200
        anchors.centerIn: parent

        Text {
            id: title
            text: Math.round(parent.rotation)
            anchors.centerIn: parent
            font.bold: true
            font.pointSize: 65
        }

        RotationAnimation {
            id:animation
            target: myShape
            loops: Animation.Infinite
            from: myShape.rotation
            to: 360 //-360 is BAD
            direction: RotationAnimation.Clockwise
            duration: 20000
            running: true
        }

        MouseArea {
            id: area
            anchors.fill: parent
            onClicked: {
                if (animation.paused) {
                    animation.resume()
                } else {
                    animation.pause()
                }
            }
        }
    }
}
2
3
4
5
6
7
8
9
10
11
12
13
14
15
16
17
18
19
20
21
22
23
24
25
26
27
28
29
30
31
32
33
34
35
36
37
38
39
40
41
42
43
44
45
46
47
48
49
TIP
animation.paused returns a boolean saying if the animation was paused, and animation.pause() apuses the animation
# Scale and SequentialAnimation
Now using a sequential animation we are going to scale up the rectangle and scale down in a sequence. We are also cliping the text to the rectangle.
import QtQuick 2.12
import QtQuick.Window 2.12

Window {
    width: 640
    height: 480
    visible: true
    title: qsTr("Image Viewer")
    id: root

    Rectangle {
        id: myShape
        color: "red"
        width: 200
        height: 200
        anchors.centerIn: parent
        clip: true

        Text {
            id: title
            text: qsTr("SCALE")
            font.bold: true
            font.pointSize: 67
            rotation: -45
            anchors.centerIn: parent
        }

        SequentialAnimation {
            id: animation
            running: true
            loops: Animation.Infinite

            ScaleAnimator {
                id: aniShrink
                target: myShape
                from: 1
                to: 0.5
                duration: 2000
                running: true
            }

            ScaleAnimator {
                id: aniGrow
                target: myShape
                from: 0.5
                to: 1
                duration: 2000
                running: true
            }
        }
    }
}
2
3
4
5
6
7
8
9
10
11
12
13
14
15
16
17
18
19
20
21
22
23
24
25
26
27
28
29
30
31
32
33
34
35
36
37
38
39
40
41
42
43
44
45
46
47
48
49
50
51
52

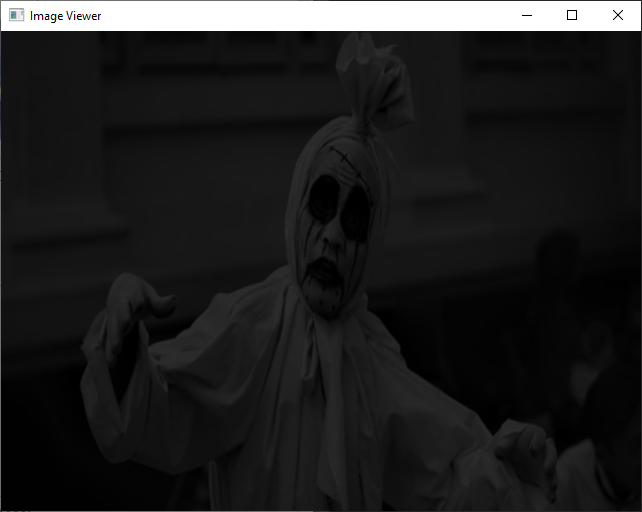
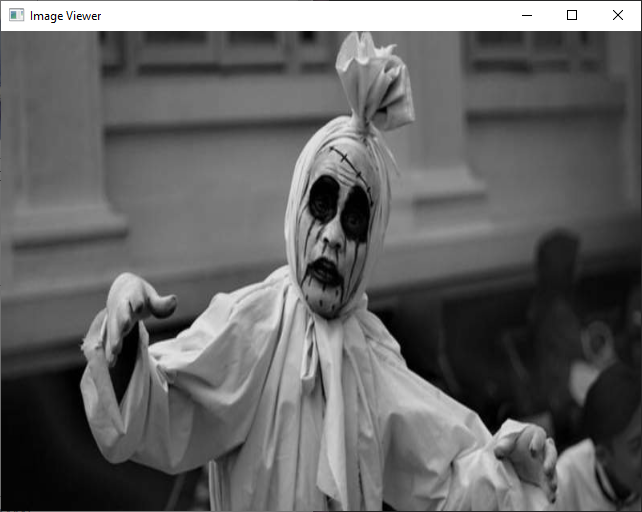
# Opacity and OpacityAnimator
For the opacity example we are going to change the windows backgroung to black so we can have the desired effect and set an opacity animation.
import QtQuick 2.12
import QtQuick.Window 2.12

Window {
    width: 640
    height: 480
    visible: true
    title: qsTr("Image Viewer")
    id: root
    color: "black"

    Image {
        id: ghost
        source: "qrc:/IMAGES/Ghost.jfif"
        anchors.fill: parent
        opacity: 0
    }

    SequentialAnimation {
        loops: Animation.Infinite
        running: true

        OpacityAnimator {
            target: ghost
            from: 0
            to: 1
            duration:  500
        }

        OpacityAnimator {
            target: ghost
            from: 1
            to: 0
            duration:  3000
        }
    }
}
2
3
4
5
6
7
8
9
10
11
12
13
14
15
16
17
18
19
20
21
22
23
24
25
26
27
28
29
30
31
32
33
34
35
36
37
# SmoothedAnimation
import QtQuick 2.15
import QtQuick.Window 2.15

Window {
    visible: true
    width: 640
    height: 480
    title: qsTr("Animation test")

    Rectangle {
        anchors.fill: parent
        color: "black"
        focus: true

        Rectangle {
            width: 60
            height: 60
            color: "yellow"
            radius: width

            x: rect1.x -5
            y: rect1.y -5

            Behavior on x { SmoothedAnimation {velocity: 100}}
            Behavior on y { SmoothedAnimation {velocity: 100}}

        }

        Rectangle {
            id:rect1
            width: 50
            height: 50
            color: "red"
            radius: width
            x: (parent.width/2) - (width/2)
            y: (parent.height/2) - (height/2)
        }

        Keys.onRightPressed: rect1.x = rect1.x + 100
        Keys.onLeftPressed: rect1.x = rect1.x - 100
        Keys.onUpPressed: rect1.y = rect1.y - 100
        Keys.onDownPressed: rect1.y = rect1.y + 100
    }
}
2
3
4
5
6
7
8
9
10
11
12
13
14
15
16
17
18
19
20
21
22
23
24
25
26
27
28
29
30
31
32
33
34
35
36
37
38
39
40
41
42
43
44
TIP
focus: true, basically means that if you hit the keyboard this item will be affected because it is in focus.

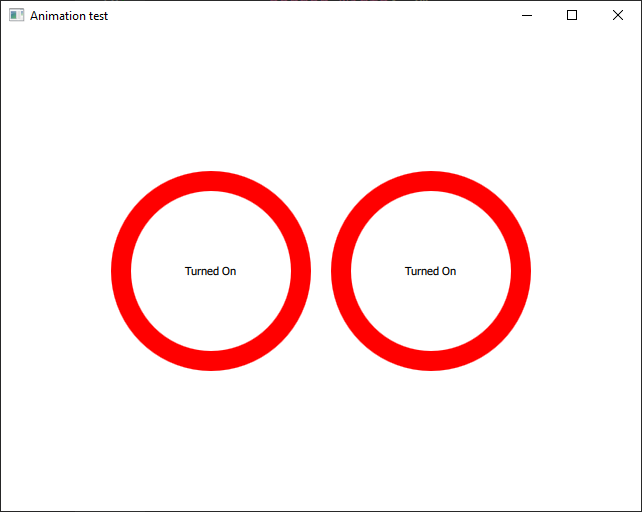
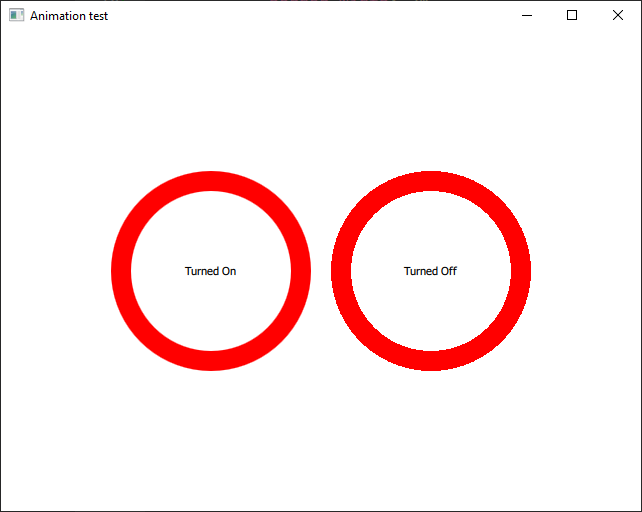
# Anti-aliasing
Anti-aliasing is turned on by default, but you can turn it off.
import QtQuick 2.15
import QtQuick.Window 2.15

Window {
    visible: true
    width: 640
    height: 480
    title: qsTr("Animation test")

    Row {
        anchors.centerIn: parent
        spacing: 20

        Rectangle {
            width: 200
            height: 200
            border.color: "red"
            border.width: 20
            radius: width

            Text {
                anchors.centerIn: parent
                text: qsTr("Turned On")
            }
        }

        Rectangle {
            width: 200
            height: 200
            border.color: "red"
            border.width: 20
            radius: width
            antialiasing: false

            Text {
                anchors.centerIn: parent
                text: qsTr("Turned Off")
            }
        }
    }
}
2
3
4
5
6
7
8
9
10
11
12
13
14
15
16
17
18
19
20
21
22
23
24
25
26
27
28
29
30
31
32
33
34
35
36
37
38
39
40
41
# Keyboard input
In this example we are going to control the width and height of the red rectangle.
import QtQuick 2.15
import QtQuick.Window 2.15

Window {
    visible: true
    width: 640
    height: 480
    title: qsTr("Animation test")

    Rectangle {
        id: background
        anchors.fill: parent
        color: "black"
        focus: true

        Rectangle {
            id: rect1
            anchors.centerIn: parent
            width: 100
            height: 100
            color: "red"
        }

        Rectangle {
            id: outline
            anchors.centerIn: parent
            width: 100
            height: 100
            color: "transparent"
            border.color: "yellow"
            border.width: 5
        }

        Keys.onUpPressed: rect1.height += 10
        Keys.onDownPressed: rect1.height -= 10
        Keys.onLeftPressed: rect1.width += 10
        Keys.onRightPressed: rect1.width -= 10
    }
}
2
3
4
5
6
7
8
9
10
11
12
13
14
15
16
17
18
19
20
21
22
23
24
25
26
27
28
29
30
31
32
33
34
35
36
37
38
39

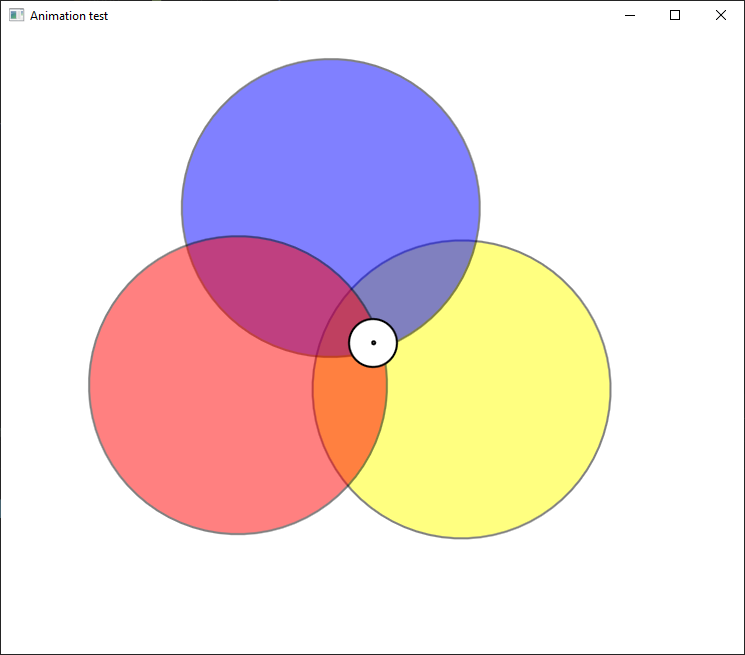
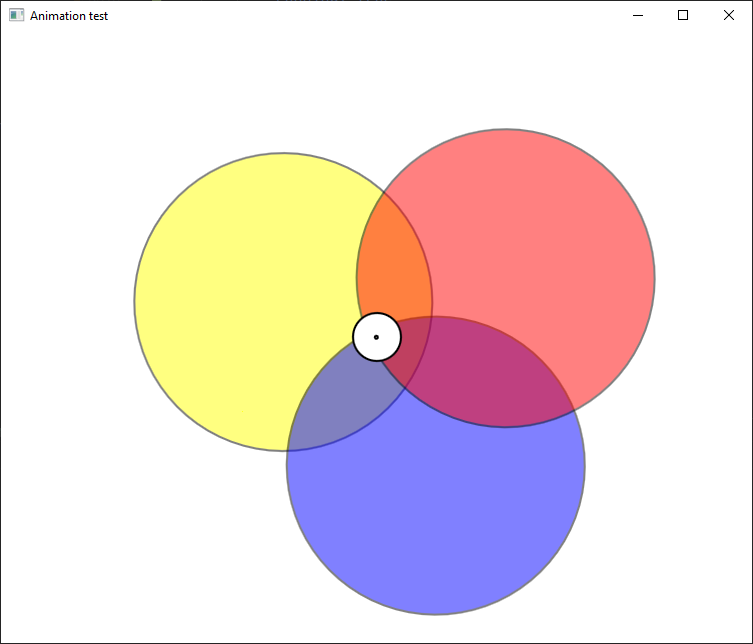
# Transform and Translate
You can anchor something and using transform translate move it on an offset based on its anchor.
kind of has this dizzying effect because this yellow one is not pixel perfect right to the center where
the blue and red are but it really outlines the power of this.
import QtQuick 2.15
import QtQuick.Window 2.15

Window {
    visible: true
    width: 640
    height: 480
    title: qsTr("Animation test")

    Item {
        id: root
        rotation: 0
        anchors.centerIn: parent

        Rectangle {
            id: yellowRect
            color: "yellow"
            width: 300
            height: 300
            radius: width
            opacity: 0.5
            border.width: 2
            border.color: "black"
            anchors.centerIn: parent
            transform: Translate {y: -100}
        }

        Rectangle {
            id: blueRect
            color: "blue"
            width: 300
            height: 300
            radius: width
            opacity: 0.5
            border.width: 2
            border.color: "black"
            anchors.centerIn: parent
            transform: Translate {y: 100; x: -100}
        }

        Rectangle {
            id: redRect
            color: "red"
            width: 300
            height: 300
            radius: width
            opacity: 0.5
            border.width: 2
            border.color: "black"
            anchors.centerIn: parent
            transform: Translate {y: 100; x: 100}
        }

        Rectangle {
            id: centerArea
            color: "white"
            width: 50
            height: 50
            radius: width
            opacity: 1
            border.width: 2
            border.color: "black"
            anchors.centerIn: parent

            Rectangle {
                id: centerCircle
                color: "gray"
                width: 5
                height: 5
                radius: width
                opacity: 1
                border.width: 2
                border.color: "black"
                anchors.centerIn: parent
            }
        }

        RotationAnimator {
            target: root
            from: 360
            to: 0
            duration: 5000
            direction: RotationAnimator.Counterclockwise
            loops: Animation.Infinite
            running: true
        }
    }
}
2
3
4
5
6
7
8
9
10
11
12
13
14
15
16
17
18
19
20
21
22
23
24
25
26
27
28
29
30
31
32
33
34
35
36
37
38
39
40
41
42
43
44
45
46
47
48
49
50
51
52
53
54
55
56
57
58
59
60
61
62
63
64
65
66
67
68
69
70
71
72
73
74
75
76
77
78
79
80
81
82
83
84
85
86
87
88
# Drag and drop
import QtQuick 2.15
import QtQuick.Window 2.15


Window {
    id: root
    visible: true
    width: 640
    height: 480
    title: qsTr("QML rules")

    property string thekey: "special key here"
    property color goalOn: "green"
    property color goalOff: "red"
    property color ballOn: "yellow"
    property color ballOff: "orange"

    DropArea {
        id: dropZone
        anchors.top: parent.top
        anchors.right: parent.right
        anchors.bottom: parent.bottom
        width: 300
        Drag.keys: [thekey]
        onDropped: {
            console.log("dropped!!!")
            goal.color = goalOn
        }

        Rectangle {
            id: goal
            anchors.fill: parent
            color: goalOff
            border.color: "black"
            border.width: 5
        }
    }

    Rectangle {
        id: ball
        width: 100
        height: 100
        radius: width
        x: 25
        y: (parent.height / 2) - (height / 2)
        color: ballOff
        border.color: "black"
        border.width: 5

        Drag.active: dragArea.drag.active
        Drag.keys: [thekey]

        Text {
            id: title
            anchors.centerIn: parent
            text: Math.round(parent.x) + " x " + Math.round(parent.y)
        }

        MouseArea {
            id: dragArea
            anchors.fill: parent
            drag.target: parent
            onPressed: {parent.color = ballOn; goal.color= goalOff}
            onReleased: {parent.color = ballOff; parent.Drag.drop()}
        }
    }
}
2
3
4
5
6
7
8
9
10
11
12
13
14
15
16
17
18
19
20
21
22
23
24
25
26
27
28
29
30
31
32
33
34
35
36
37
38
39
40
41
42
43
44
45
46
47
48
49
50
51
52
53
54
55
56
57
58
59
60
61
62
63
64
65
66
67
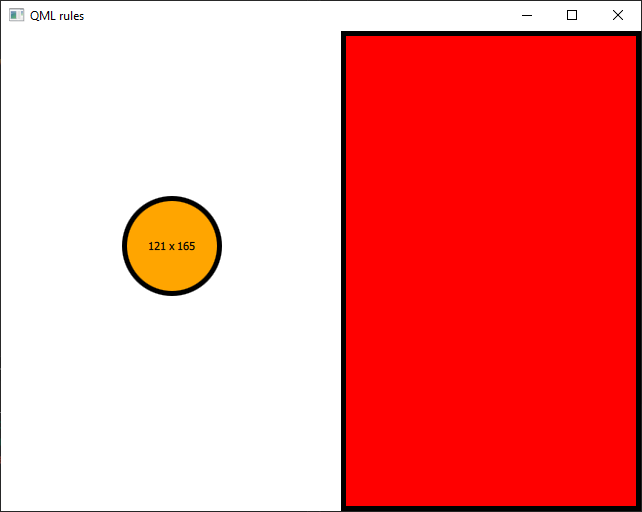

# Qt Designer
# Connections
onClicked is a bit misleading, because you have to have a mouse area on the object to be able to click. If you click on rectangle and add a connection onClicked, nothing happens.
import QtQuick 2.15
import QtQuick.Window 2.15


Window {
    id: root
    visible: true
    width: 640
    height: 480
    title: qsTr("QML rules")

    Rectangle {
        id: rectangle
        x: 125
        y: 92
        width: 100
        height: 100
        color: "#d80101"

        MouseArea {
            id: mouseArea
            anchors.fill: parent

            Connections {
                target: mouseArea
                onClicked: console.log("clicked")
            }
        }

    }

    Rectangle {
        id: rectangle1
        x: 270
        y: 92
        width: 100
        height: 100
        color: "#00dd0f"
    }

    Rectangle {
        id: rectangle2
        x: 413
        y: 92
        width: 100
        height: 100
        color: "#0212e4"
    }
}

/*##^##
Designer {
    D{i:0;formeditorZoom:0.6600000262260437}D{i:2}
}
##^##*/
2
3
4
5
6
7
8
9
10
11
12
13
14
15
16
17
18
19
20
21
22
23
24
25
26
27
28
29
30
31
32
33
34
35
36
37
38
39
40
41
42
43
44
45
46
47
48
49
50
51
52
53
54
55
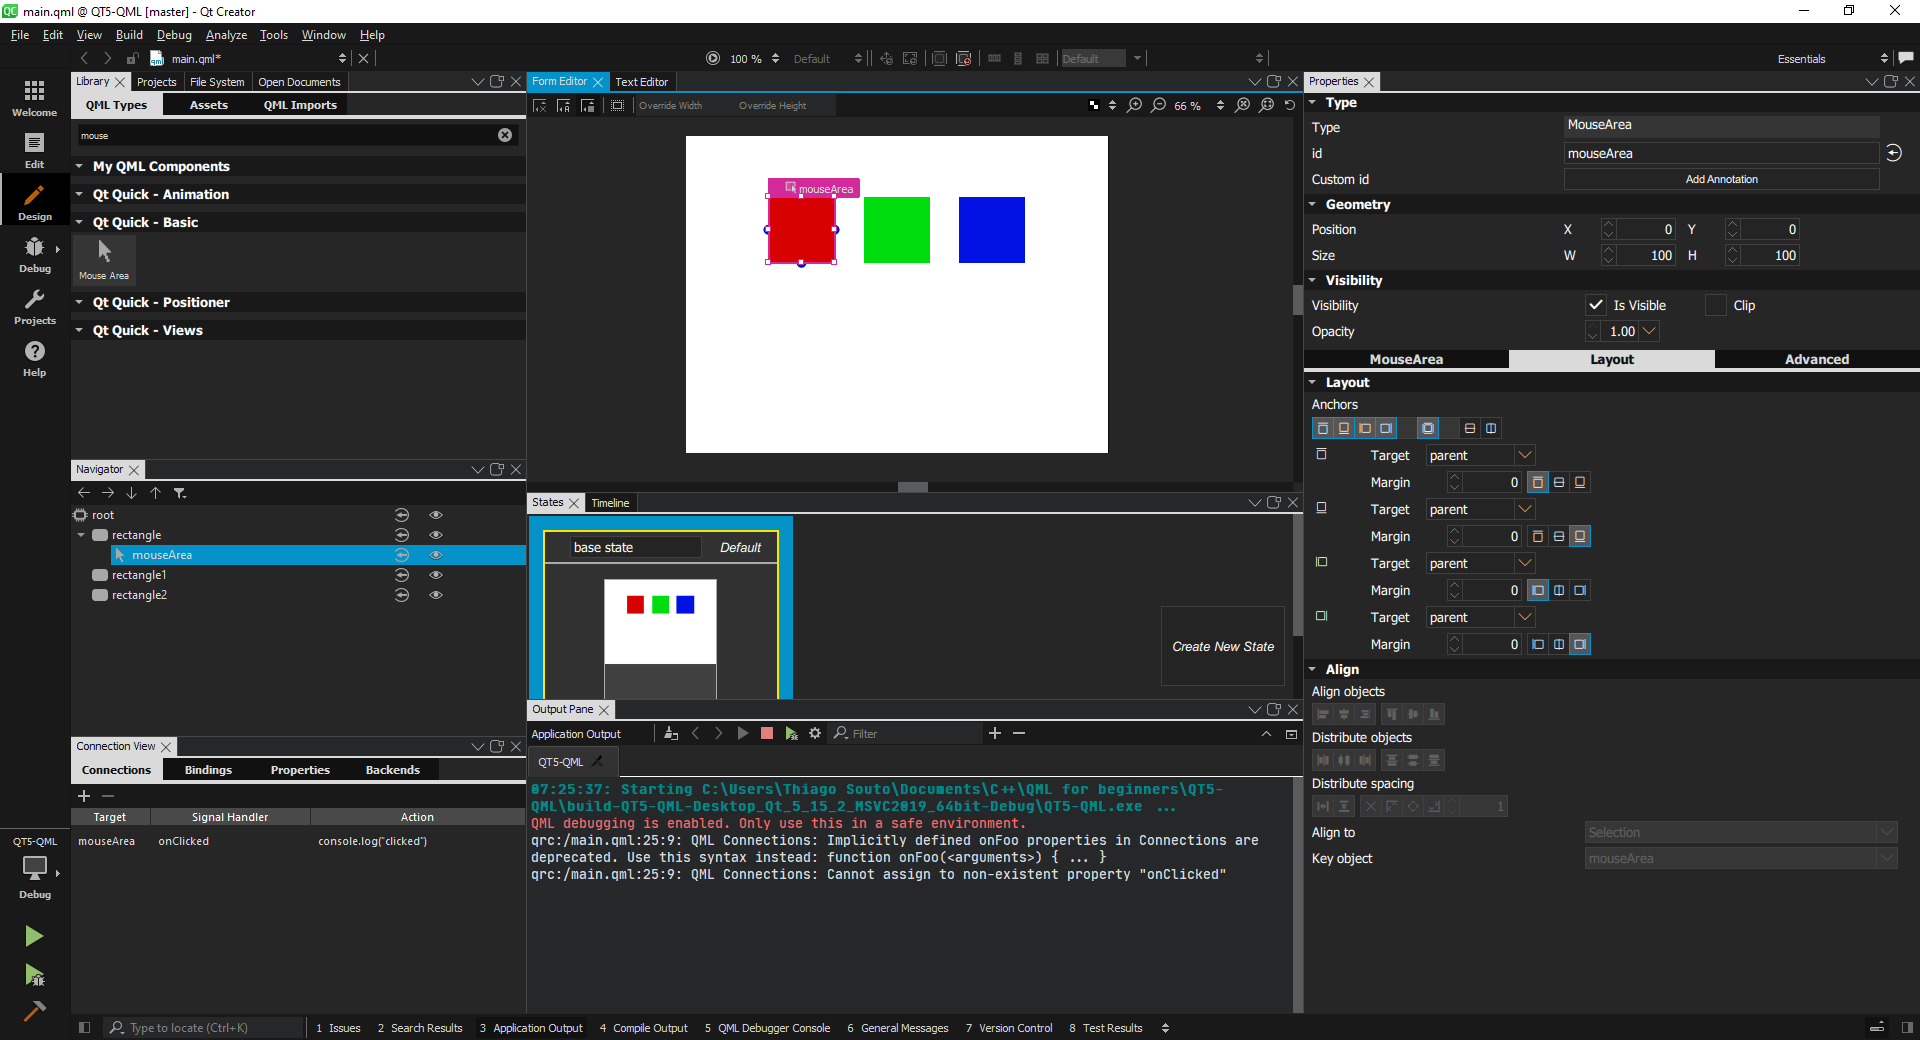
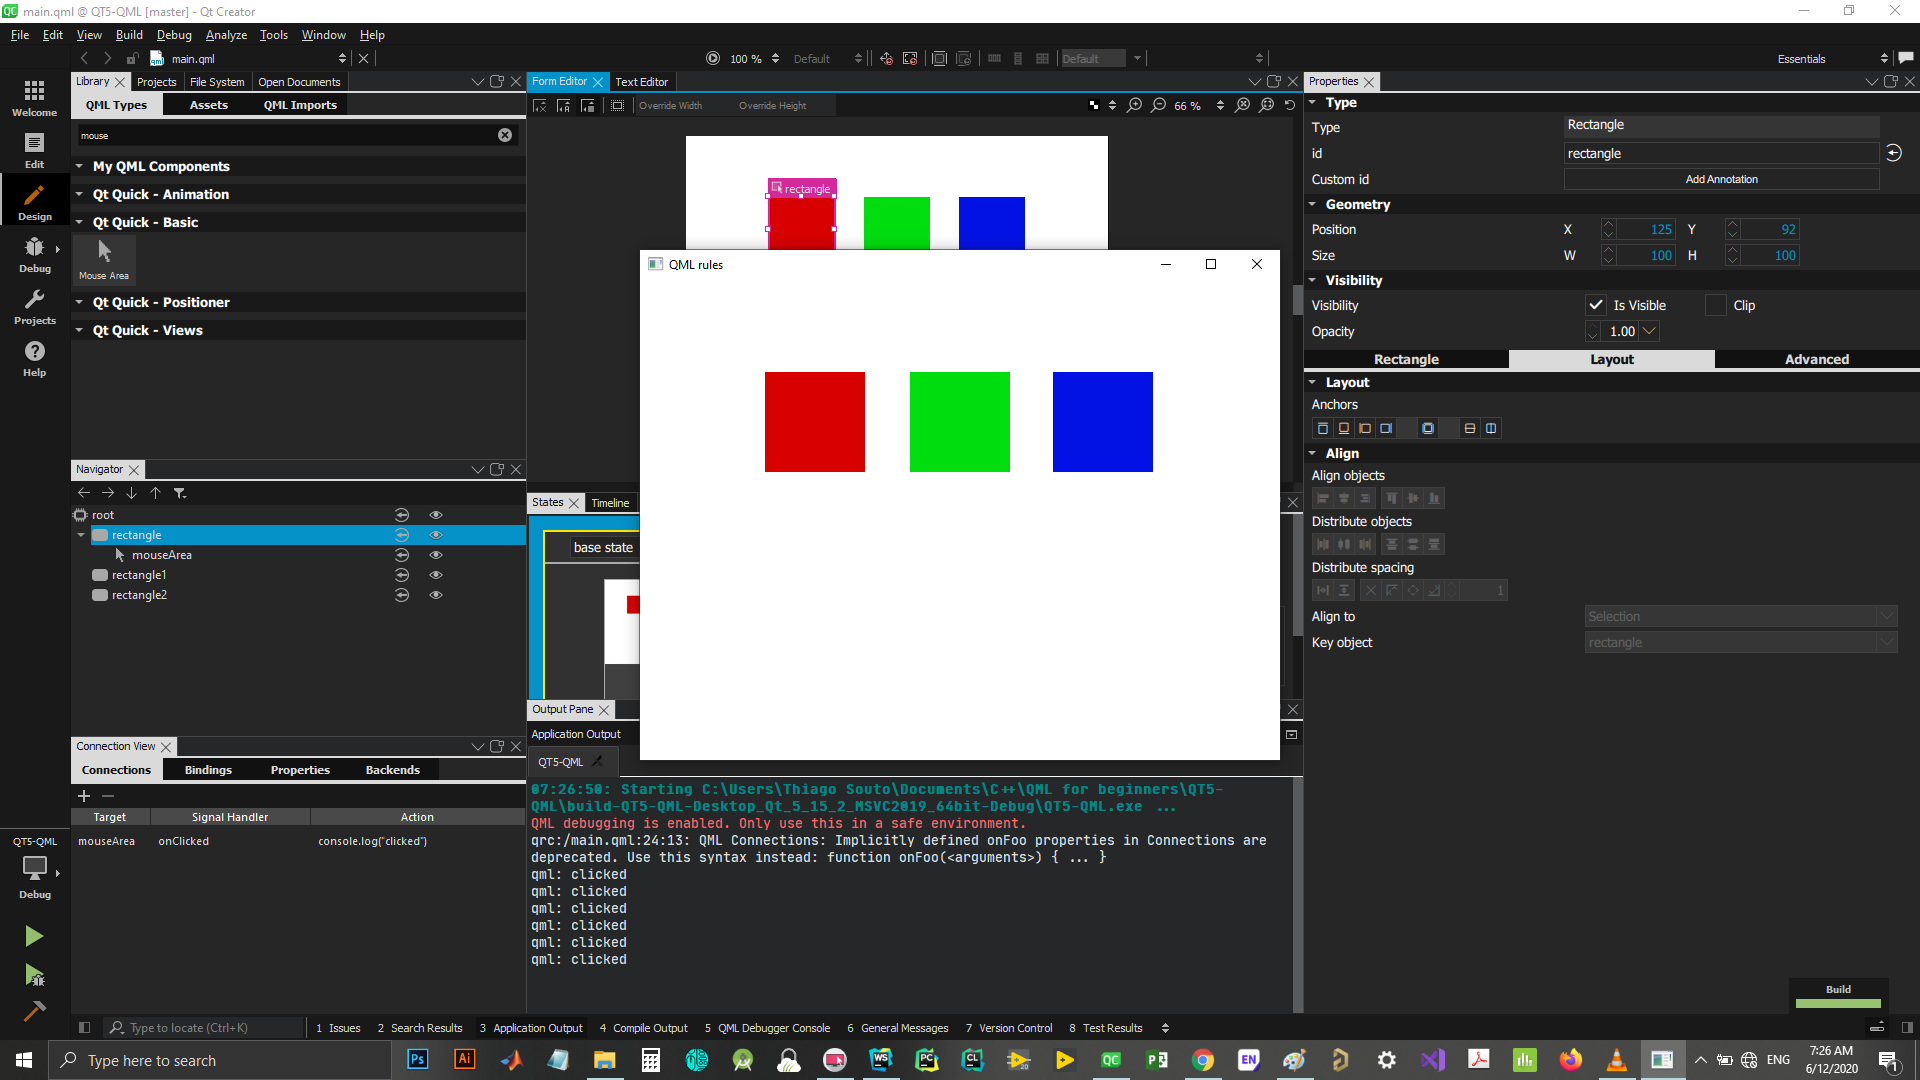
# Bindings
We can also set bindings between the objects:
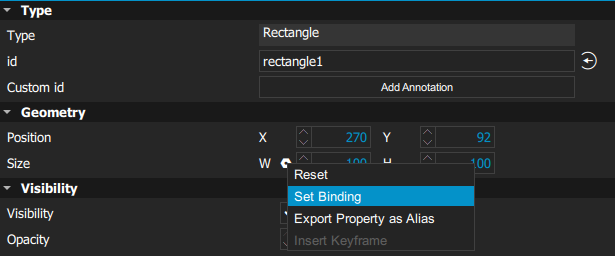
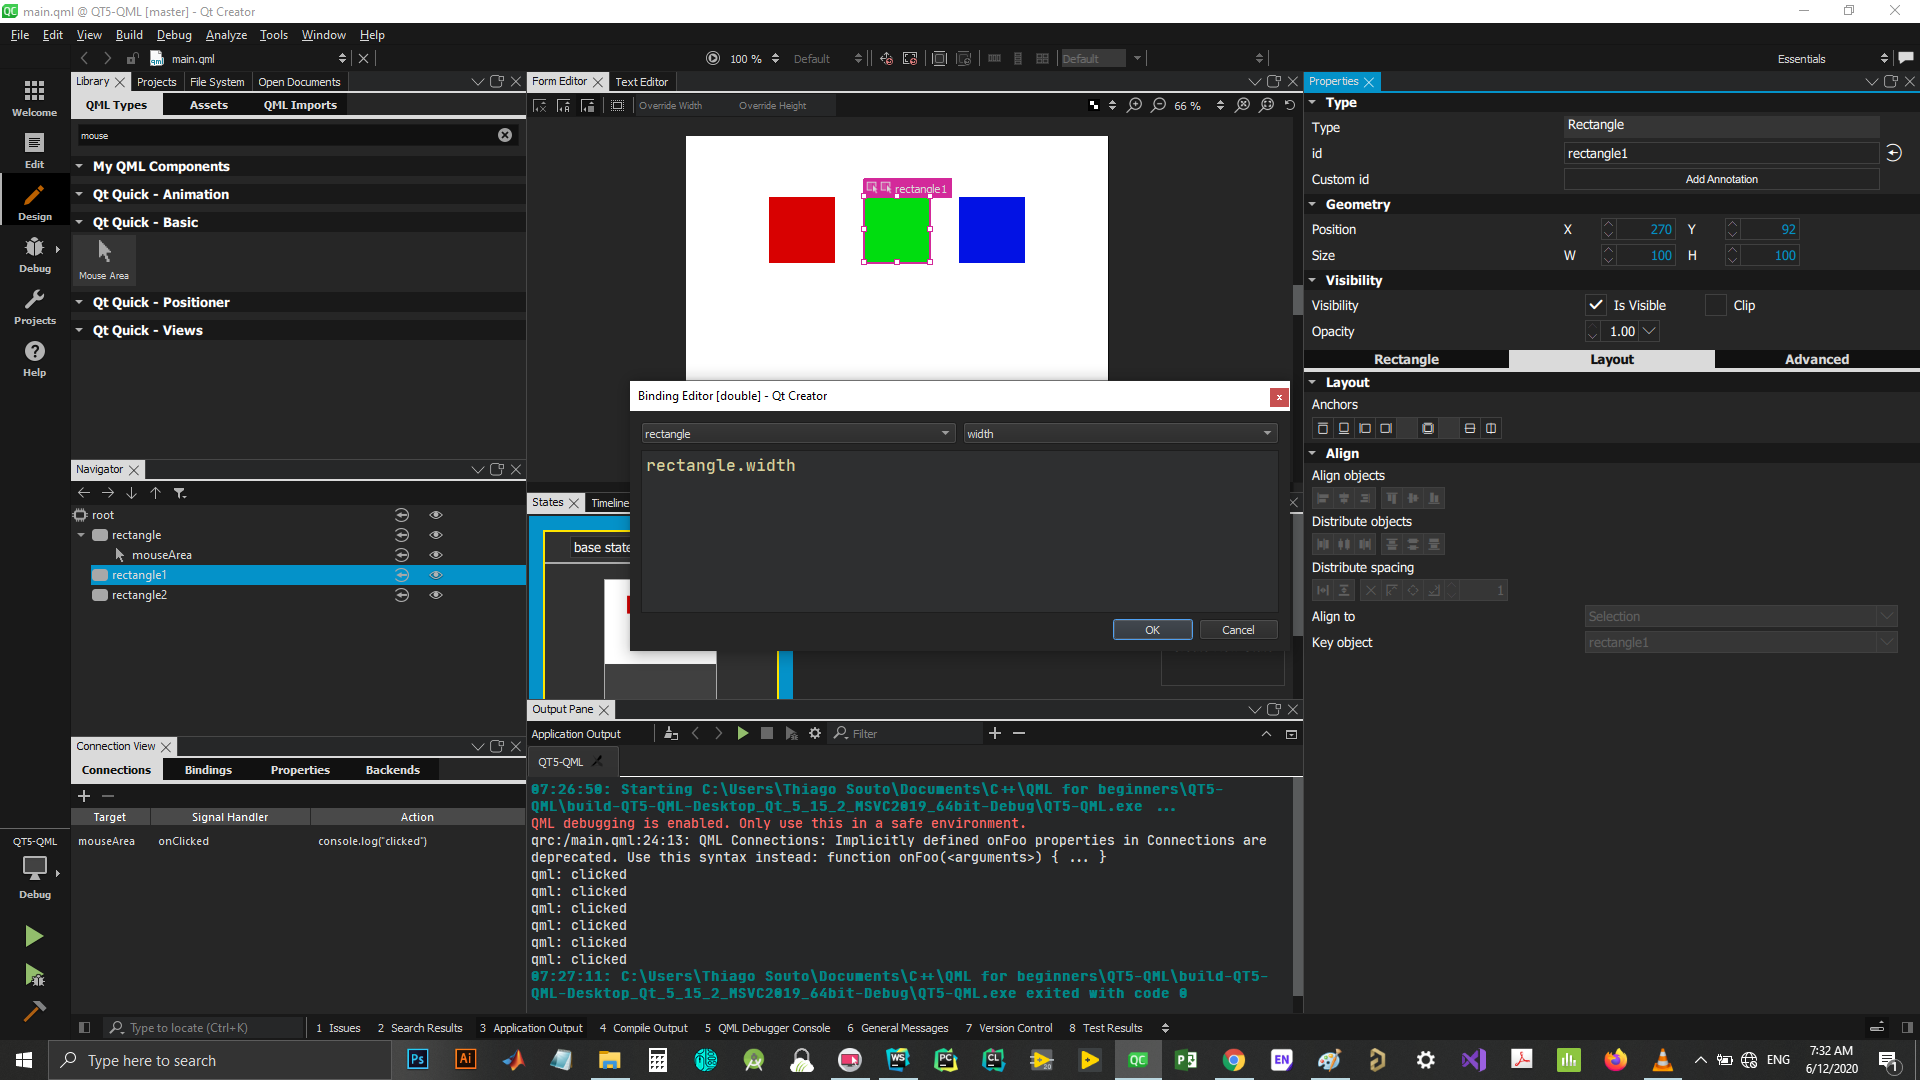
Now to test the binding lets make the mouse click change the width and height.
import QtQuick 2.15
import QtQuick.Window 2.15


Window {
    id: root
    visible: true
    width: 640
    height: 480
    title: qsTr("QML rules")

    Rectangle {
        id: rectangle
        x: 125
        y: 92
        width: 100
        height: 100
        color: "#d80101"

        MouseArea {
            id: mouseArea
            anchors.fill: parent

            Connections {
                target: mouseArea
                onClicked: {
                    print("clicked")
                    rectangle.width= 50
                    rectangle.height= 150
                }
            }
        }

    }

    Rectangle {
        id: rectangle1
        x: 270
        y: 92
        width: rectangle.width
        height: rectangle.height
        color: "#00dd0f"
    }

    Rectangle {
        id: rectangle2
        x: 413
        y: 92
        width: 100
        height: 100
        color: "#0212e4"
    }
}

/*##^##
Designer {
    D{i:0;formeditorZoom:0.6600000262260437}D{i:2}
}
##^##*/
2
3
4
5
6
7
8
9
10
11
12
13
14
15
16
17
18
19
20
21
22
23
24
25
26
27
28
29
30
31
32
33
34
35
36
37
38
39
40
41
42
43
44
45
46
47
48
49
50
51
52
53
54
55
56
57
58
59

Now Let's make two rectangles and a text to one and make it change when the other one is clicked.
import QtQuick 2.15
import QtQuick.Window 2.15


Window {
    id: root
    visible: true
    width: 640
    height: 480
    title: qsTr("QML rules")

    Rectangle {
        id: rectangle
        x: 102
        y: 151
        width: 200
        height: 200
        color: "#2f04ea"

        MouseArea {
            id: mouseArea
            anchors.fill: parent

            Connections {
                target: mouseArea
                onClicked: text1.text = "Hello"
            }
        }
    }

    Rectangle {
        id: rectangle1
        x: 347
        y: 151
        width: 200
        height: 200
        color: "#118013"

        Text {
            id: text1
            color: "#ffffff"
            text: qsTr("Text")
            anchors.verticalCenter: parent.verticalCenter
            font.pixelSize: 35
            font.bold: true
            anchors.horizontalCenter: parent.horizontalCenter
        }
    }
}

/*##^##
Designer {
    D{i:0;formeditorZoom:0.6600000262260437}D{i:2}
}
##^##*/
2
3
4
5
6
7
8
9
10
11
12
13
14
15
16
17
18
19
20
21
22
23
24
25
26
27
28
29
30
31
32
33
34
35
36
37
38
39
40
41
42
43
44
45
46
47
48
49
50
51
52
53
54
55
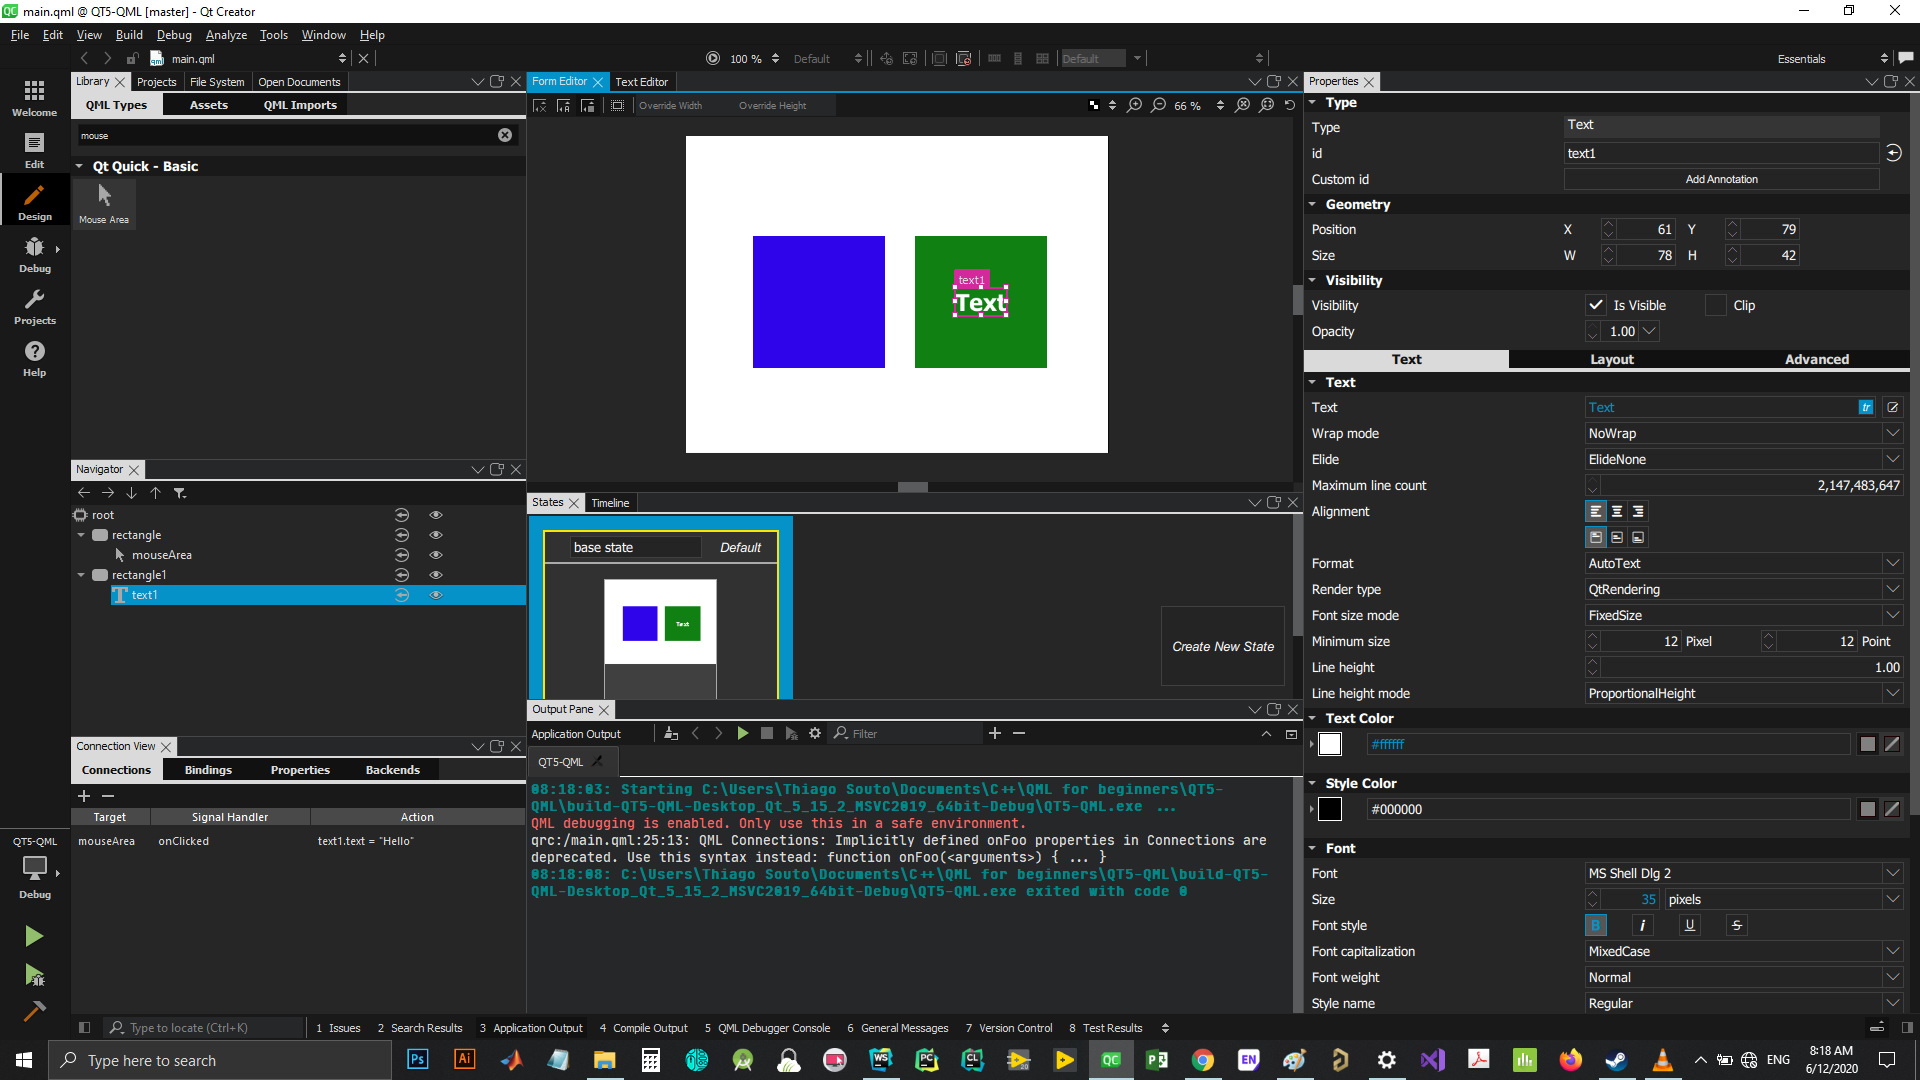

TIP
Remember that we have to add a mouse area and add the connection to the mouse area and not the rectangle.
# Properties
We can also add properties to the objects, like a title for instance; and it will appear on the qml code.

Now we can bind the title property to the text.
import QtQuick 2.15
import QtQuick.Window 2.15


Window {
    id: root
    visible: true
    width: 640
    height: 480
    title: qsTr("QML rules")

    Rectangle {
        id: rectangle
        x: 102
        y: 151
        width: 200
        height: 200
        color: "#2f04ea"

        MouseArea {
            id: mouseArea
            anchors.fill: parent

            Connections {
                target: mouseArea
                onClicked: rectangle1.title = "Hello"
            }
        }
    }

    Rectangle {
        id: rectangle1
        x: 347
        y: 151
        width: 200
        height: 200
        color: "#118013"
        property string title: "Title"

        Text {
            id: text1
            color: "#ffffff"
            text: parent.title
            anchors.verticalCenter: parent.verticalCenter
            font.pixelSize: 35
            font.bold: true
            anchors.horizontalCenter: parent.horizontalCenter
        }
    }
}

/*##^##
Designer {
    D{i:0;formeditorZoom:0.6600000262260437}D{i:2}
}
##^##*/
2
3
4
5
6
7
8
9
10
11
12
13
14
15
16
17
18
19
20
21
22
23
24
25
26
27
28
29
30
31
32
33
34
35
36
37
38
39
40
41
42
43
44
45
46
47
48
49
50
51
52
53
54
55
56
And it works the same way.


# States
First, let's create another qml file called MyBox and add some properties.
Also let's bind the color to the defaultColor propertie.
import QtQuick 2.0

Item {
    id: element
    property color offColor: "red"
    property color onColor: "green"
    property color defaultColor: "gray"

    Rectangle {
        id: rectangle
        x: 220
        y: 140
        width: 200
        height: 200
        color: defaultColor
    }
}
2
3
4
5
6
7
8
9
10
11
12
13
14
15
16
17
Now let's fill the rectangle to the item,make it round, and add a state.
import QtQuick 2.0

Item {
    id: element
    property color offColor: "red"
    property color onColor: "green"
    property color defaultColor: "gray"

    Rectangle {
        id: rectangle
        color: defaultColor
        anchors.fill: parent
        radius: width
    }

}

/*##^##
Designer {
    D{i:0;autoSize:true;height:480;width:640}D{i:1}
}
##^##*/
2
3
4
5
6
7
8
9
10
11
12
13
14
15
16
17
18
19
20
21
22
Now let's add some other states
import QtQuick 2.0

Item {
    id: element
    property color offColor: "red"
    property color onColor: "green"
    property color defaultColor: "gray"

    Rectangle {
        id: rectangle
        color: defaultColor
        anchors.fill: parent
        radius: width
    }
    states: [
        State {
            name: "on"

            PropertyChanges {
                target: rectangle
                color: onColor
            }
        },

        State {
            name: "off"

            PropertyChanges {
                target: rectangle
                color: offColor
            }
        }
    ]

}

/*##^##
Designer {
    D{i:0;autoSize:true;formeditorZoom:0.6600000262260437;height:480;width:640}D{i:1}
}
##^##*/
2
3
4
5
6
7
8
9
10
11
12
13
14
15
16
17
18
19
20
21
22
23
24
25
26
27
28
29
30
31
32
33
34
35
36
37
38
39
40
41
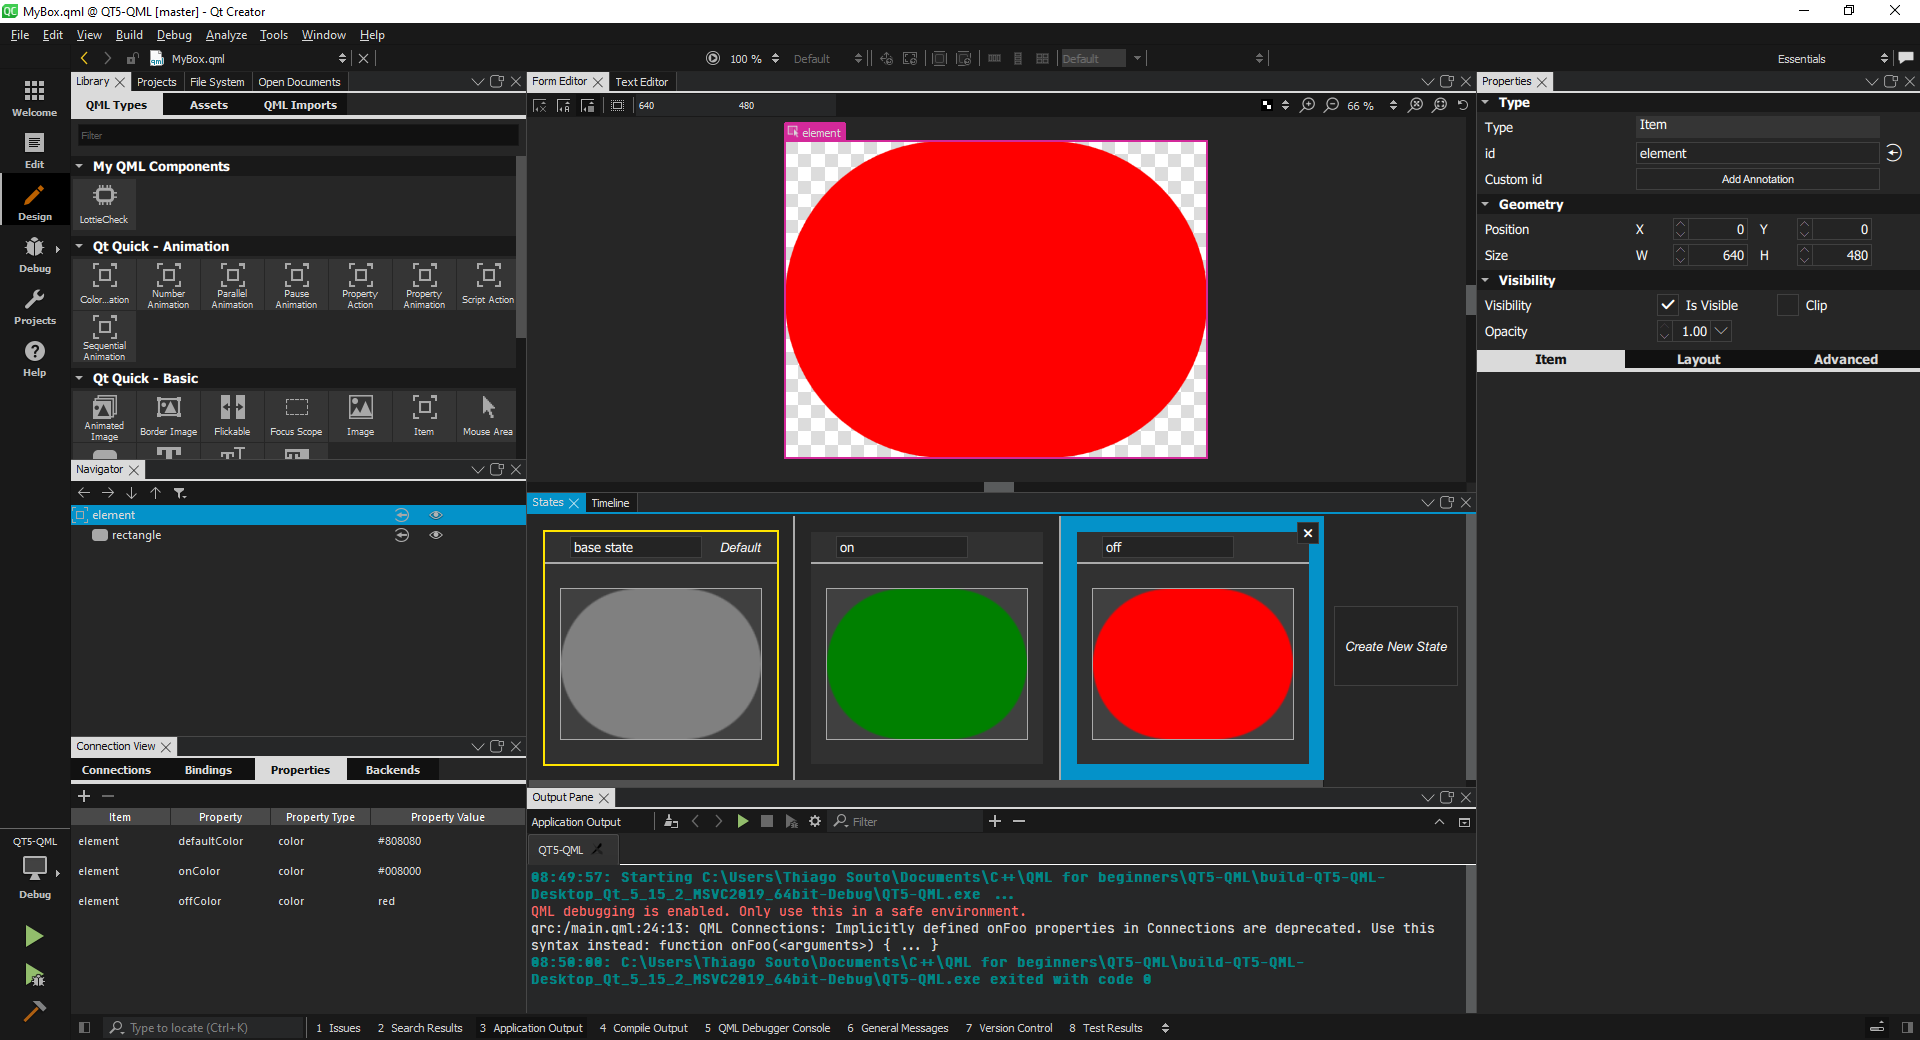
TIP
States cannot be added to a Window, has to be a custom object.
Now the item is on My QML Components, and we can drag and drop it. Although we have to give it a width and height, otherwise is will be only a point.
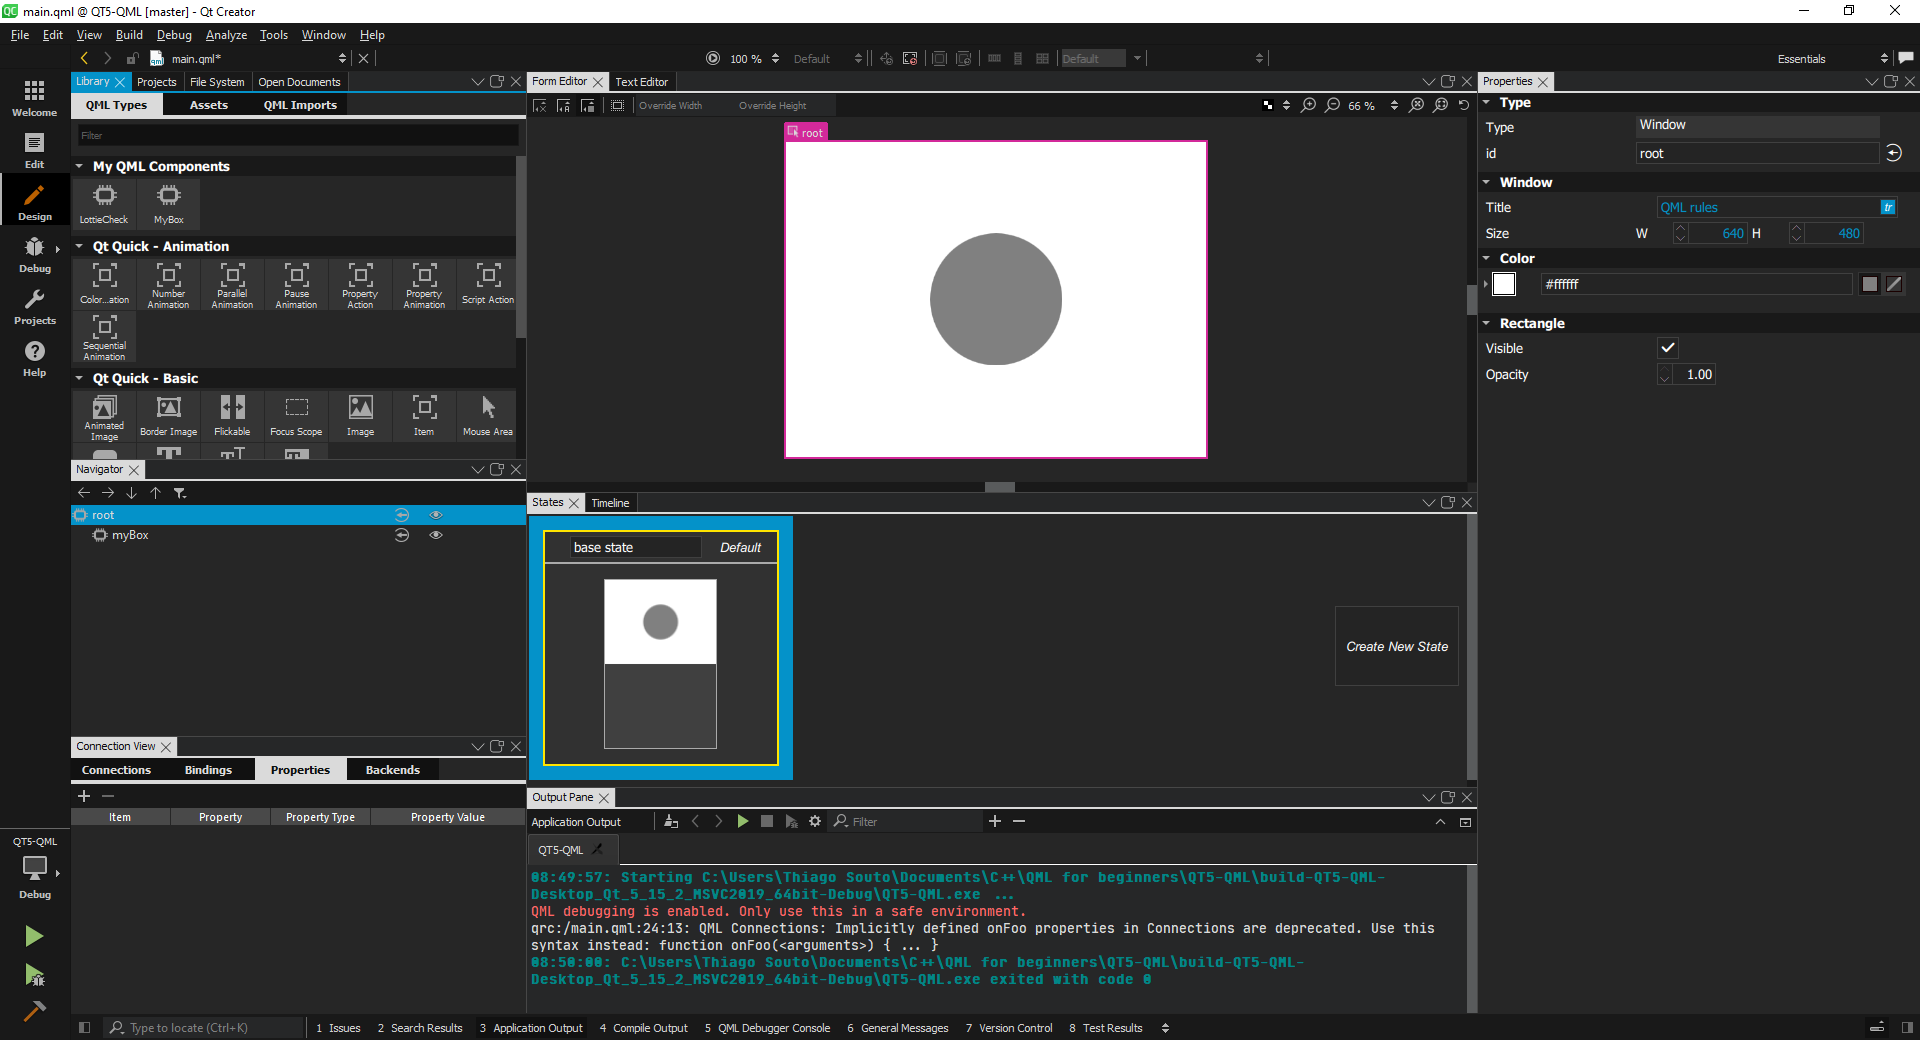
we can change the state by adding a connextion on the mouse area:
import QtQuick 2.15
import QtQuick.Window 2.15


Window {
    id: root
    visible: true
    width: 640
    height: 480
    title: qsTr("QML rules")

    MyBox {
        id: myBox
        x: 220
        y: 140
        width: 200
        height: 200

        MouseArea {
            id: mouseArea
            anchors.fill: parent

            Connections {
                target: mouseArea
                onClicked: {
                    if(myBox.state === "on") {
                        myBox.state = "off"
                    } else {
                        myBox.state = "on"
                    }
                }
            }
        }
    }
}

/*##^##
Designer {
    D{i:0;formeditorZoom:0.6600000262260437}D{i:2}
}
##^##*/
2
3
4
5
6
7
8
9
10
11
12
13
14
15
16
17
18
19
20
21
22
23
24
25
26
27
28
29
30
31
32
33
34
35
36
37
38
39
40
41

or by adding an onclicked to the mouse area directly on the code. And in this case we can use parent instead of MyBox.
import QtQuick 2.15
import QtQuick.Window 2.15


Window {
    id: root
    visible: true
    width: 640
    height: 480
    title: qsTr("QML rules")

    MyBox {
        id: myBox
        x: 220
        y: 140
        width: 200
        height: 200

        MouseArea {
            id: mouseArea
            anchors.fill: parent

            onClicked: {
                if(parent.state === "on") {
                    parent.state = "off"
                } else {
                    parent.state = "on"
                }
            }
        }
    }
}

/*##^##
Designer {
    D{i:0;formeditorZoom:0.6600000262260437}D{i:2}
}
##^##*/
2
3
4
5
6
7
8
9
10
11
12
13
14
15
16
17
18
19
20
21
22
23
24
25
26
27
28
29
30
31
32
33
34
35
36
37
38

# Qt Material Design
CMakeLists.txt
cmake_minimum_required(VERSION 3.14)

project(QTMaterial_Design LANGUAGES CXX)

set(CMAKE_INCLUDE_CURRENT_DIR ON)

set(CMAKE_AUTOUIC ON)
set(CMAKE_AUTOMOC ON)
set(CMAKE_AUTORCC ON)

set(CMAKE_CXX_STANDARD 11)
set(CMAKE_CXX_STANDARD_REQUIRED ON)

# QtCreator supports the following variables for Android, which are identical to qmake Android variables.
# Check http://doc.qt.io/qt-5/deployment-android.html for more information.
# They need to be set before the find_package(Qt5 ...) call.

#if(ANDROID)
#    set(ANDROID_PACKAGE_SOURCE_DIR "${CMAKE_CURRENT_SOURCE_DIR}/android")
#    if (ANDROID_ABI STREQUAL "armeabi-v7a")
#        set(ANDROID_EXTRA_LIBS
#            ${CMAKE_CURRENT_SOURCE_DIR}/path/to/libcrypto.so
#            ${CMAKE_CURRENT_SOURCE_DIR}/path/to/libssl.so)
#    endif()
#endif()

find_package(Qt5 COMPONENTS Core Quick QuickControls2 REQUIRED)

if(ANDROID)
    add_library(QTMaterial_Design SHARED
      main.cpp
      qml.qrc
    )
else()
    add_executable(QTMaterial_Design
      main.cpp
      qml.qrc
    )
endif()

target_compile_definitions(QTMaterial_Design
  PRIVATE $<$<OR:$<CONFIG:Debug>,$<CONFIG:RelWithDebInfo>>:QT_QML_DEBUG>)
target_link_libraries(QTMaterial_Design
  PRIVATE Qt${QT_VERSION_MAJOR}::Core Qt${QT_VERSION_MAJOR}::Quick Qt5::QuickControls2)
2
3
4
5
6
7
8
9
10
11
12
13
14
15
16
17
18
19
20
21
22
23
24
25
26
27
28
29
30
31
32
33
34
35
36
37
38
39
40
41
42
43
44
main.cpp
#include <QGuiApplication>
#include <QQmlApplicationEngine>
#include <QQuickStyle>
#include <QtQuickControls2>
#include <QFontDatabase>


int main(int argc, char *argv[])
{
    QCoreApplication::setAttribute(Qt::AA_EnableHighDpiScaling);

    QGuiApplication app(argc, argv);

    QQuickStyle::setStyle("Material");

    QFontDatabase::addApplicationFont("qrc:/ICONS/ICONS/materialdesignicons-webfont.ttf");

    QQmlApplicationEngine engine;
    const QUrl url(QStringLiteral("qrc:/main.qml"));
    QObject::connect(&engine, &QQmlApplicationEngine::objectCreated,
                     &app, [url](QObject *obj, const QUrl &objUrl) {
        if (!obj && url == objUrl)
            QCoreApplication::exit(-1);
    }, Qt::QueuedConnection);
    engine.load(url);

    return app.exec();
}
2
3
4
5
6
7
8
9
10
11
12
13
14
15
16
17
18
19
20
21
22
23
24
25
26
27
28
main.qml
import QtQuick 2.15
import QtQuick.Controls 2.5
import QtQuick.Layouts 1.3
import QtQuick.Controls.Material 2.3
import "qrc:/ICONS/ICONS/Icon.js" as MdiFont


ApplicationWindow {
    width: 640
    height: 480

    visible: true

    Material.theme: Material.Dark

    menuBar: ToolBar {
        RowLayout {
            ToolButton {
                text: "A"
            }

            Label {
                text: "Travel Stream"
            }

            ToolButton {
                text: "148"
            }

            Button {
                text: qsTr("Button")
            }

            SwitchDelegate {
                text: qsTr("Switch Delegate")
            }

            ProgressBar {
                value: 0.5
            }
            Dial {
                height: 25
            }


        }

    }

    Button {
        id: button
        x: 301
        y: 186
        text: qsTr("Button")
    }

    SwitchDelegate {
        id: switchDelegate
        x: 323
        y: 352
        text: qsTr("Switch Delegate")
    }

    ProgressBar {
        id: progressBar
        x: 182
        y: 120
        value: 0.5
    }

    Dial {
        id: dial
        x: 40
        y: 220
    }
}
2
3
4
5
6
7
8
9
10
11
12
13
14
15
16
17
18
19
20
21
22
23
24
25
26
27
28
29
30
31
32
33
34
35
36
37
38
39
40
41
42
43
44
45
46
47
48
49
50
51
52
53
54
55
56
57
58
59
60
61
62
63
64
65
66
67
68
69
70
71
72
73
74
75
76
# Qt Quick Controls
We have built a custom control, but there is no need to reinvent the wheel here, we can actually use what is called Qt Quick Controls.
First, we have to import the Qt Quick Controls, and we can do that from the Design window.
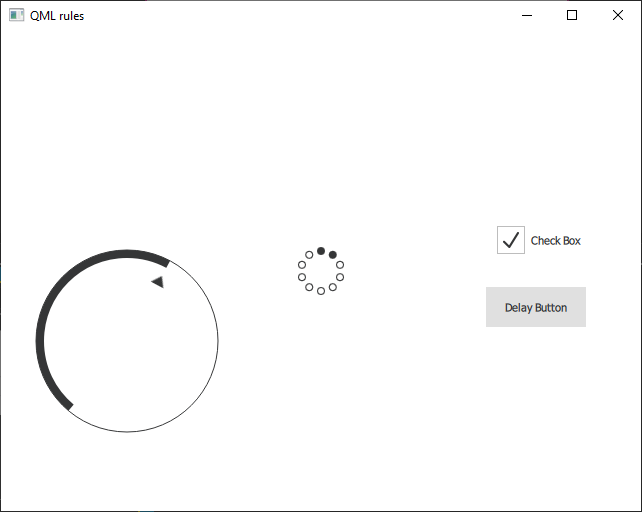
WARNING
To be done later
# QML Project Templates
WARNING
To be done later
# QML and C++ integration
- QML lives on top of C++
- You can expose C++ classes to QML
- C++ and QMl communicate via signals and slots
#include <QGuiApplication>
#include <QQmlApplicationEngine> // This loads all the QML

//Entry point of the application
int main(int argc, char *argv[])
{
    // Application Attributes (this is for cell phones with high DPI screens)
    QCoreApplication::setAttribute(Qt::AA_EnableHighDpiScaling);

    // The Application class
    QGuiApplication app(argc, argv);

    // QML engine
    QQmlApplicationEngine engine;

    // The URL of the QML file, notice this is a compiled resource.
    // Bassically it loads the QML file as a String into the engine that runs it as QML
    const QUrl url(QStringLiteral("qrc:/main.qml"));

    // Connecting a signal and slot - making sure the object and url match
    QObject::connect(&engine, &QQmlApplicationEngine::objectCreated,
                     &app, [url](QObject *obj, const QUrl &objUrl) {
        if (!obj && url == objUrl)
            QCoreApplication::exit(-1);
    }, Qt::QueuedConnection);

    // The engine loading the QML file
    engine.load(url);

    // The application entering an event loop that keeps the application open
    return app.exec();
}
2
3
4
5
6
7
8
9
10
11
12
13
14
15
16
17
18
19
20
21
22
23
24
25
26
27
28
29
30
31
32
# Call C++ Slot from QML

First create a function with a slot, in this case will be the Test function.
public slots:
    void bark();
2
then, include on main.cpp:
#include <QQmlContext>
#include <test.h>
2
Then create an instance of the function and add the instance to the root context:
Test test;
engine.rootContext()->setContextProperty("testing", &test);
2
Now you can call the slot from the QML file:
onClicked: {
    //Call a slot
    testing.bark();
}
2
3
4
CMakeLists:
cmake_minimum_required(VERSION 3.14)

project(QT5 LANGUAGES CXX)

set(CMAKE_INCLUDE_CURRENT_DIR ON)

set(CMAKE_AUTOUIC ON)
set(CMAKE_AUTOMOC ON)
set(CMAKE_AUTORCC ON)

set(CMAKE_CXX_STANDARD 17)
set(CMAKE_CXX_STANDARD_REQUIRED ON)

# QtCreator supports the following variables for Android, which are identical to qmake Android variables.
# Check http://doc.qt.io/qt-5/deployment-android.html for more information.
# They need to be set before the find_package(Qt5 ...) call.

#if(ANDROID)
#    set(ANDROID_PACKAGE_SOURCE_DIR "${CMAKE_CURRENT_SOURCE_DIR}/android")
#    if (ANDROID_ABI STREQUAL "armeabi-v7a")
#        set(ANDROID_EXTRA_LIBS
#            ${CMAKE_CURRENT_SOURCE_DIR}/path/to/libcrypto.so
#            ${CMAKE_CURRENT_SOURCE_DIR}/path/to/libssl.so)
#    endif()
#endif()

find_package(QT NAMES Qt6 Qt5 COMPONENTS Core Quick REQUIRED)
find_package(Qt${QT_VERSION_MAJOR} COMPONENTS Core Quick QuickControls2 REQUIRED)

if(ANDROID)
    add_library(QT5 SHARED
      main.cpp
      qml.qrc
      test.cpp
      test.h
    )
else()
    add_executable(QT5
      main.cpp
      qml.qrc
      test.cpp
      test.h
    )
endif()

target_compile_definitions(QT5
  PRIVATE $<$<OR:$<CONFIG:Debug>,$<CONFIG:RelWithDebInfo>>:QT_QML_DEBUG>)
target_link_libraries(QT5
  PRIVATE Qt${QT_VERSION_MAJOR}::Core Qt${QT_VERSION_MAJOR}::Quick Qt5::QuickControls2)
2
3
4
5
6
7
8
9
10
11
12
13
14
15
16
17
18
19
20
21
22
23
24
25
26
27
28
29
30
31
32
33
34
35
36
37
38
39
40
41
42
43
44
45
46
47
48
49
Main.cpp
#include <QGuiApplication>
#include <QQmlApplicationEngine>
#include <QQuickStyle>

//imports
#include <QQmlContext>
#include <test.h>

int main(int argc, char *argv[])
{
    QCoreApplication::setAttribute(Qt::AA_EnableHighDpiScaling);

    QGuiApplication app(argc, argv);

    QQuickStyle::setStyle("Material");

    QQmlApplicationEngine engine;

    //Add to the root context
    Test test; // Basically we are creating a instance of the function,
    engine.rootContext()->setContextProperty("testing", &test);
    // Then we are taking that instance and puting on the context proterty

    const QUrl url(QStringLiteral("qrc:/main.qml"));
    QObject::connect(&engine, &QQmlApplicationEngine::objectCreated,
                     &app, [url](QObject *obj, const QUrl &objUrl) {
        if (!obj && url == objUrl)
            QCoreApplication::exit(-1);
    }, Qt::QueuedConnection);
    engine.load(url);

    return app.exec();
}
2
3
4
5
6
7
8
9
10
11
12
13
14
15
16
17
18
19
20
21
22
23
24
25
26
27
28
29
30
31
32
33
main.qml
import QtQuick 2.15
import QtQuick.Window 2.15
import QtQuick.Controls 2.3

// Test

Window {
    id: window
    width: 640
    height: 480
    visible: true
    title: qsTr("Hello World")

    Column {
        id: column
        width: 200
        height: 168
        anchors.verticalCenter: parent.verticalCenter
        anchors.horizontalCenter: parent.horizontalCenter
        spacing: 25

        Label {
            id: label
            text: qsTr("Call a C++ Slot")
            anchors.horizontalCenter: parent.horizontalCenter
        }

        Button {
            id: button
            text: qsTr("Click Me")
            anchors.horizontalCenter: parent.horizontalCenter
            onClicked: {
                //Call a slot
                testing.bark();

                //Can not call a non-slot - must be a property
                var num = testing.number()
                print(num)
            }
        }
    }
}
2
3
4
5
6
7
8
9
10
11
12
13
14
15
16
17
18
19
20
21
22
23
24
25
26
27
28
29
30
31
32
33
34
35
36
37
38
39
40
41
42
Test.h
#ifndef TEST_H
#define TEST_H

#include <QObject>
#include <QDebug>

class Test : public QObject
{
    Q_OBJECT
public:
    explicit Test(QObject *parent = nullptr);

    //Normal Function
    int number();

signals:

public slots:
    void bark();

};

#endif // TEST_H
2
3
4
5
6
7
8
9
10
11
12
13
14
15
16
17
18
19
20
21
22
23
24
Test.cpp
#include "test.h"

Test::Test(QObject *parent) : QObject(parent)
{

}

int Test::number()
{
    qInfo() << "Called Number()";
    return 42;
}

void Test::bark()
{
    qInfo() << "Bark Bark Bark";
}
2
3
4
5
6
7
8
9
10
11
12
13
14
15
16
17
18
Output:
Bark Bark Bark
qrc:/main.qml:35: TypeError: Property 'number' of object Test(0x79fd90) is not a function
Bark Bark Bark
qrc:/main.qml:35: TypeError: Property 'number' of object Test(0x79fd90) is not a function
Bark Bark Bark
qrc:/main.qml:35: TypeError: Property 'number' of object Test(0x79fd90) is not a function
2
3
4
5
6
TIP
If something shows up as "Its not a function", first check the spelling and then check if it is a slot. QML can not call a non-slot - must be a property.
In this case the problem was that the function number() was not a slot.
# Call a QML slot from C++
Here, we're going to connect to a signal.
We have a start button a stop button and a status labels going to start a timer stop a timer and get the current timer status.
That being said we're gonna have a back in class and a signal is going to be emitted. and we're going to read or connect to that signal inside of QML and that's how this whole magic happens.
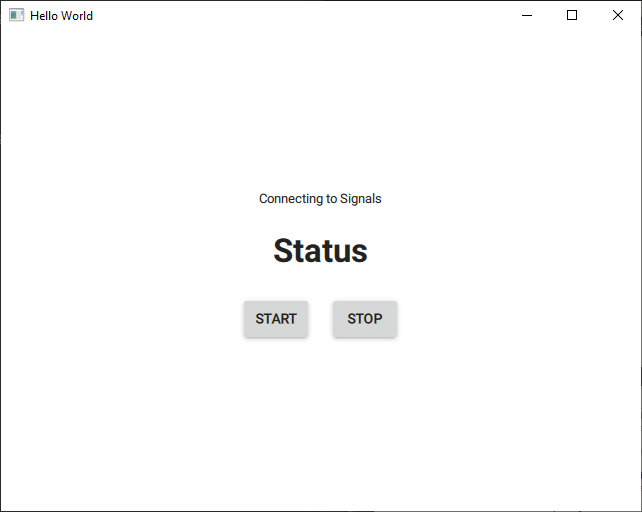
TIP
it is important we use QVariant, Because the data we pass back and forth from C++ to QML is going to be
wrapped inside of a QVariant.
main.qml
import QtQuick 2.15
import QtQuick.Window 2.15
import QtQuick.Controls 2.3

// This is the root context

Window {
    id: window
    width: 640
    height: 480
    visible: true
    title: qsTr("Hello World")
    property string timerlabel: "Counter"

    Connections {
        target: testing //our C++ object on the root context
        onNotice: {
            console.log("Slot called from C++")
            timerlabel = data // get this from the signal
            if(data === "Starting...") labelStatus.text = "Counter Started"
            if(data === "Stopped") labelStatus.text = "Counter Stopped"
        }
    }

    Column {
        id: column
        width: 228
        height: 159
        anchors.verticalCenter: parent.verticalCenter
        anchors.horizontalCenter: parent.horizontalCenter
        spacing: 25

        Label {
            id: labelTitle
            text: "Connecting to Signals"
            font.pointSize: 10
            anchors.horizontalCenter: parent.horizontalCenter
        }

        Label {
            id: labelStatus
            text: "Status"
            font.pointSize: 25
            font.bold: true
            anchors.horizontalCenter: parent.horizontalCenter
        }

        Row {
            id: row
            spacing: 25
            anchors.horizontalCenter: parent.horizontalCenter

            Button {
                id: buttonStart
                text: qsTr("Start")
                onClicked: {
                    //Call a slot
                    testing.start();
                    }
                }
            Button {
                id: buttonStop
                text: qsTr("Stop")
                onClicked: {
                    //Call a slot
                    testing.stop();
                    }
            }
        }

        Label {
            id: labelCounter
            text: timerlabel
            font.pointSize: 20
            font.bold: true
            anchors.horizontalCenter: parent.horizontalCenter
        }
    }
}
2
3
4
5
6
7
8
9
10
11
12
13
14
15
16
17
18
19
20
21
22
23
24
25
26
27
28
29
30
31
32
33
34
35
36
37
38
39
40
41
42
43
44
45
46
47
48
49
50
51
52
53
54
55
56
57
58
59
60
61
62
63
64
65
66
67
68
69
70
71
72
73
74
75
76
77
78
79
main.cpp
#include <QGuiApplication>
#include <QQmlApplicationEngine>
#include <QQuickStyle>

//imports
#include <QQmlContext>
#include "test.h"

int main(int argc, char *argv[])
{
    QCoreApplication::setAttribute(Qt::AA_EnableHighDpiScaling);

    QGuiApplication app(argc, argv);

    QQuickStyle::setStyle("Material");

    QQmlApplicationEngine engine;

    //Add to the root context
    Test test; // Basically we are creating a instance of the function,
    engine.rootContext()->setContextProperty("testing", &test);
    // Then we are taking that instance and puting on the context proterty

    const QUrl url(QStringLiteral("qrc:/main.qml"));
    QObject::connect(&engine, &QQmlApplicationEngine::objectCreated,
                     &app, [url](QObject *obj, const QUrl &objUrl) {
        if (!obj && url == objUrl)
            QCoreApplication::exit(-1);
    }, Qt::QueuedConnection);
    engine.load(url);

    return app.exec();
}
2
3
4
5
6
7
8
9
10
11
12
13
14
15
16
17
18
19
20
21
22
23
24
25
26
27
28
29
30
31
32
33
test.h
#ifndef TEST_H
#define TEST_H

#include <QObject>
#include <QDebug>

#include <QTimer>
#include <QDateTime>
#include <QVariant>


class Test : public QObject
{
    Q_OBJECT
public:
    explicit Test(QObject *parent = nullptr);

signals:
    void notice(QVariant data);

private slots:
    void timeout();

public slots:
    void start();
    void stop();

private:
    QTimer m_timer;
    QString m_display;
};

#endif // TEST_H
2
3
4
5
6
7
8
9
10
11
12
13
14
15
16
17
18
19
20
21
22
23
24
25
26
27
28
29
30
31
32
33
test.cpp
So our test class is going to create we're going to connect our signal slot we're going to configure the timer emit our initial display.
When that timer fires we're going to actually update it with the current time. Actually get the current date time and commit our notice and then starting and stopping the timer
#include "test.h"

Test::Test(QObject *parent) : QObject(parent)
{
    connect(&m_timer, &QTimer::timeout, this, &Test::timeout);
    m_timer.setInterval(1000);
    m_display = "Starting";
    qInfo() << m_display;
    emit notice(QVariant(m_display));
}

void Test::timeout()
{
    m_display = QDateTime::currentDateTime().toString();
    qInfo() << m_display;
    emit notice(QVariant(m_display));
}

void Test::start()
{
    m_display = "Starting...";
    emit notice(QVariant(m_display));
    m_timer.start();
}

void Test::stop()
{
    m_timer.stop();
    m_display = "Stopped";
    qInfo() << m_display;
    emit notice(QVariant(m_display));
}
2
3
4
5
6
7
8
9
10
11
12
13
14
15
16
17
18
19
20
21
22
23
24
25
26
27
28
29
30
31
32
output:
"Starting"
"Wed Jan 6 10:35:30 2021"
"Wed Jan 6 10:35:31 2021"
"Wed Jan 6 10:35:32 2021"
"Wed Jan 6 10:35:33 2021"
"Wed Jan 6 10:35:34 2021"
"Wed Jan 6 10:35:35 2021"
"Stopped"
2
3
4
5
6
7
8
TIP
I don't like working with connections but this is a perfect example of why you would Somerset connections targets and you guessed it.
Our target's going to be testing and this is our C++ object on the root context so we can actually connect to this because it is a queue object and it has signals and slots.
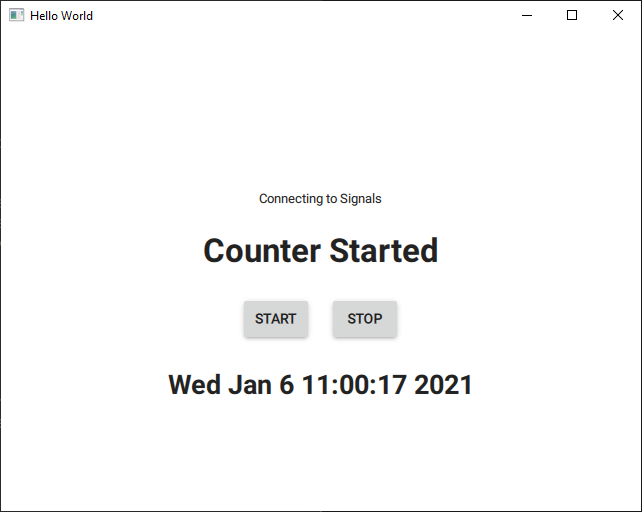
# Register a C++ Class with QML
The previous videos had a bit of a problem and that problem was putting something well globally is not really necessarily the best design practice.
So what we're gonna do is we're going to actually register a C++ class.
This is what we need to do.
We're going to register a type in QML.
we need to give it some sort of URI.
In this case it's going to be com.company.test, That's basically the namespace that we're shoving in the, tube but it's not really a namespace.
Then we're going to give it a major version a minor version and we need some sort of name that it can be used by
qmlRegisterType<Test>("com.company.test", 1, 0, "Test");
Once we get to this point this class can be created in QML.
Now this is different than previous videos where we've actually created an instance of the class and then shoved it into the context.
What we're doing now is we're saying this type test is actual class can be created inside QML.
So in the QML we import com.company.test 1.0
Now this is different than previous videos because what we're doing here is we are actually creating this inside of QML, so it's not available up in the root context, it's actually available in the context of our window , so we could actually create different versions of this in different QML files.
TIP
First and foremost, signals and slots we're not working with public and private functions.
In the main.cpp you have to follow this QML registered type give it the class type, give it a URI, major and minor version, and a name in QML that you can actually create, that's the actual QML type name.
main.cpp
#include <QGuiApplication>
#include <QQmlApplicationEngine>

#include <QQmlContext>
#include "test.h"


/*
Registering a C++ class as QML Type
allows you to use it in QML directly
*/


int main(int argc, char *argv[])
{
    QCoreApplication::setAttribute(Qt::AA_EnableHighDpiScaling);

    //Register a type in QML
    qmlRegisterType<Test>("com.company.test", 1, 0, "Test");

    QGuiApplication app(argc, argv);

    QQmlApplicationEngine engine;
    const QUrl url(QStringLiteral("qrc:/main.qml"));
    QObject::connect(&engine, &QQmlApplicationEngine::objectCreated,
                     &app, [url](QObject *obj, const QUrl &objUrl) {
        if (!obj && url == objUrl)
            QCoreApplication::exit(-1);
    }, Qt::QueuedConnection);
    engine.load(url);

    return app.exec();
}
2
3
4
5
6
7
8
9
10
11
12
13
14
15
16
17
18
19
20
21
22
23
24
25
26
27
28
29
30
31
32
33
main.qml
import QtQuick 2.15
import QtQuick.Window 2.15
import QtQuick.Controls 2.3

// This is the root context

import com.company.test 1.0

Window {
    id: window
    width: 640
    height: 480
    visible: true
    title: qsTr("Hello World")

    Test {
        id: test
        onStatus: labelStatus.text = data;
    }

    Column {
        id: column
        width: 228
        height: 159
        anchors.verticalCenter: parent.verticalCenter
        anchors.horizontalCenter: parent.horizontalCenter
        spacing: 25

        Label {
            id: labelTitle
            text: "Connecting to Signals"
            font.pointSize: 10
            anchors.horizontalCenter: parent.horizontalCenter
        }

        Label {
            id: labelStatus
            text: "Status"
            font.pointSize: 25
            font.bold: true
            anchors.horizontalCenter: parent.horizontalCenter
        }

        Row {
            id: row
            spacing: 25
            anchors.horizontalCenter: parent.horizontalCenter

            Button {
                id: buttonStart
                text: qsTr("Start")
                onClicked: {
                    var num = Math.round(Math.random() * 100)
                    test.work(num)
                    }
                }
            Button {
                id: buttonStop
                text: qsTr("Stop")
                onClicked: {
                    //Call a slot
                    }
            }
        }
    }
}
2
3
4
5
6
7
8
9
10
11
12
13
14
15
16
17
18
19
20
21
22
23
24
25
26
27
28
29
30
31
32
33
34
35
36
37
38
39
40
41
42
43
44
45
46
47
48
49
50
51
52
53
54
55
56
57
58
59
60
61
62
63
64
65
66
test.h
#ifndef TEST_H
#define TEST_H

#include <QObject>
#include <QDebug>
#include <QVariant>
#include <QRandomGenerator>

class Test : public QObject
{
    Q_OBJECT
public:
    explicit Test(QObject *parent = nullptr);

signals:

    void status(QVariant data);

public slots:
    void work(QVariant data);

};

#endif // TEST_H
2
3
4
5
6
7
8
9
10
11
12
13
14
15
16
17
18
19
20
21
22
23
24
test.cpp
#include "test.h"

Test::Test(QObject *parent) : QObject(parent)
{

}

void Test::work(QVariant data)
{
    bool ok;
    int numIn = data.toInt(&ok);
    int numOut = 0;

    if(!ok) {
        qWarning() << "Not a valid number";
    } else {
        int numRand = QRandomGenerator::global()->bounded(100);
        numOut = numIn * numRand;
        qInfo() << "In: " << numIn;
        qInfo() << "Random: " << numRand;
        qInfo() << "Out: " << numOut;
    }

    emit status(QVariant(numOut));
}
2
3
4
5
6
7
8
9
10
11
12
13
14
15
16
17
18
19
20
21
22
23
24
25

# C++ integration example
CMakeLists
cmake_minimum_required(VERSION 3.14)

project(Cpp_Integration_Example LANGUAGES CXX)

set(CMAKE_INCLUDE_CURRENT_DIR ON)

set(CMAKE_AUTOUIC ON)
set(CMAKE_AUTOMOC ON)
set(CMAKE_AUTORCC ON)

set(CMAKE_CXX_STANDARD 17)
set(CMAKE_CXX_STANDARD_REQUIRED ON)

# QtCreator supports the following variables for Android, which are identical to qmake Android variables.
# Check http://doc.qt.io/qt-5/deployment-android.html for more information.
# They need to be set before the find_package(Qt5 ...) call.

#if(ANDROID)
#    set(ANDROID_PACKAGE_SOURCE_DIR "${CMAKE_CURRENT_SOURCE_DIR}/android")
#    if (ANDROID_ABI STREQUAL "armeabi-v7a")
#        set(ANDROID_EXTRA_LIBS
#            ${CMAKE_CURRENT_SOURCE_DIR}/path/to/libcrypto.so
#            ${CMAKE_CURRENT_SOURCE_DIR}/path/to/libssl.so)
#    endif()
#endif()

find_package(QT NAMES Qt6 Qt5 COMPONENTS Core Quick REQUIRED)
find_package(Qt${QT_VERSION_MAJOR} COMPONENTS Core Quick REQUIRED)


if(ANDROID)
    add_library(Cpp_Integration_Example SHARED
      main.cpp
      qml.qrc
    )
else()
    add_executable(Cpp_Integration_Example
      main.cpp
      qml.qrc
    )
endif()

target_sources(Cpp_Integration_Example
    PRIVATE
        machine.cpp
        machine.h
    )


target_compile_definitions(Cpp_Integration_Example
  PRIVATE $<$<OR:$<CONFIG:Debug>,$<CONFIG:RelWithDebInfo>>:QT_QML_DEBUG>)
target_link_libraries(Cpp_Integration_Example
  PRIVATE Qt${QT_VERSION_MAJOR}::Core Qt${QT_VERSION_MAJOR}::Quick)
2
3
4
5
6
7
8
9
10
11
12
13
14
15
16
17
18
19
20
21
22
23
24
25
26
27
28
29
30
31
32
33
34
35
36
37
38
39
40
41
42
43
44
45
46
47
48
49
50
51
52
53
main.cpp
#include <QGuiApplication>
#include <QQmlApplicationEngine>

#include "machine.h"

int main(int argc, char *argv[])
{
    QCoreApplication::setAttribute(Qt::AA_EnableHighDpiScaling);

    QGuiApplication app(argc, argv);

    qmlRegisterType<Machine>("com.skinnyrobot.machine", 1, 0, "Machine");

    QQmlApplicationEngine engine;
    const QUrl url(QStringLiteral("qrc:/main.qml"));
    QObject::connect(&engine, &QQmlApplicationEngine::objectCreated,
                     &app, [url](QObject *obj, const QUrl &objUrl) {
        if (!obj && url == objUrl)
            QCoreApplication::exit(-1);
    }, Qt::QueuedConnection);
    engine.load(url);

    return app.exec();
}
2
3
4
5
6
7
8
9
10
11
12
13
14
15
16
17
18
19
20
21
22
23
24
machine.h
#ifndef MACHINE_H
#define MACHINE_H

#include <QObject>
#include <QTimer>
#include <QVariant>
#include <QDebug>

class Machine : public QObject
{
    Q_OBJECT

    Q_PROPERTY(int workload READ value WRITE setValue NOTIFY progress)

public:
    explicit Machine(QObject *parent = nullptr);

    int value();
    void setValue(int data);

signals:
    void progress();
    void started();
    void stopped();
    void paused();
    void resumed();

public slots:
    void start();
    void stop();
    void pause();
    void resume();

private slots:
    void timeout();

private:
    QTimer m_timer;
    int m_value;
};

#endif // MACHINE_H
2
3
4
5
6
7
8
9
10
11
12
13
14
15
16
17
18
19
20
21
22
23
24
25
26
27
28
29
30
31
32
33
34
35
36
37
38
39
40
41
42
machine.cpp
#include "machine.h"

Machine::Machine(QObject *parent) : QObject(parent)
{
    m_timer.setInterval(1000);
    connect(&m_timer, &QTimer::timeout, this, &Machine::timeout);
}

int Machine::value()
{
    qInfo() << "Returning value";
    return m_value;
}

void Machine::setValue(int data)
{
    qInfo() << "Setting value";
    m_value = data;
    emit progress();
}

void Machine::start()
{
    setValue(0);
    m_timer.start();
    emit started();
}

void Machine::stop()
{
    m_timer.stop();
    emit stopped();
}

void Machine::pause()
{
    m_timer.stop();
    emit paused();
}

void Machine::resume()
{
    m_timer.start();
    emit resumed();
}

void Machine::timeout()
{
    m_value++;
    emit progress();
    if(m_value > 99) stop();
}
2
3
4
5
6
7
8
9
10
11
12
13
14
15
16
17
18
19
20
21
22
23
24
25
26
27
28
29
30
31
32
33
34
35
36
37
38
39
40
41
42
43
44
45
46
47
48
49
50
51
52
main.qml
import QtQuick 2.12
import QtQuick.Window 2.12
import QtQuick.Controls 2.3

import com.skinnyrobot.machine 1.0

Window {
    id: window
    width: 640
    height: 480
    visible: true
    title: qsTr("C++ Example")

    Component.onCompleted: {

        progressBar.value = machine.workload

        btnStart.enable = true
        btnStop.enable = false
        btnPause.enable = false
        btnResume.enable = false
    }

    Machine {
        id: machine
        onStarted: {
            btnStart.enabled = false
            btnStop.enable = true
            btnPause.enabled = true
            btnResume.enabled = false
            lblStatus.text = "Started"
        }

        onStopped: {
            btnStart.enabled = true
            btnStop.enable = false
            btnPause.enabled = false
            btnResume.enabled = false
            lblStatus.text = "Stopped"
            progressBar.value = 0.0
        }

        onPaused: {
            btnStart.enabled = false
            btnStop.enable = true
            btnPause.enabled = false
            btnResume.enabled = true
            lblStatus.text = "Paused"
        }

        onResumed: {
            btnStart.enabled = false
            btnStop.enable = true
            btnPause.enabled = true
            btnResume.enabled = false
            lblStatus.text = "Resumed"
        }

        onProgress: {
            lblStatus.text = "Progress: " + machine.workload + "%"
            progressBar.value = (machine.workload * 0.01)
        }
    }

    Column {
        id:column
        width: 434
        height: 62
        anchors.horizontalCenter: parent.horizontalCenter
        anchors.verticalCenter: parent.verticalCenter
        spacing: 10

        Label {
            id: lblStatus
            text: "Status"
        }

        ProgressBar {
            id: progressBar
            width: parent.width
            anchors.horizontalCenter: parent.horizontalCenter
            value: 0.5
        }

        Row {
            id: row
            width: 200
            height: 400
            spacing: 10

            Button {
                id: btnStart
                text: qsTr("Start")
                onClicked: machine.start()
            }

            Button {
                id: btnPause
                text: qsTr("Pause")
                onClicked: machine.pause()
            }

            Button {
                id: btnResume
                text: qsTr("Resume")
                onClicked: machine.resume()
            }

            Button {
                id: btnStop
                text: qsTr("Stop")
                onClicked: machine.stop()
            }
        }
    }
}
2
3
4
5
6
7
8
9
10
11
12
13
14
15
16
17
18
19
20
21
22
23
24
25
26
27
28
29
30
31
32
33
34
35
36
37
38
39
40
41
42
43
44
45
46
47
48
49
50
51
52
53
54
55
56
57
58
59
60
61
62
63
64
65
66
67
68
69
70
71
72
73
74
75
76
77
78
79
80
81
82
83
84
85
86
87
88
89
90
91
92
93
94
95
96
97
98
99
100
101
102
103
104
105
106
107
108
109
110
111
112
113
114
115
116
117
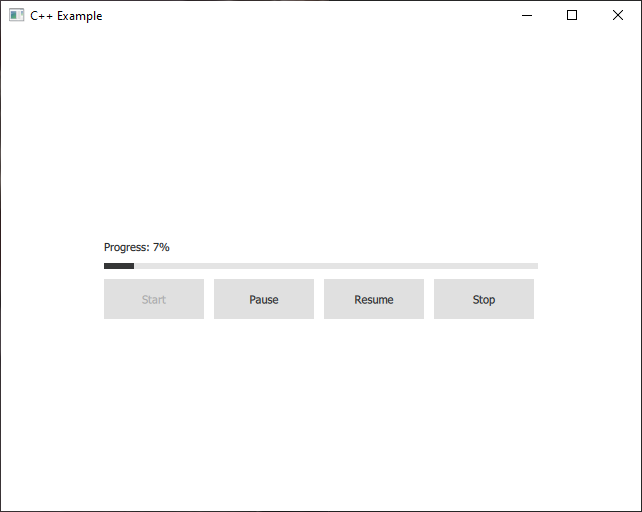
# Examples
# Square footage calculator
import QtQuick 2.15
import QtQuick.Window 2.15
import QtQuick.Controls 2.15

Window {
    id: window
    width: 640
    height: 480
    visible: true
    title: qsTr("Square Footage Calculator")

    function calc() {
        var num = sbWidth.value * sbHeight.value
        label.text = num + " sqft"
    }


    Column {
        id: column
        x: 0
        y: 0
        width: 200
        height: 164
        anchors.verticalCenter: parent.verticalCenter
        anchors.horizontalCenter: parent.horizontalCenter
        spacing: 10

        Label {
            id: label
            text: qsTr("0 sqft")
            anchors.horizontalCenter: parent.horizontalCenter
            font.pointSize: 25
        }

        Grid {
            id: grid
            width: 400
            height: 400
            rows: 2
            columns: 2
            spacing: 10

            Label {
                id: label1
                text: qsTr("Width")
            }

            SpinBox {
                id: sbWidth
            }

            Label {
                id: label2
                text: qsTr("Height")
            }

            SpinBox {
                id: sbHeight
            }
        }
    }

    Connections {
        target: sbWidth
        onValueModified: calc()
    }

    Connections {
        target: sbHeight
        onValueModified: calc()
    }
}
2
3
4
5
6
7
8
9
10
11
12
13
14
15
16
17
18
19
20
21
22
23
24
25
26
27
28
29
30
31
32
33
34
35
36
37
38
39
40
41
42
43
44
45
46
47
48
49
50
51
52
53
54
55
56
57
58
59
60
61
62
63
64
65
66
67
68
69
70
71
72
