# Robot Studio
# Basics
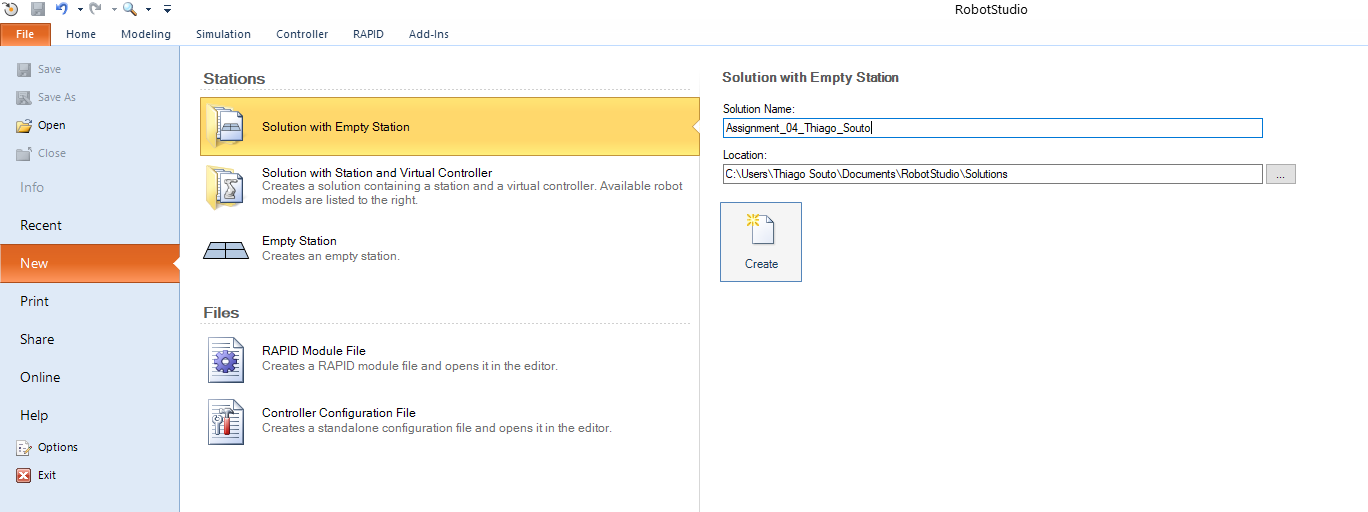
# Creating a new project
Simply go File -> New Project
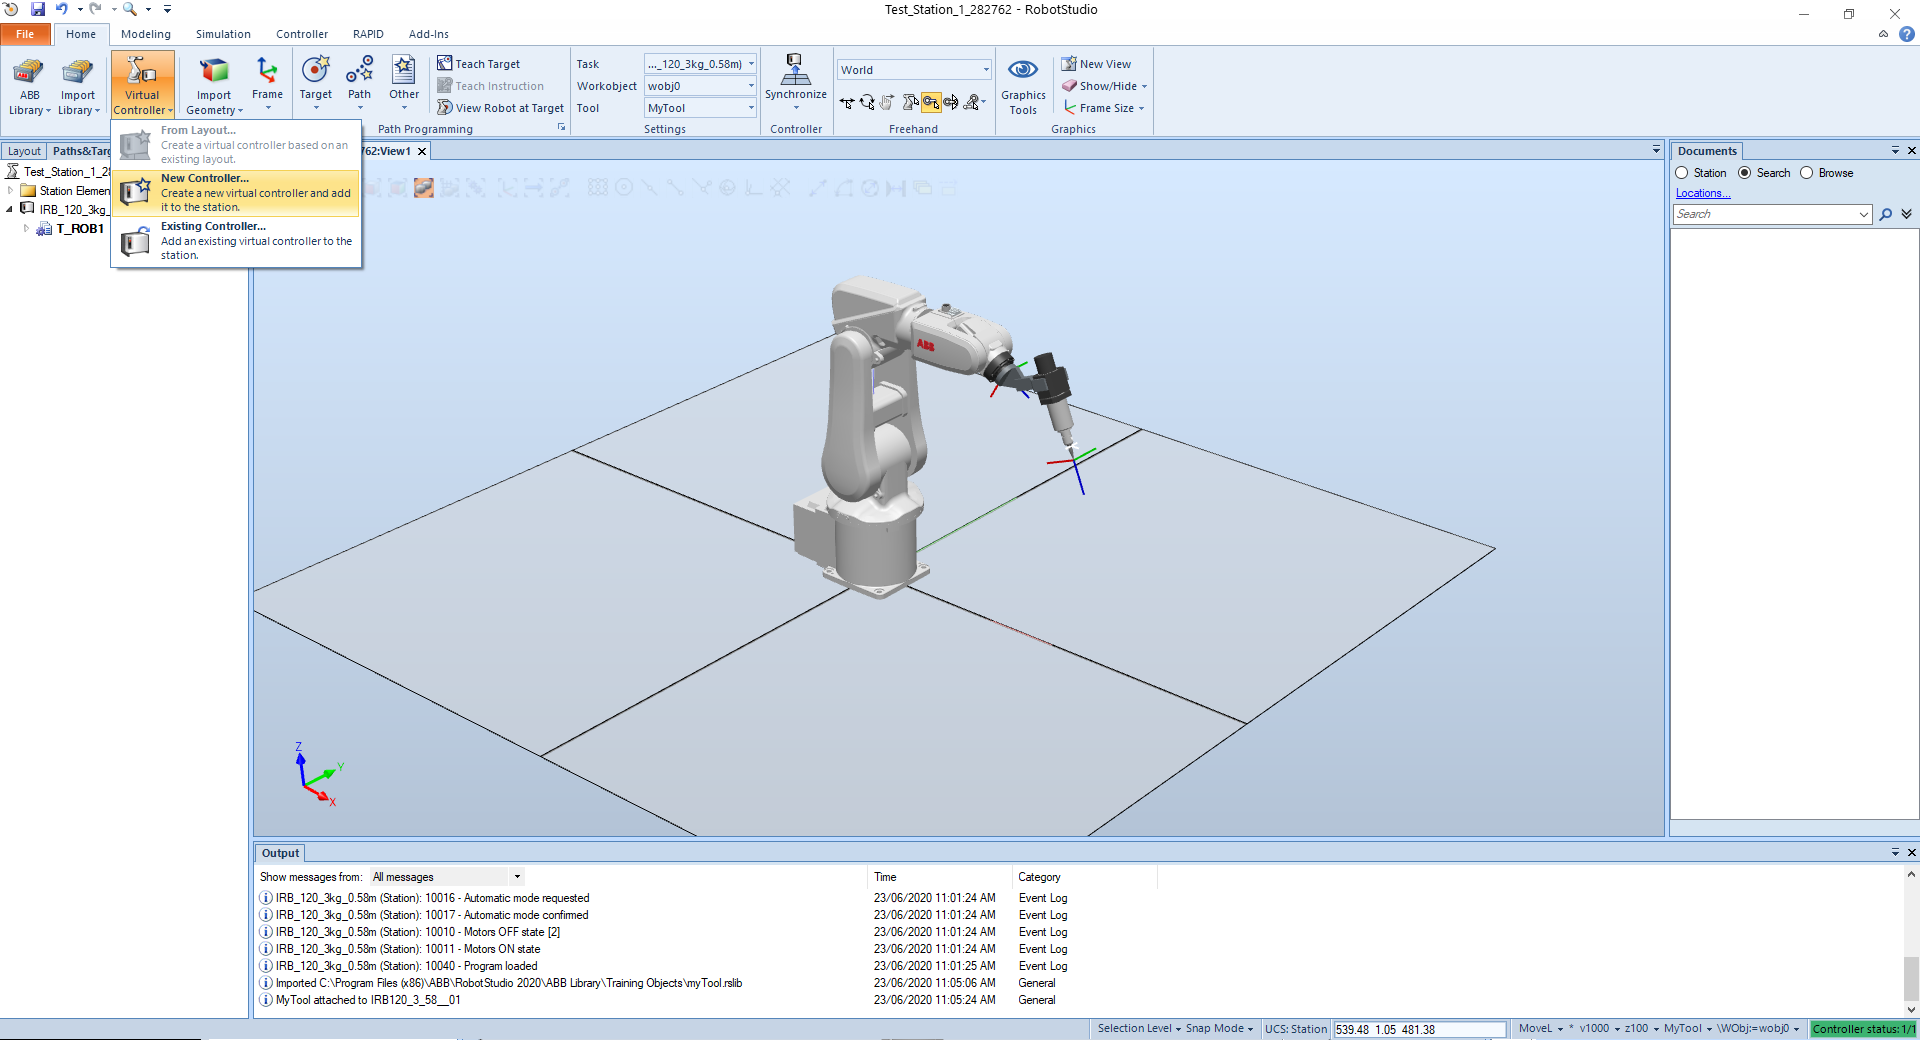
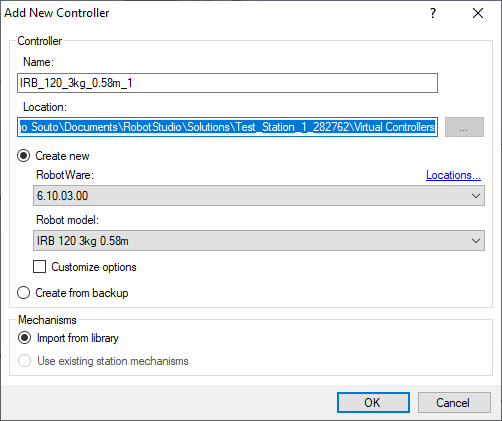
# Adding a controller
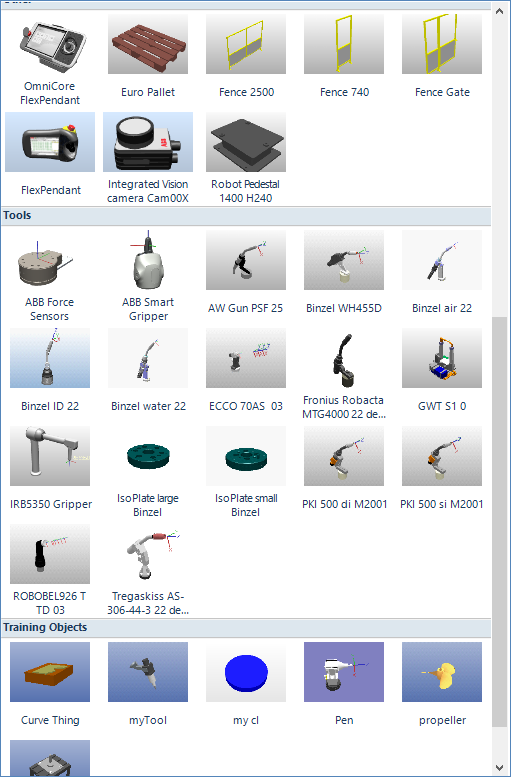
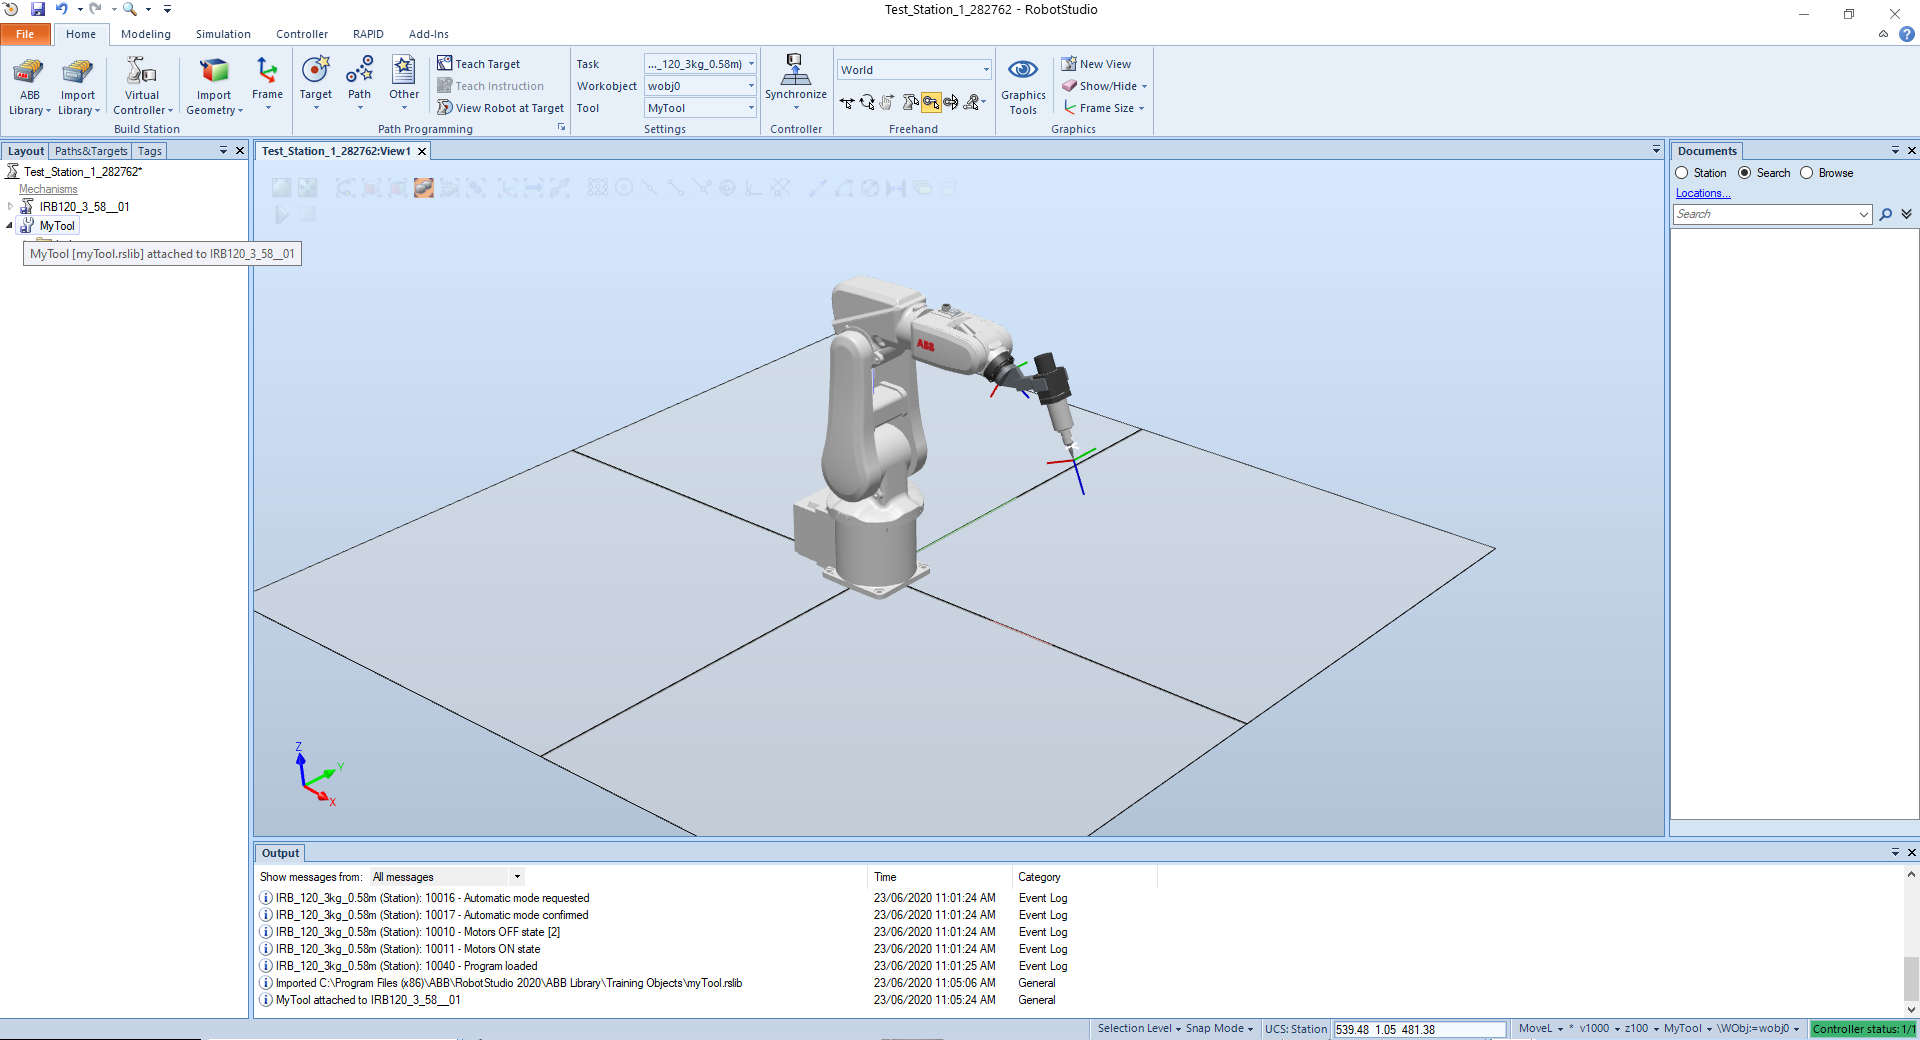
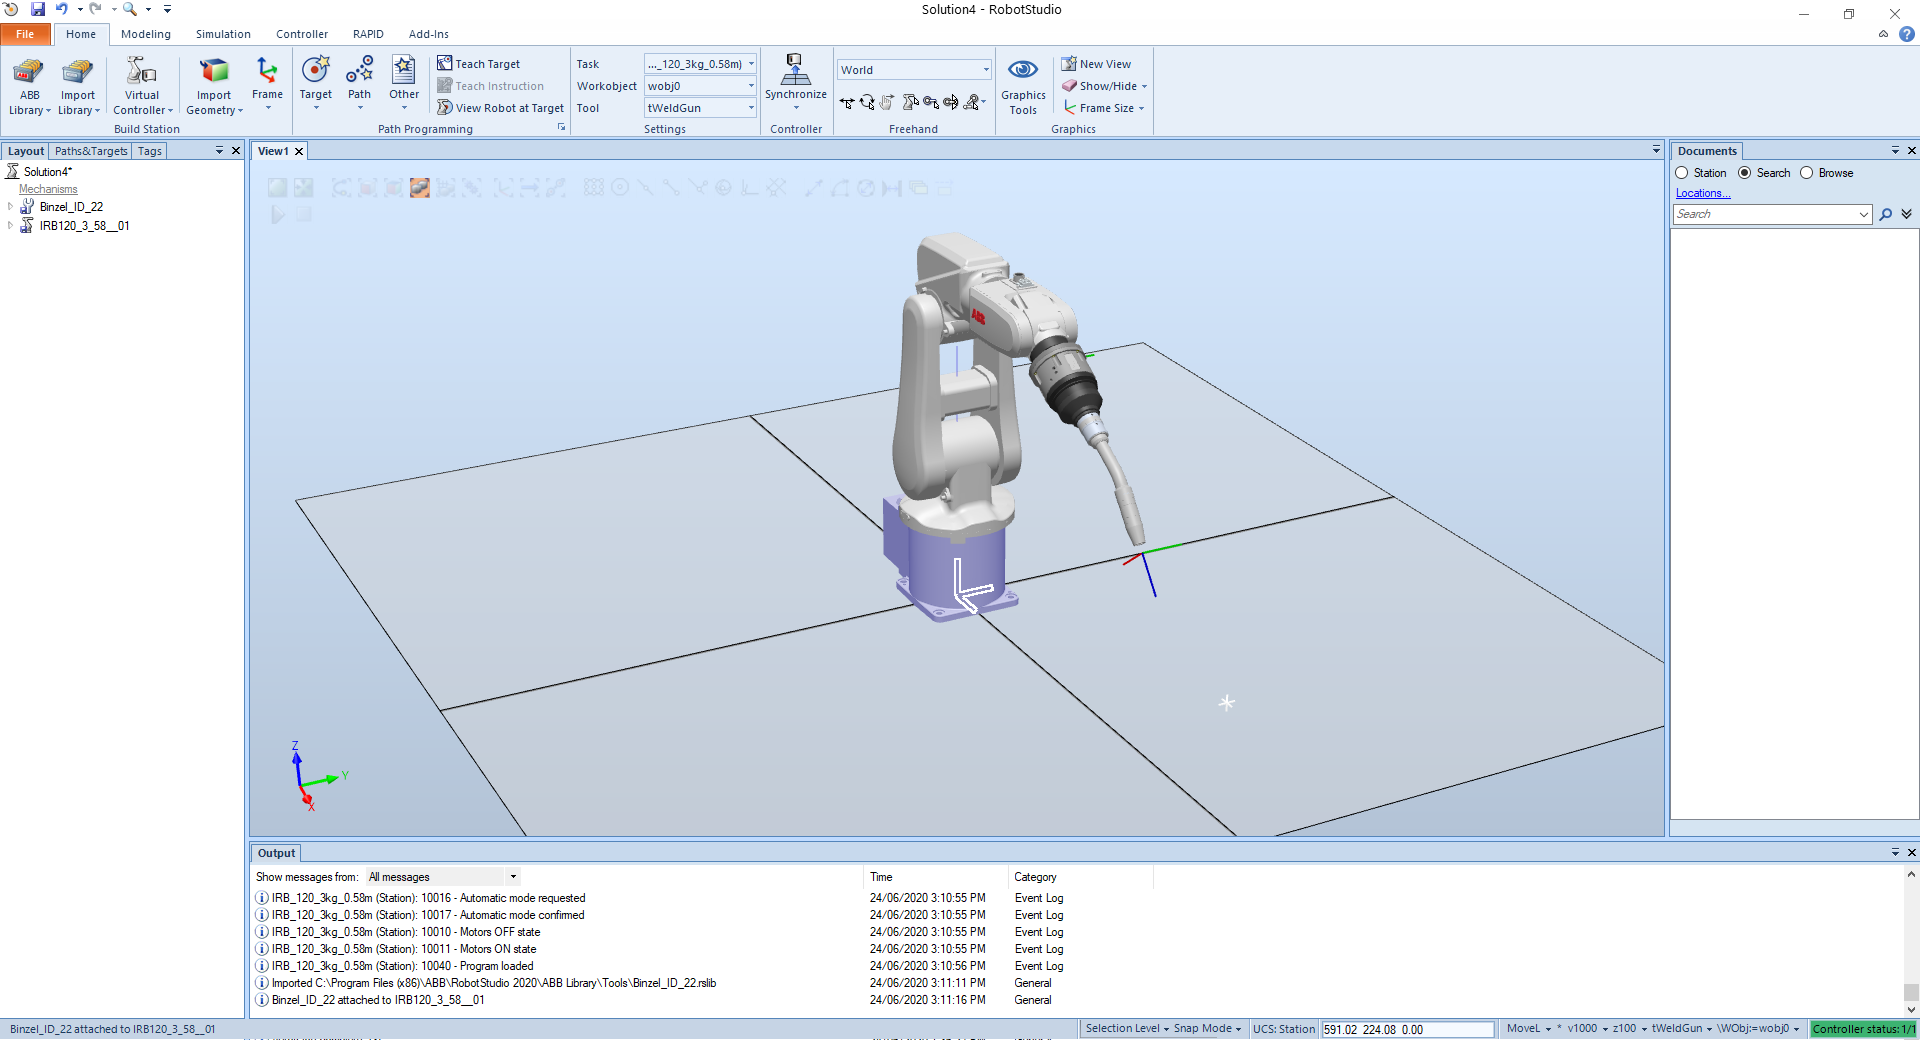
# Adding a Tool
From the menu import Library -> Equipment -> Choose the tool.
Then From the layout panel drag and drop the tool into the robot.
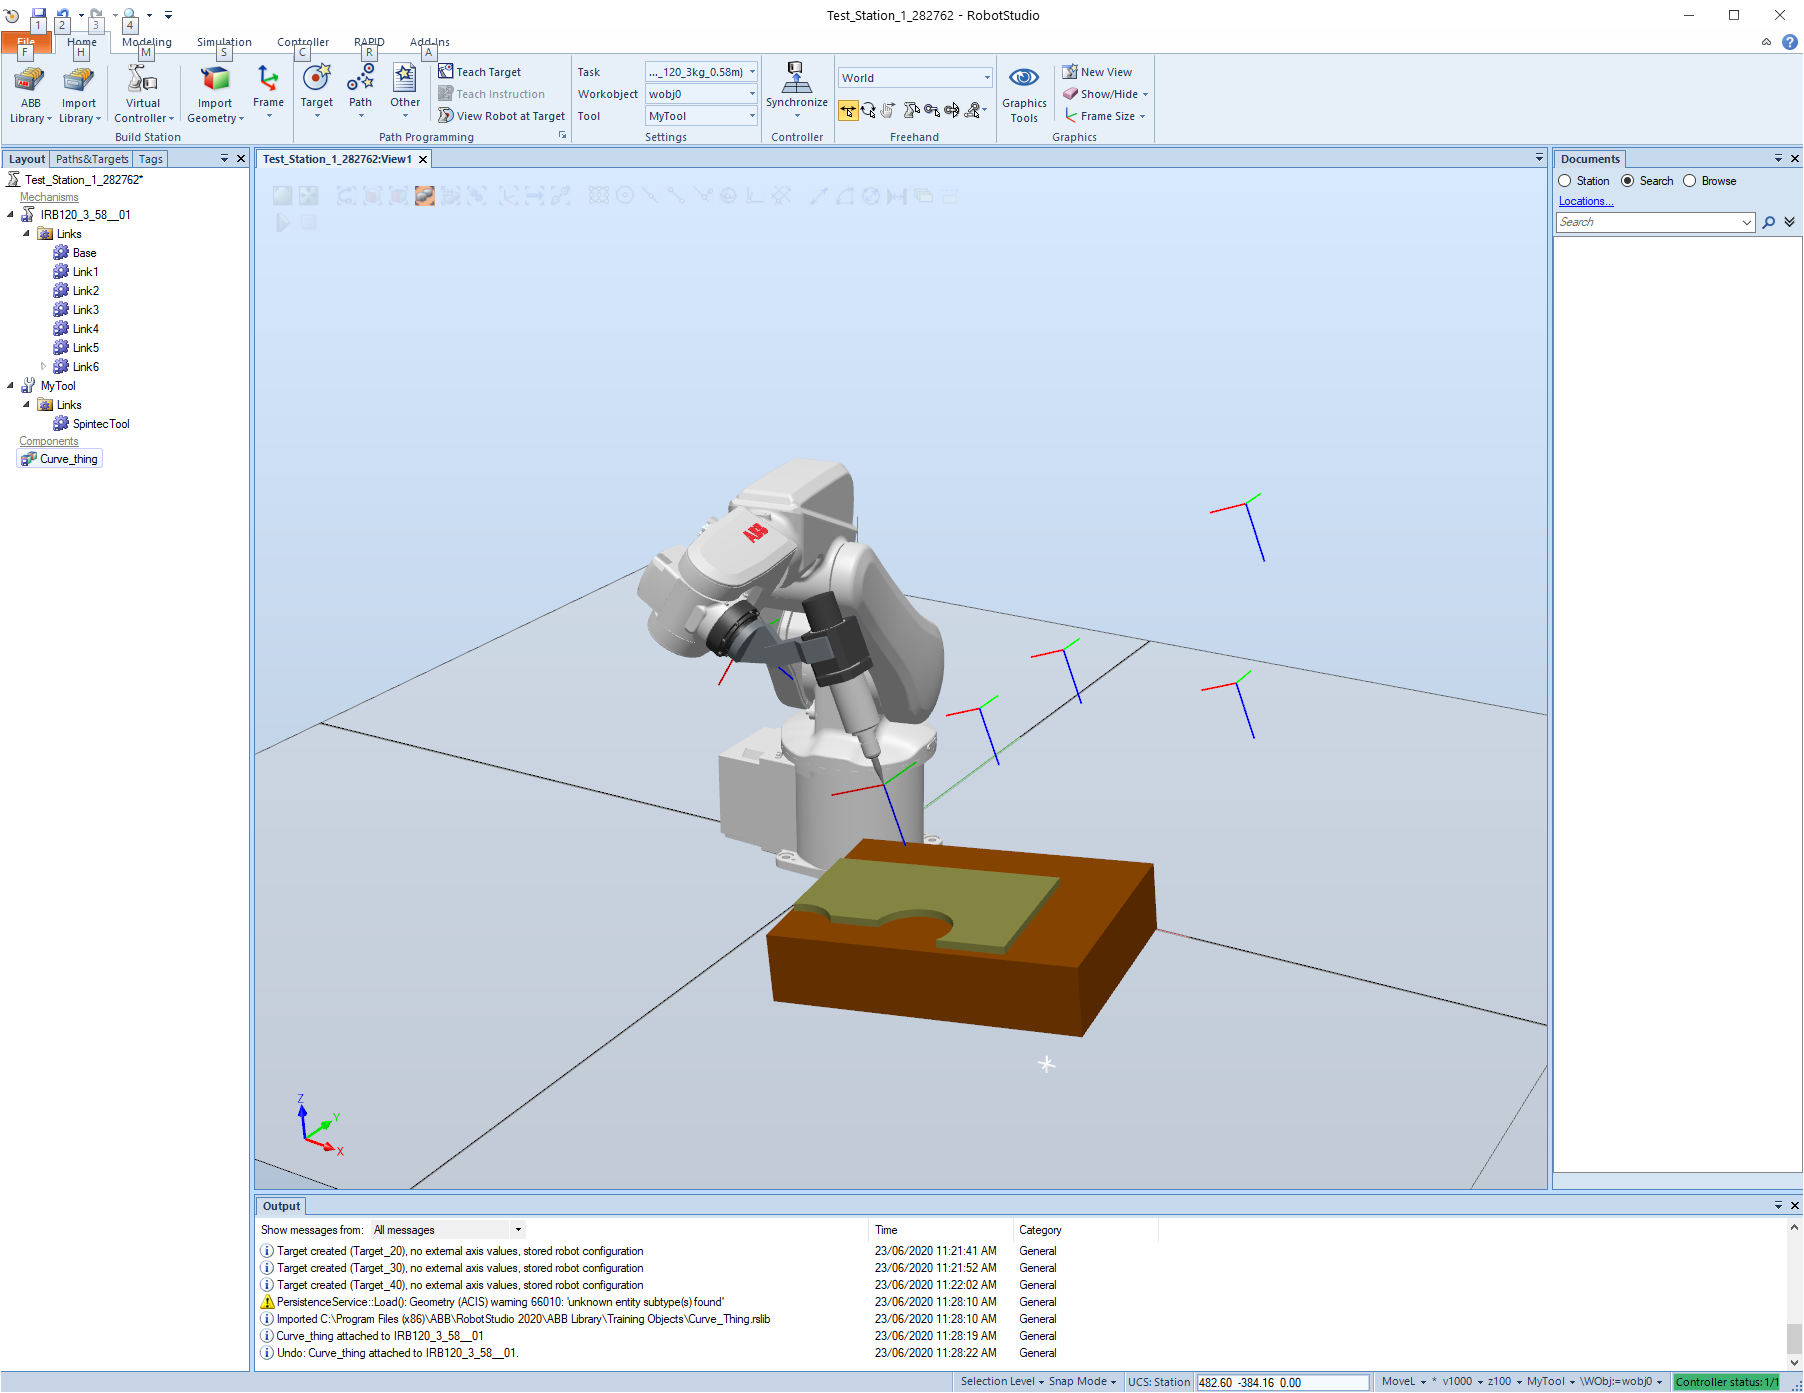
# Adding target points
Move the tool to the desired position and click on Teach Target.
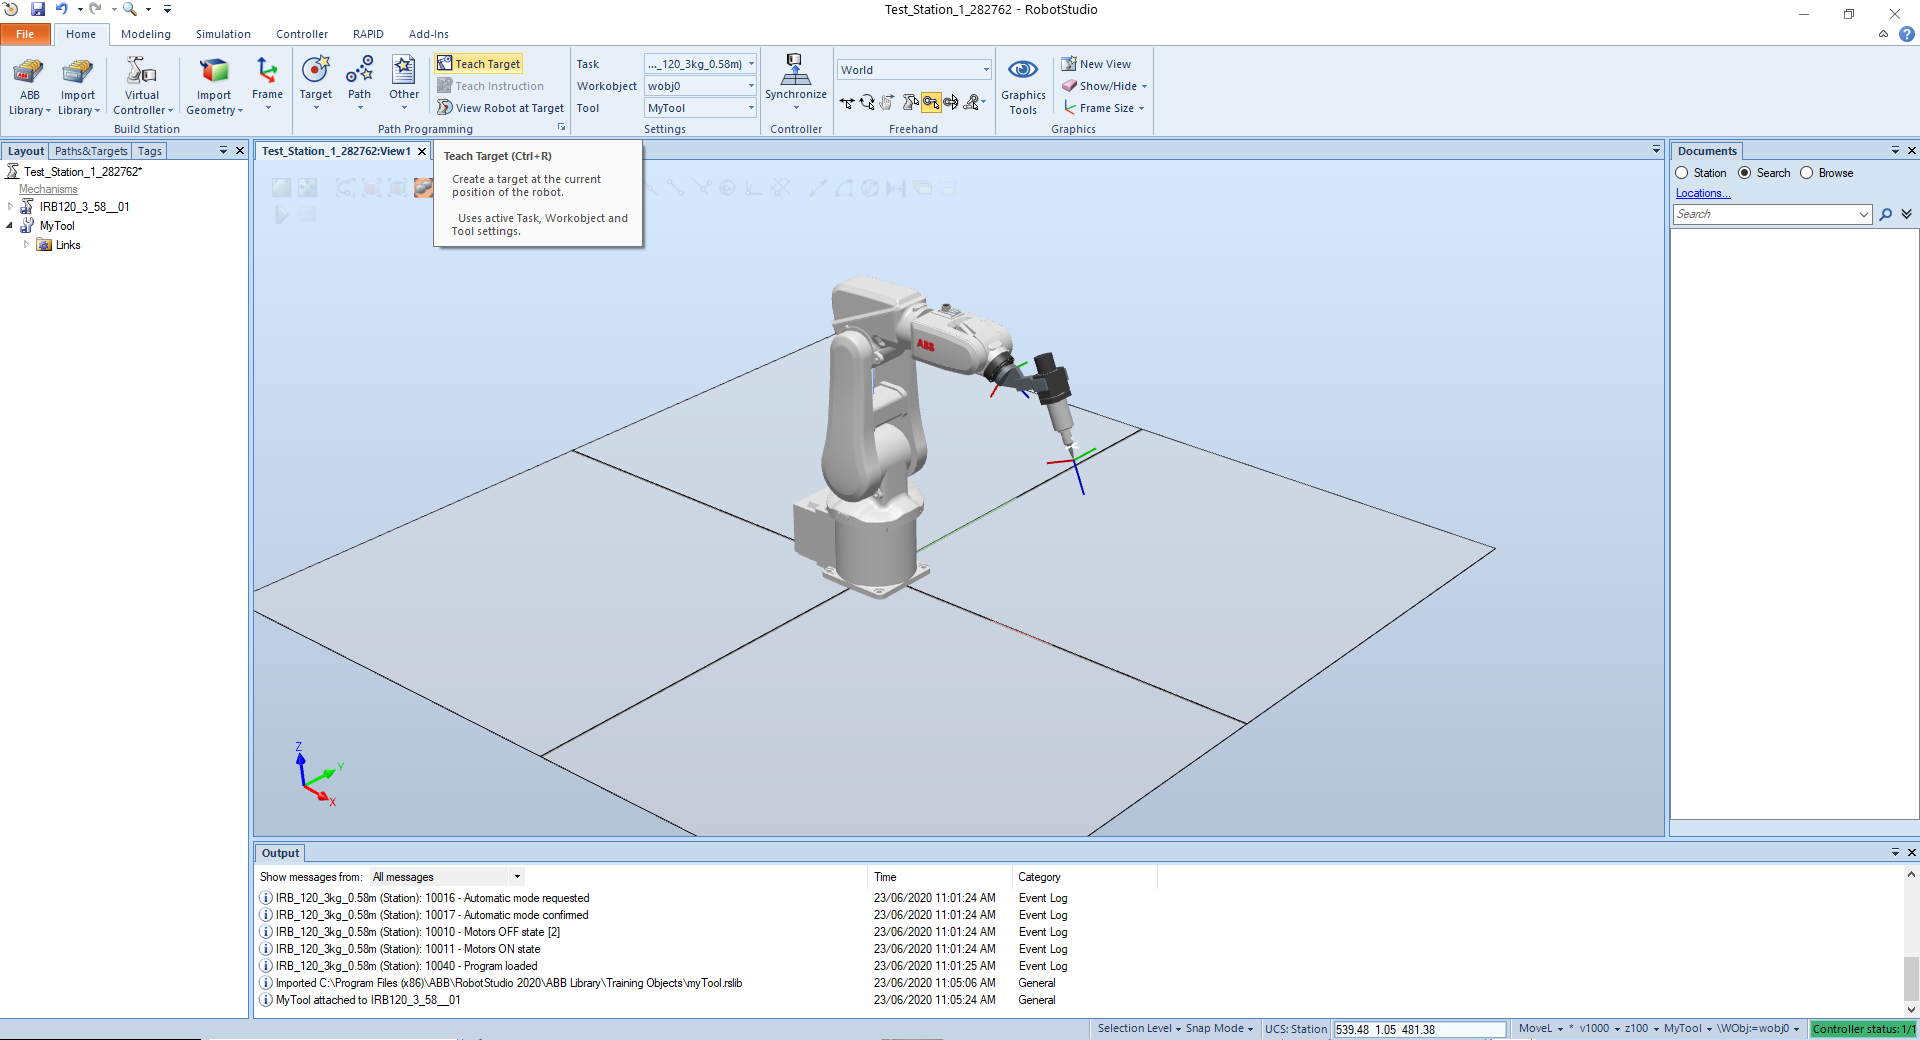
As you move the end-effector and Teach Targets the targets will be added to the project.
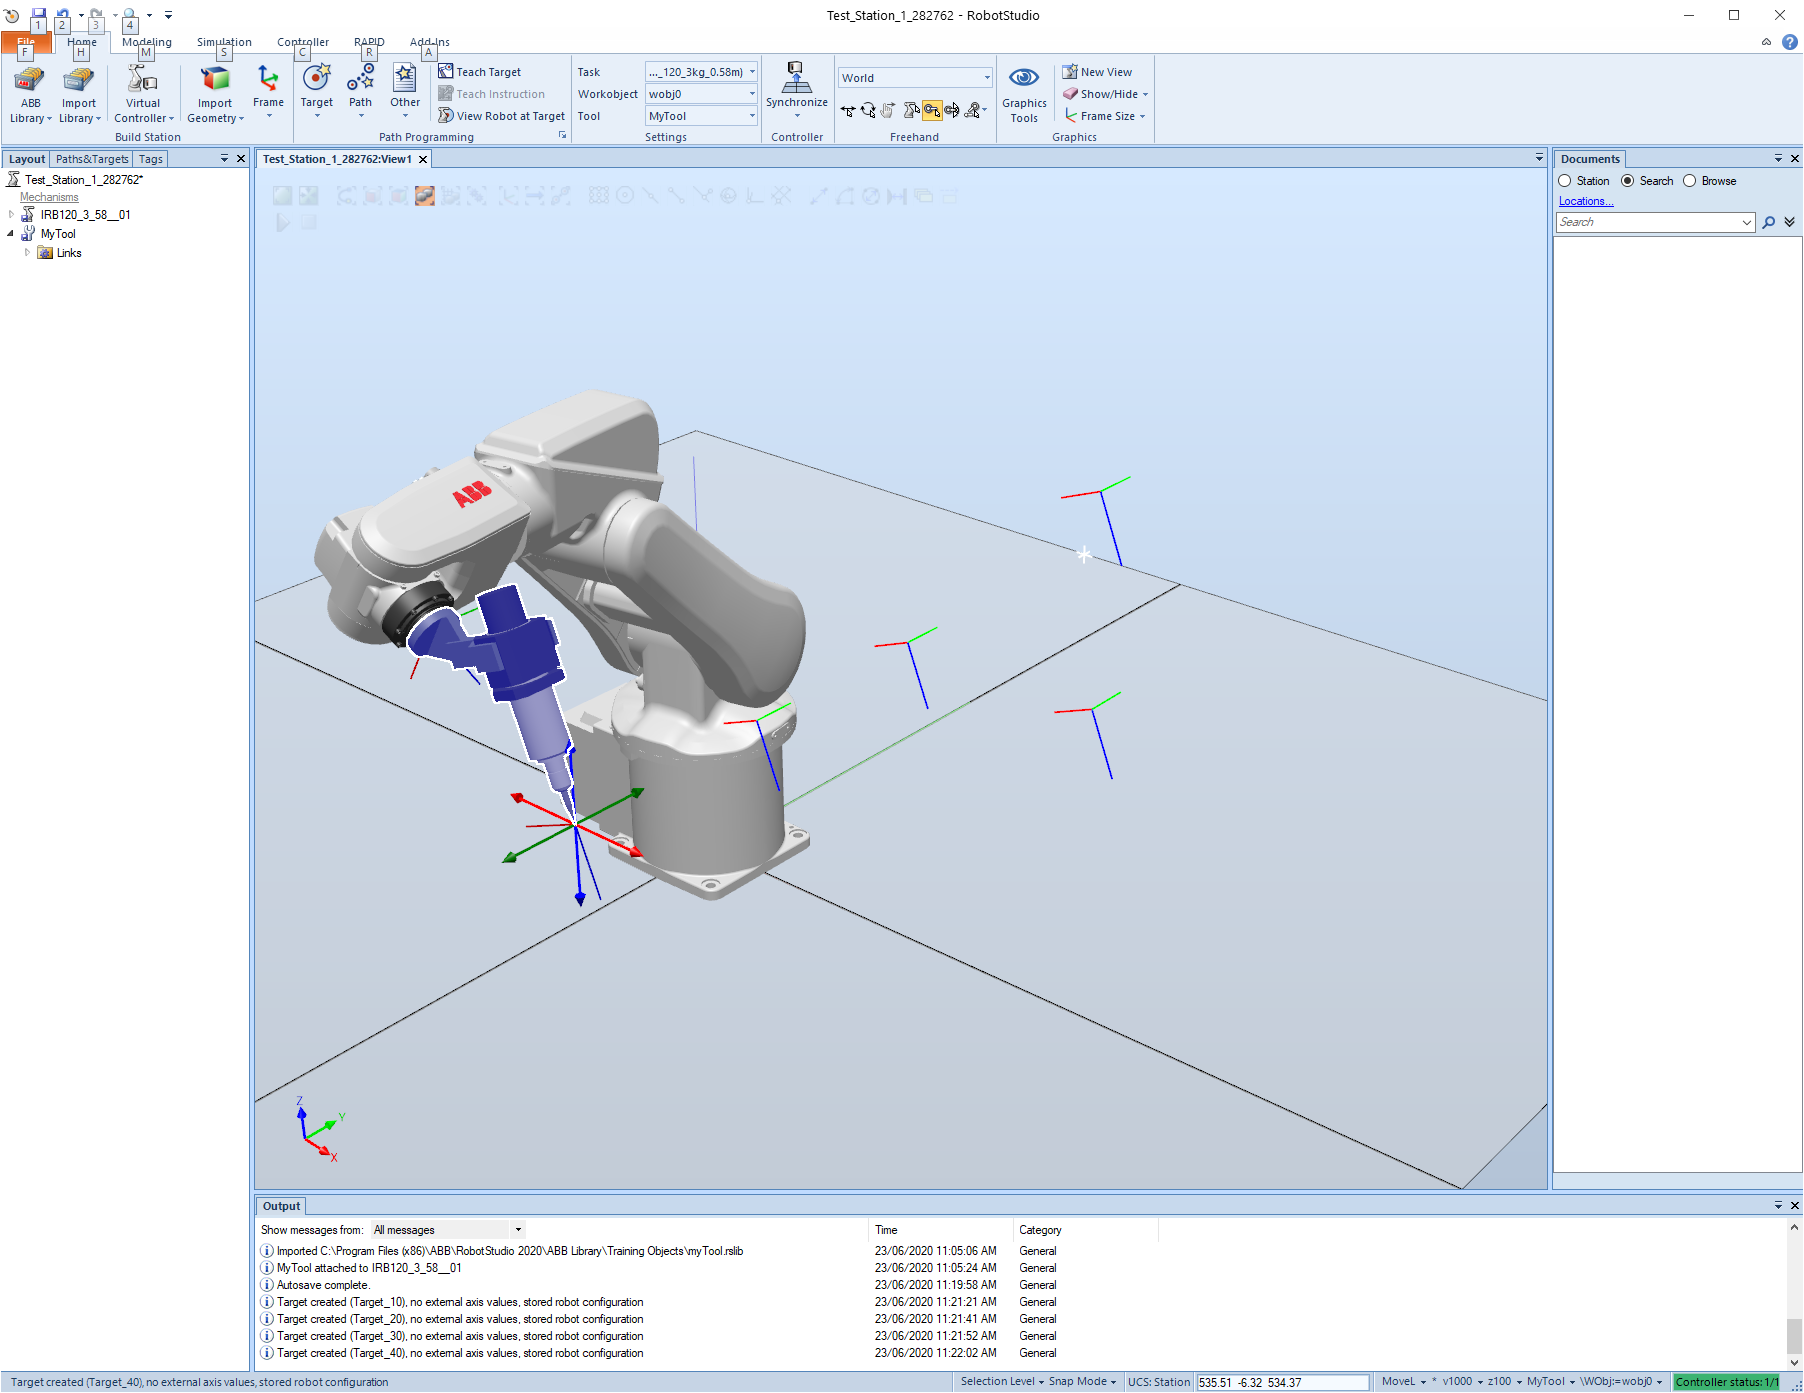
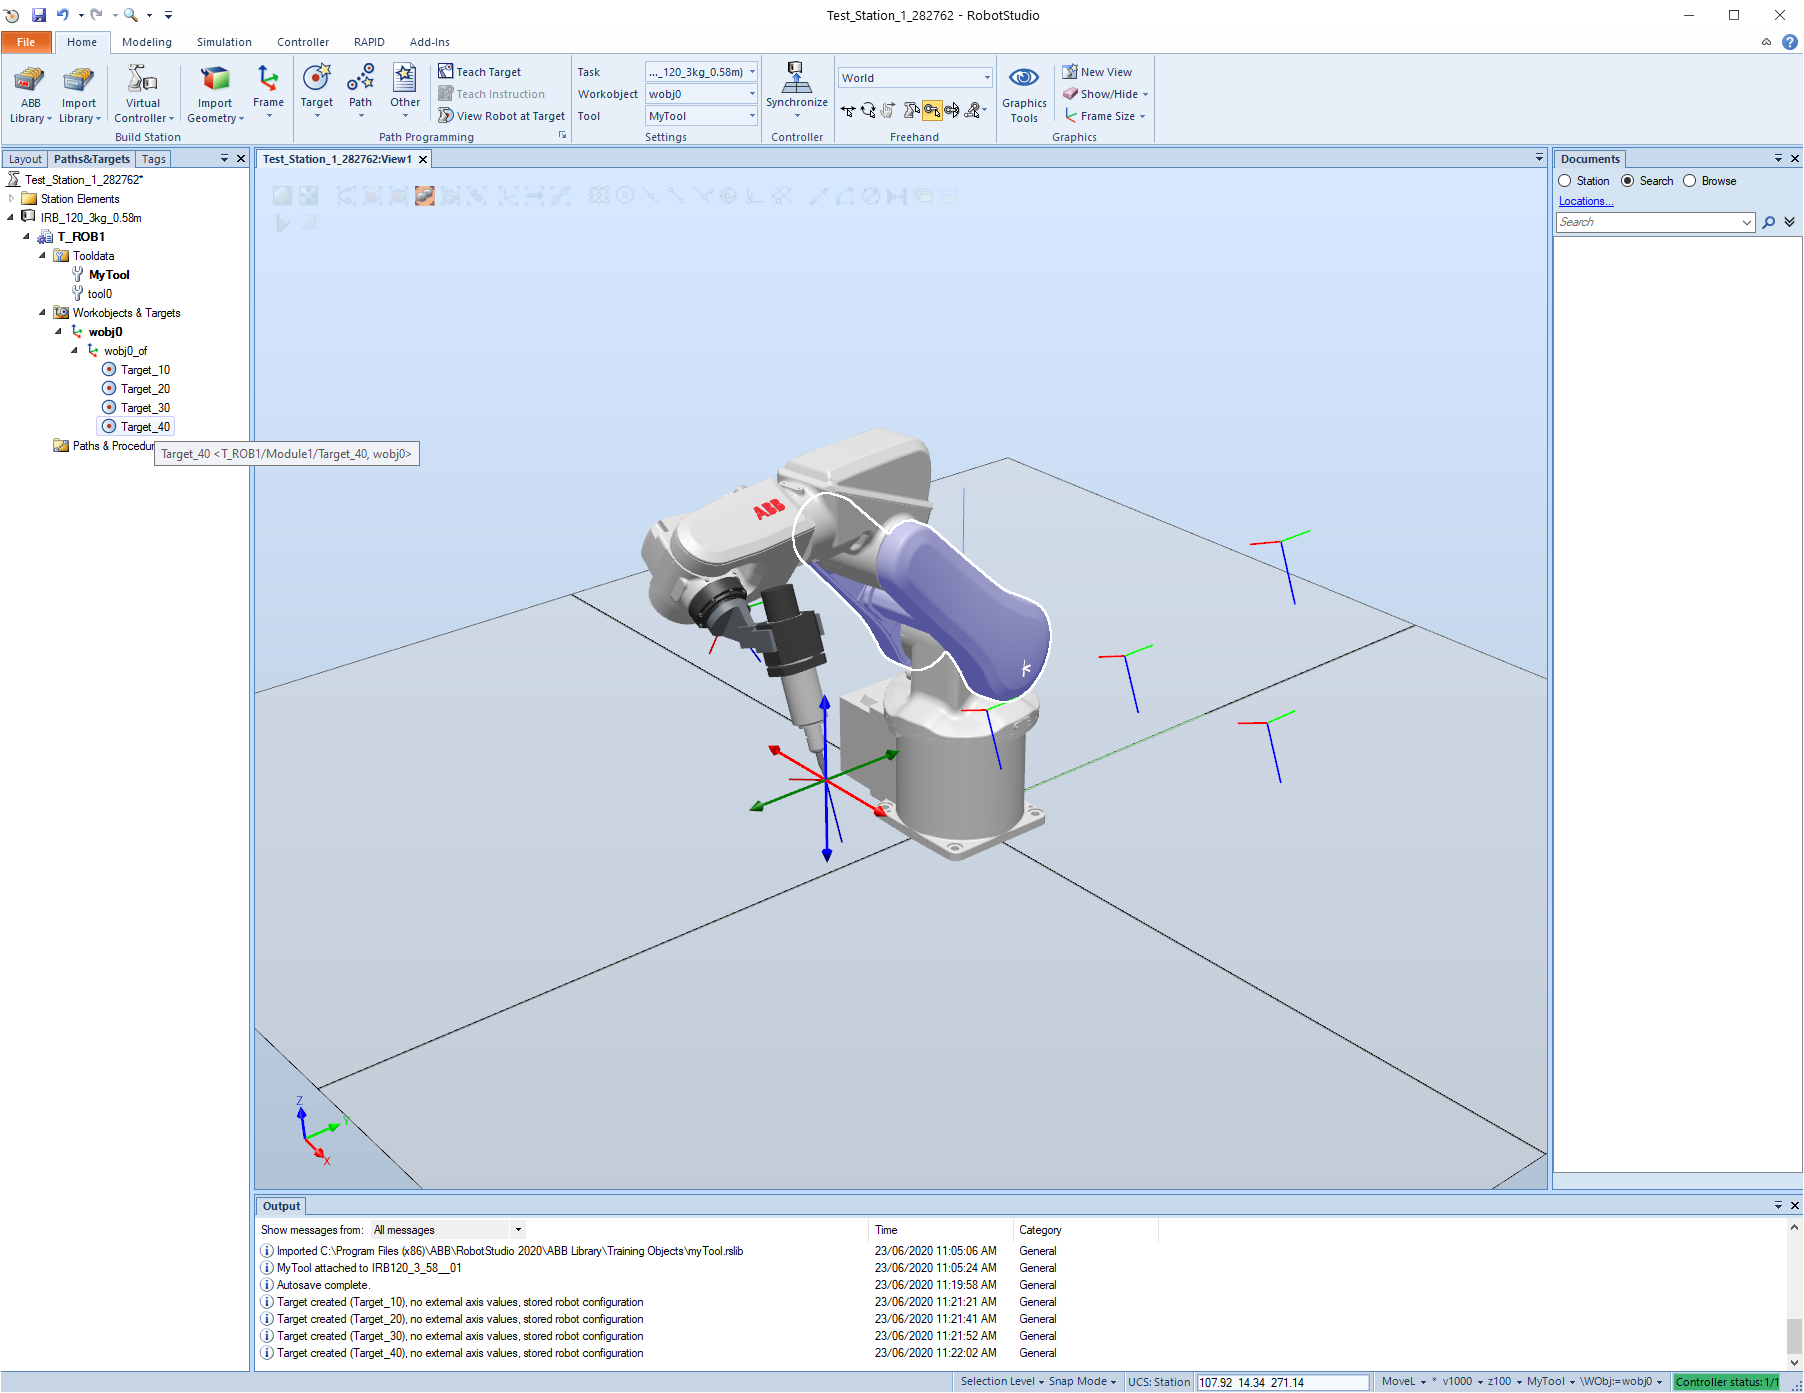
The targets will be located at the Paths&Targets panel in the Workobjects & Targets. The Workobject is the space where the robot will be working on.
# Adding Working Objects from outside
Got to import Library -> Equipment and choose.
# Making a path
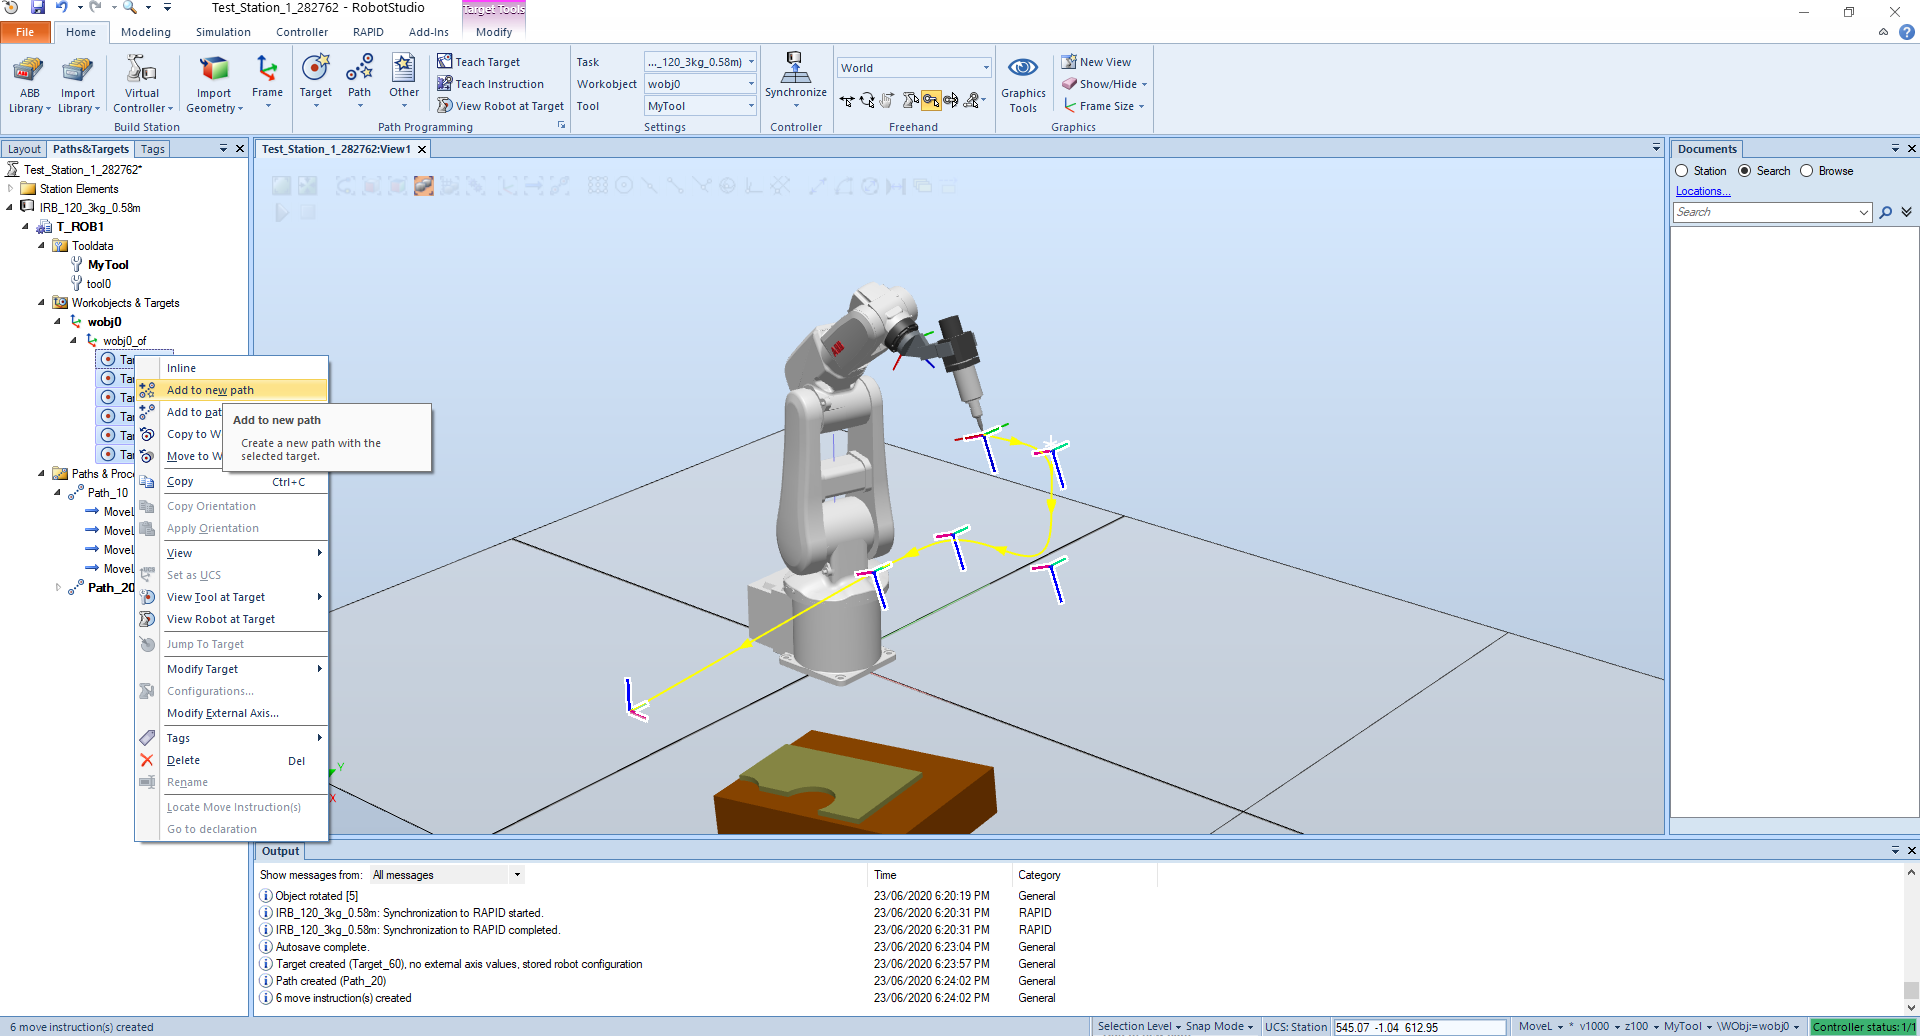
Select the Targets and click on add to new path.
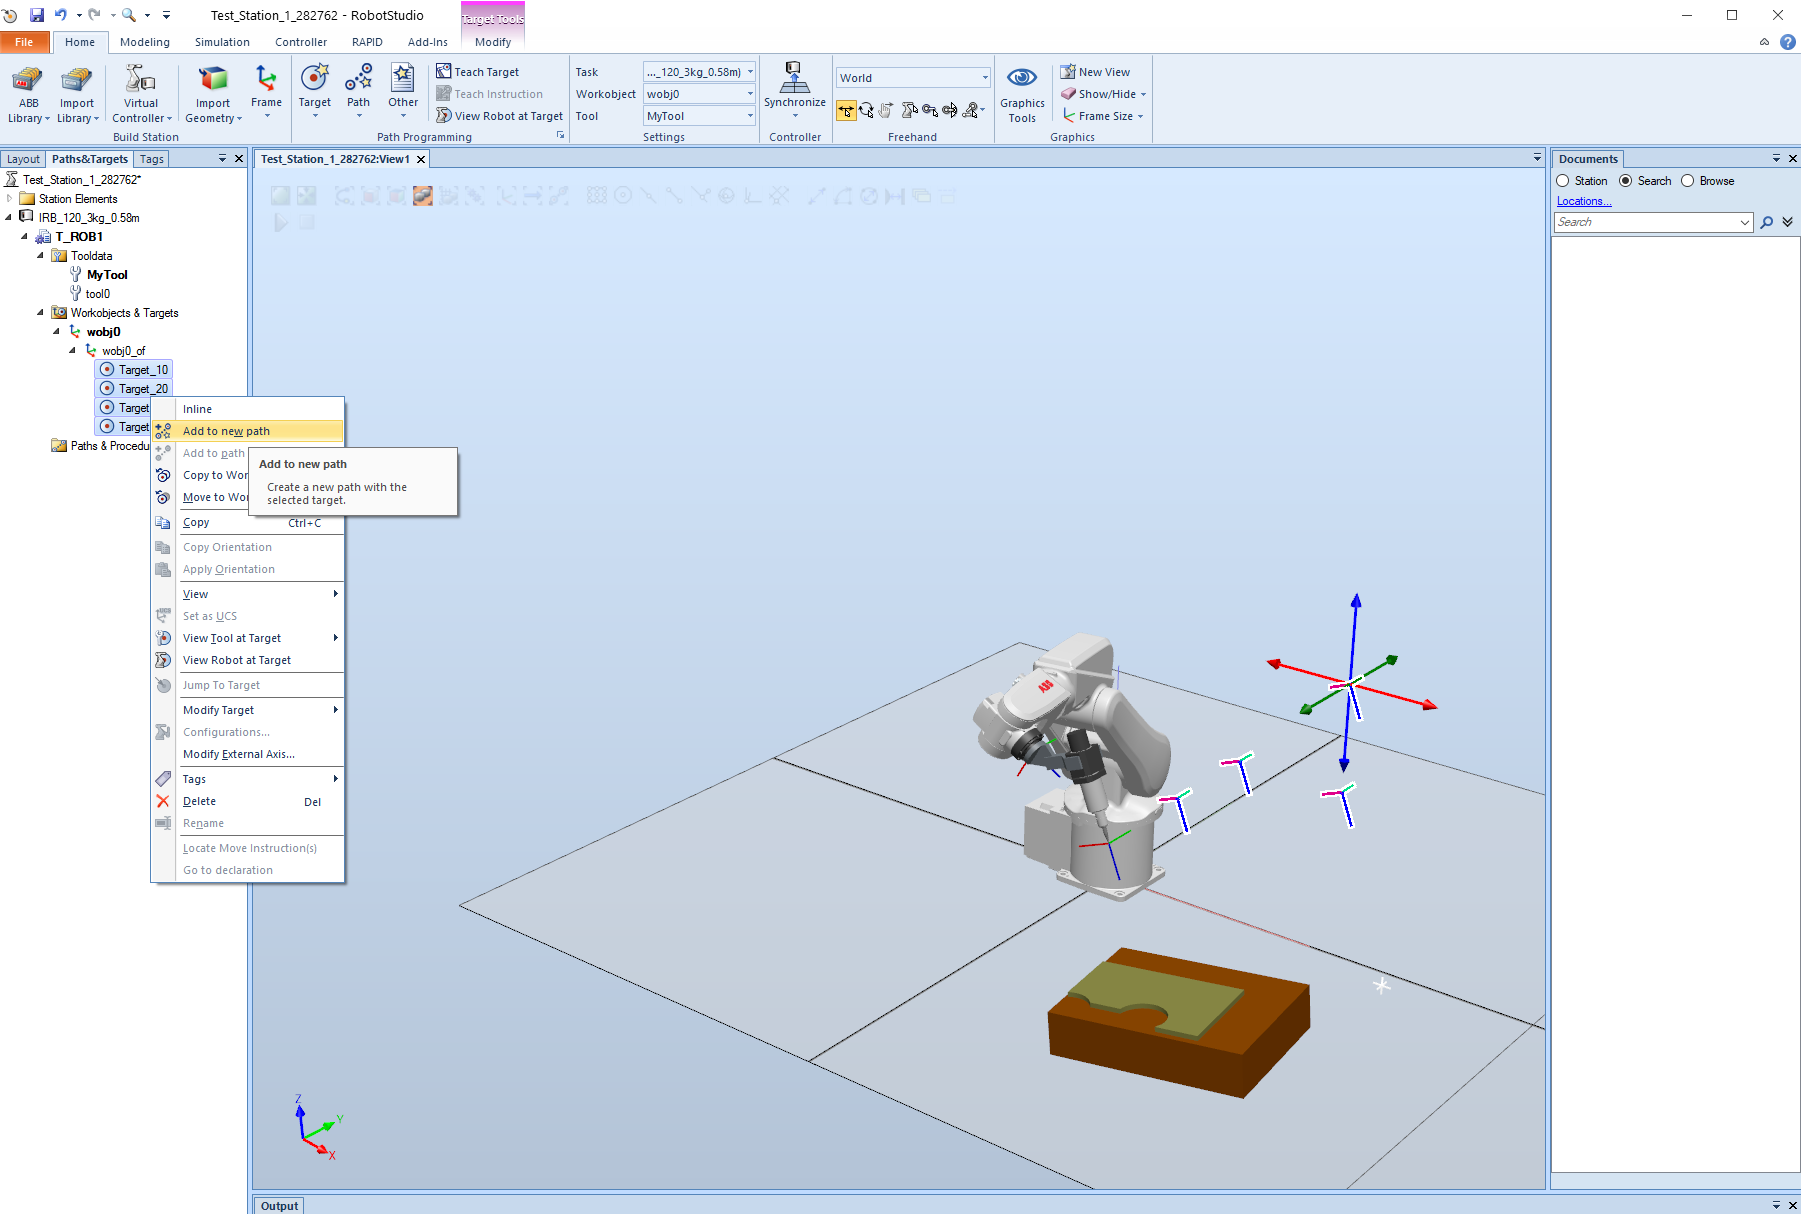
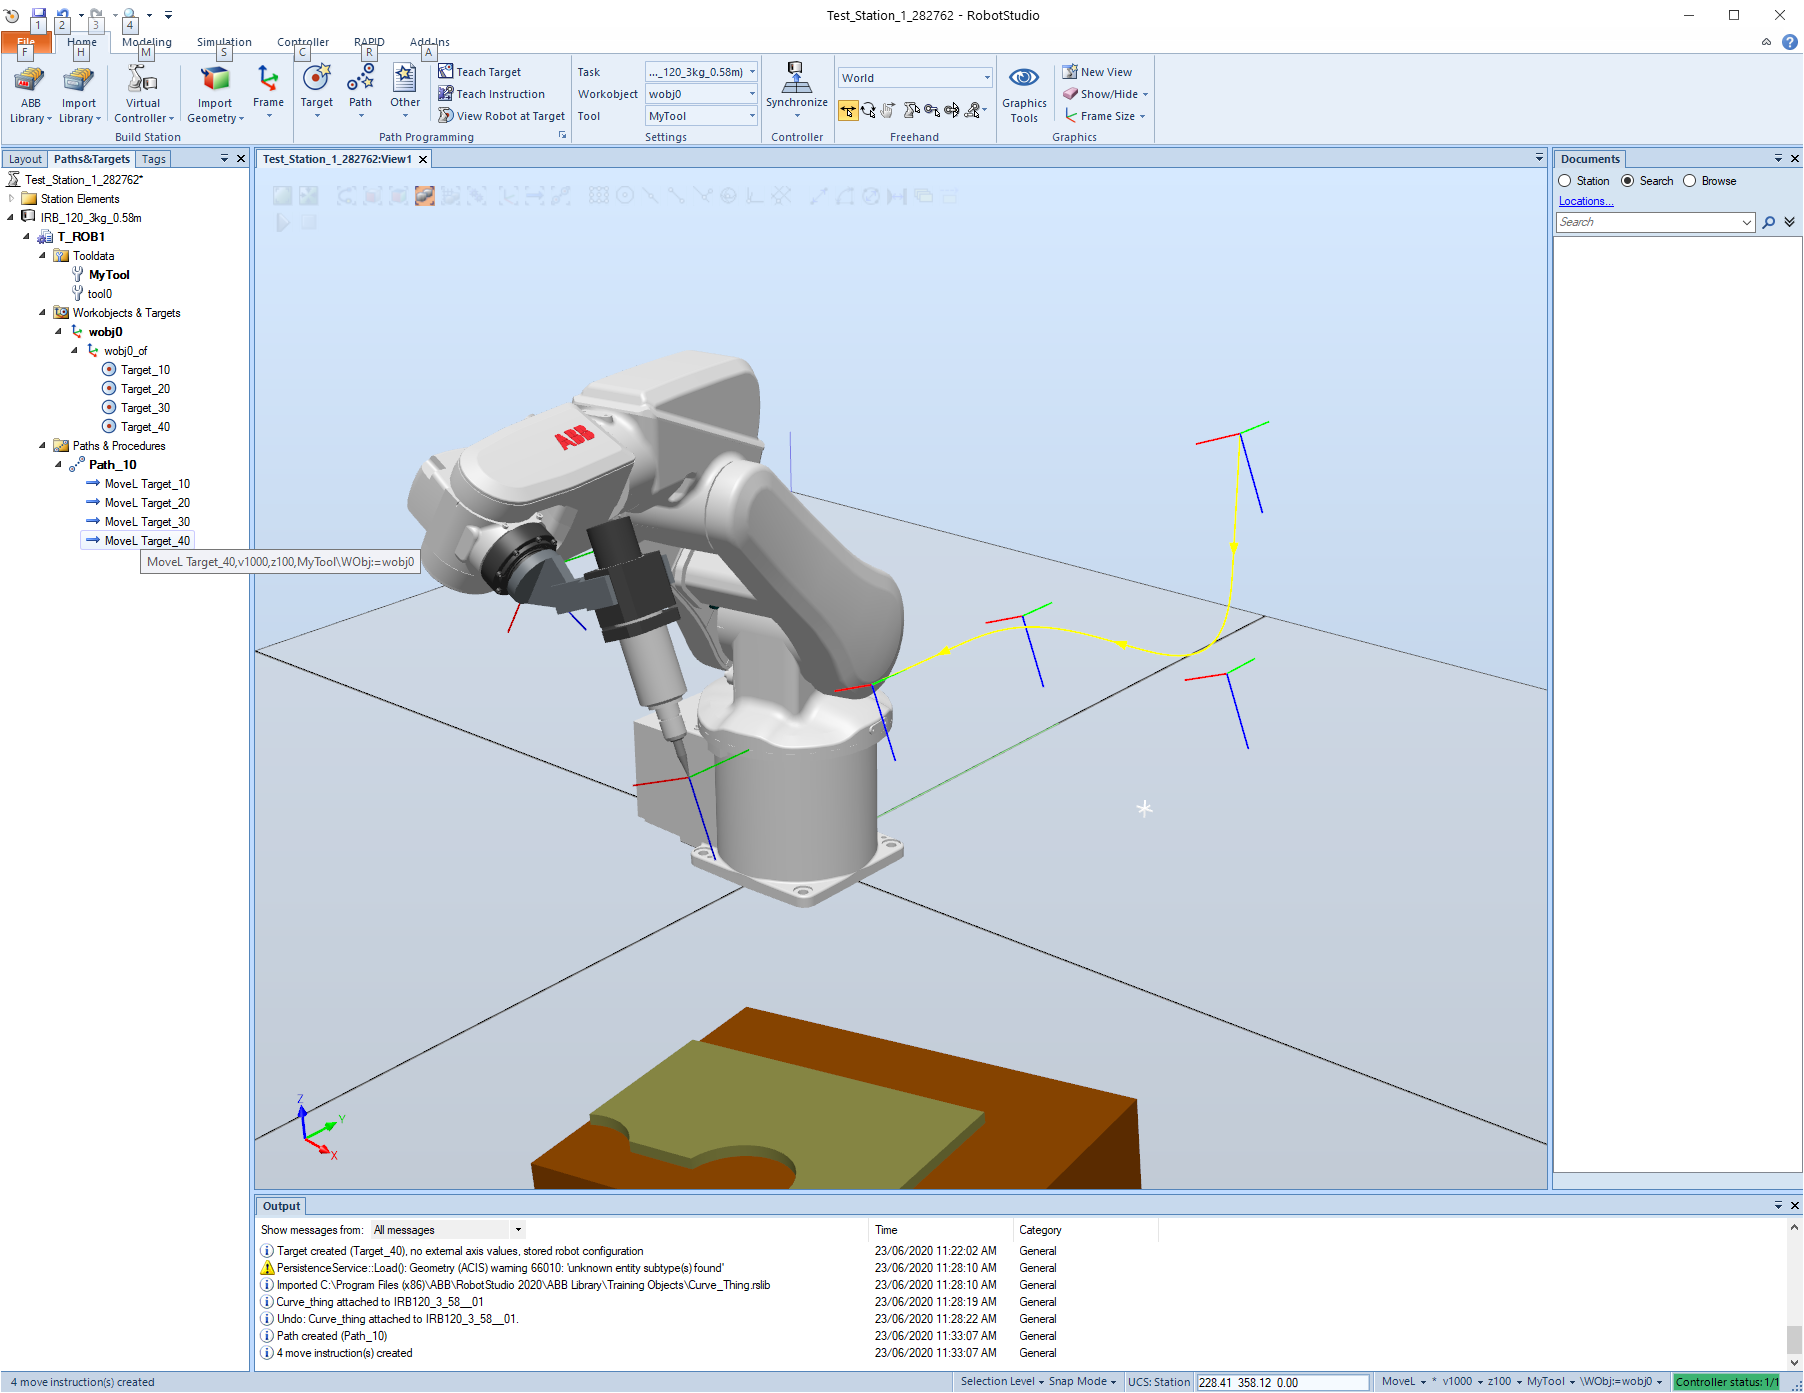
Then a new path will be created.
We can also click on Create Target.
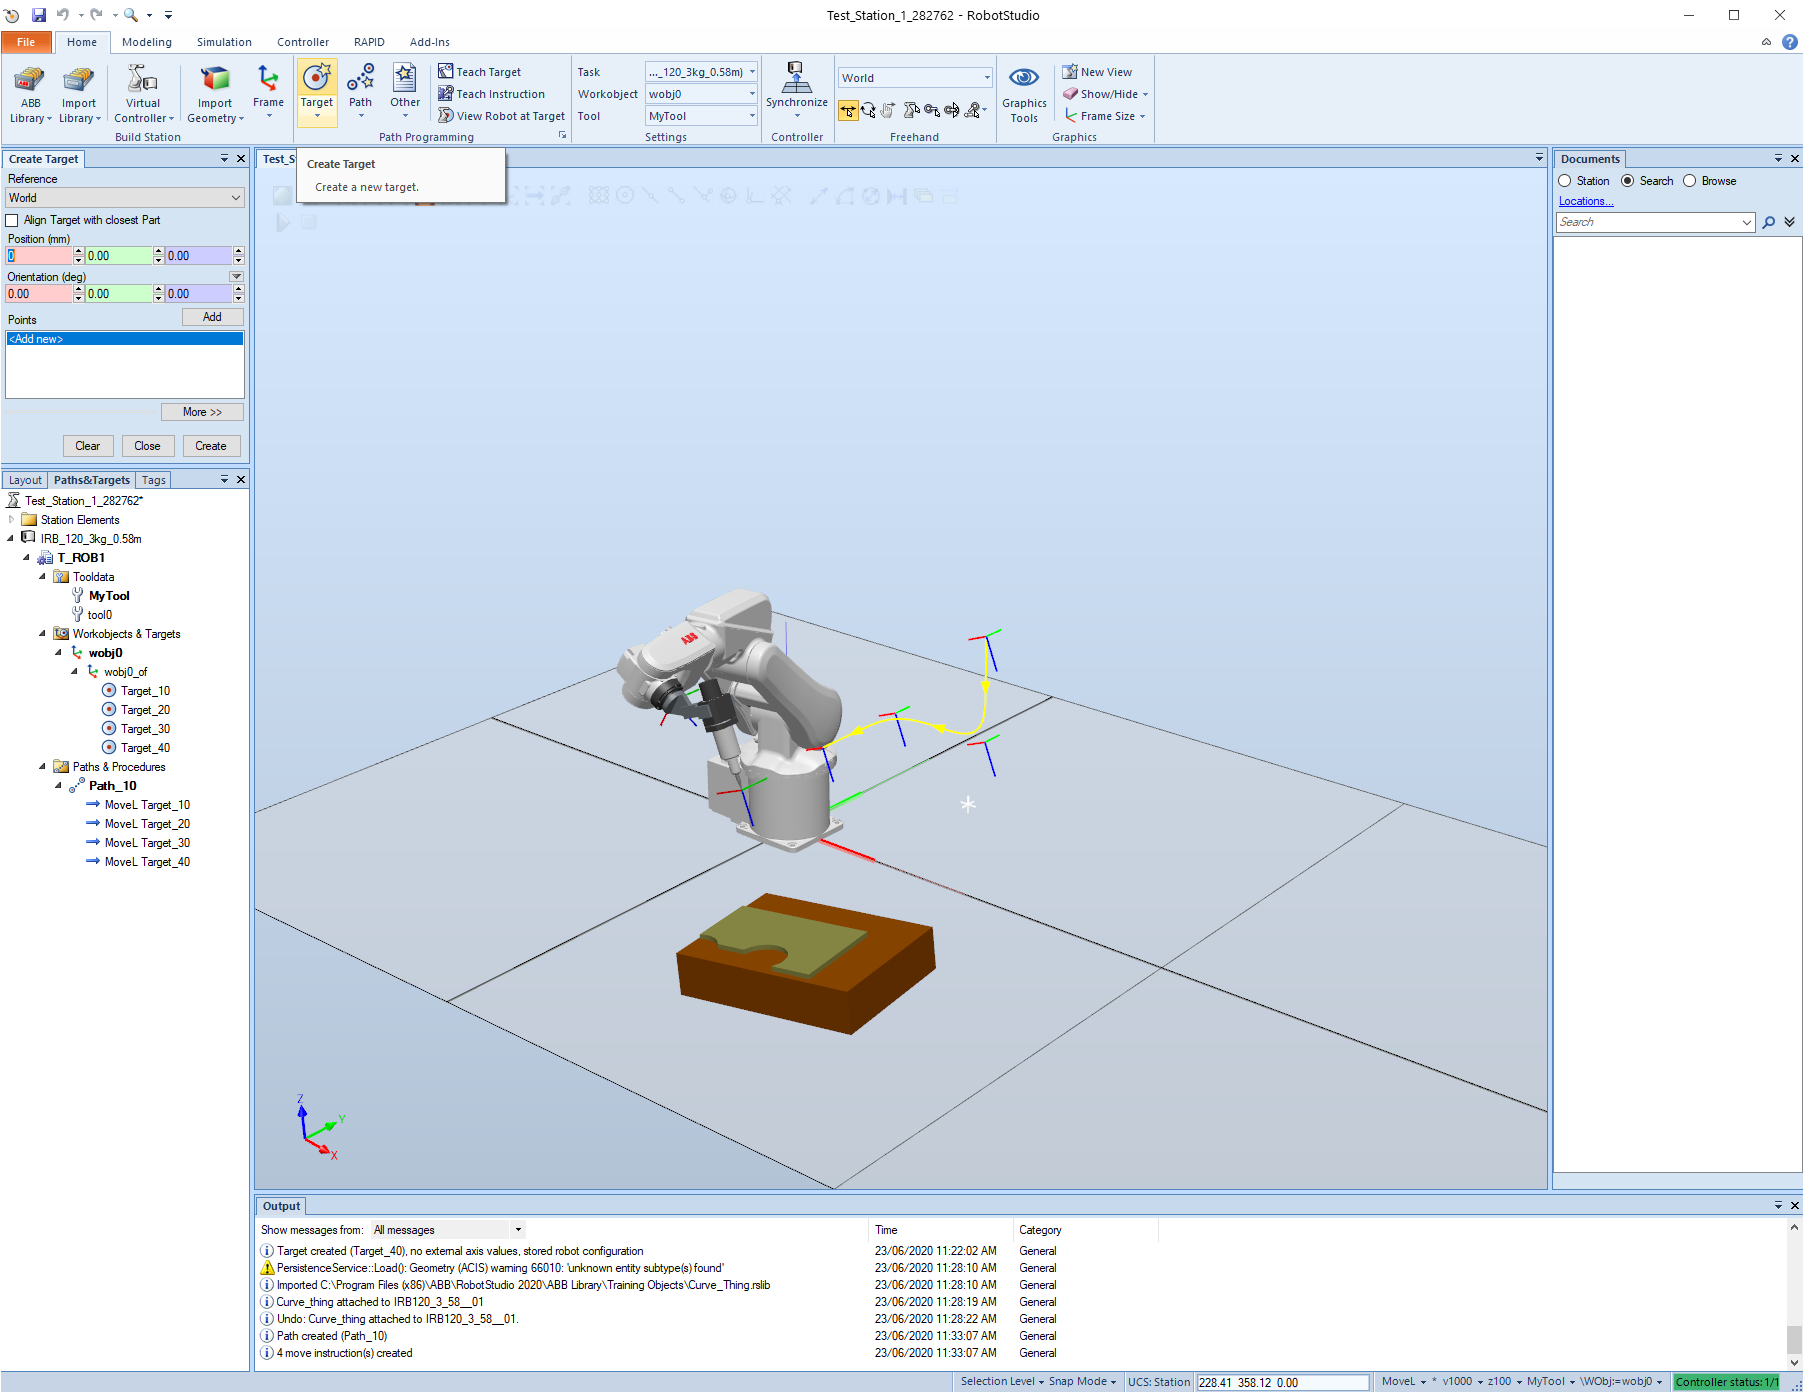
Pick a place and click on Create.
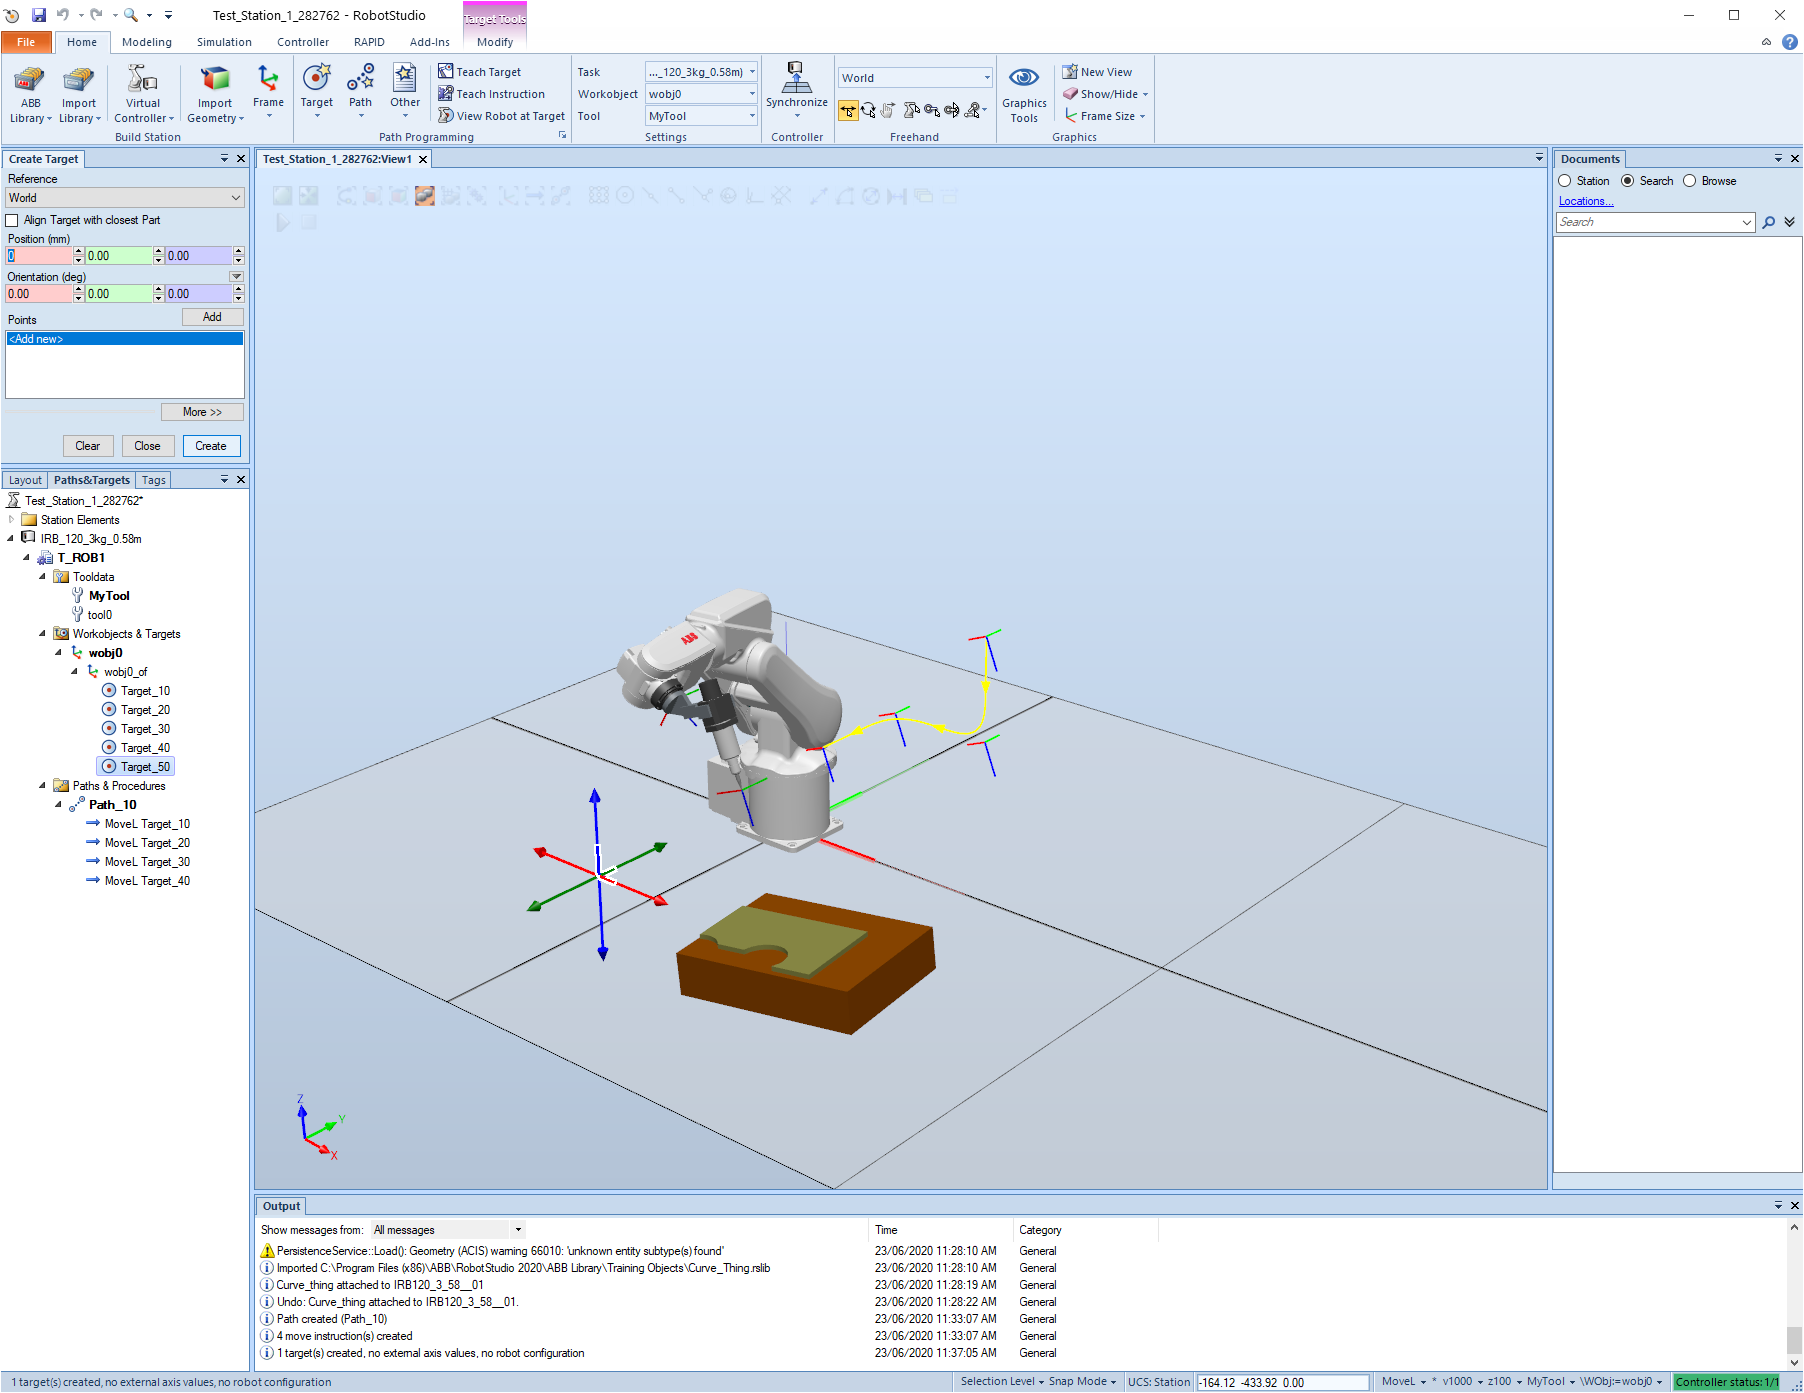
Now add the target to the end of the path.
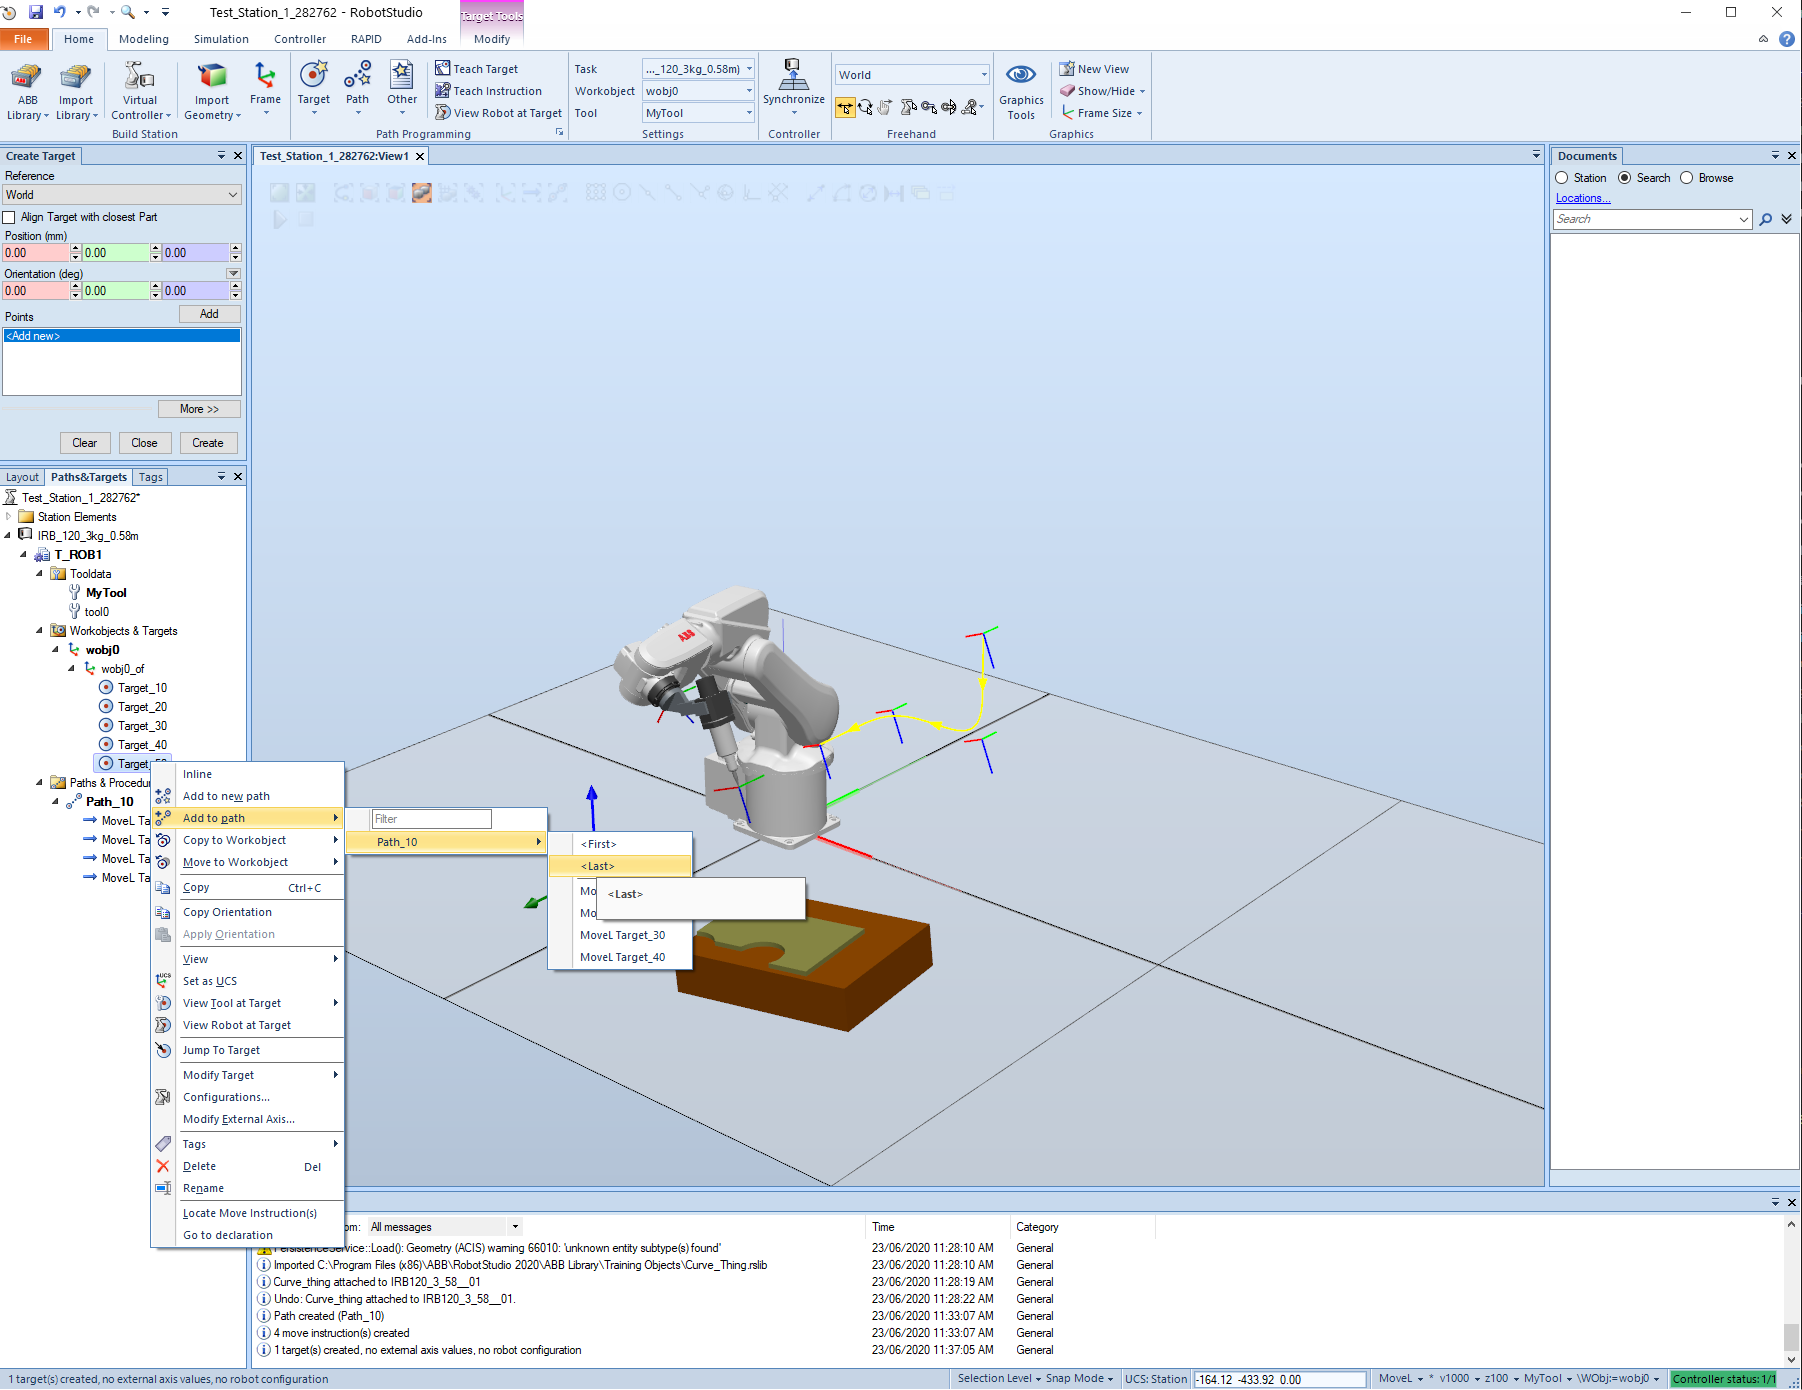
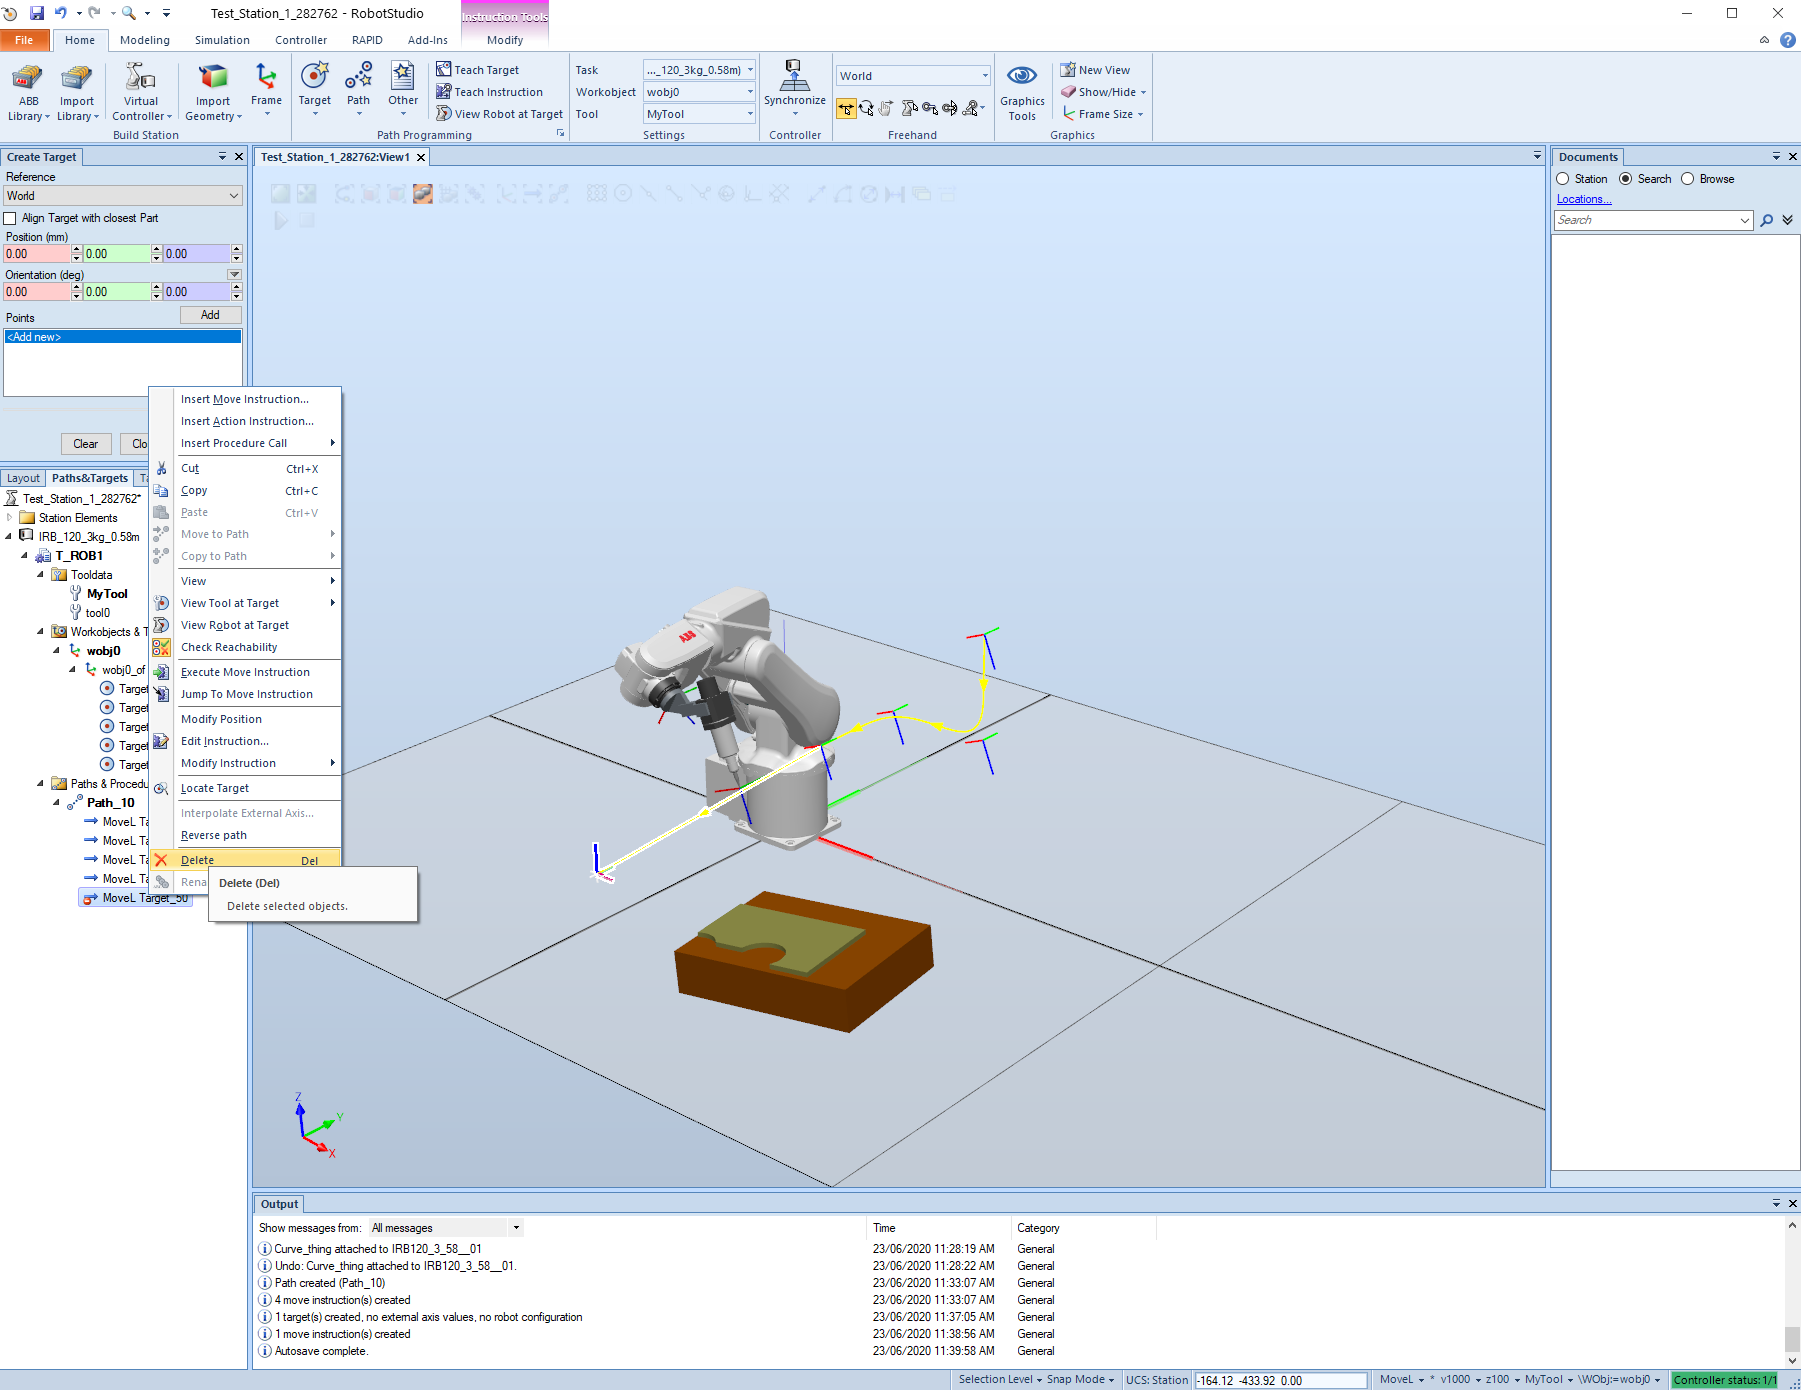
In this case the path will show an error because the robot cannot go there so we have to delete the target from the path.
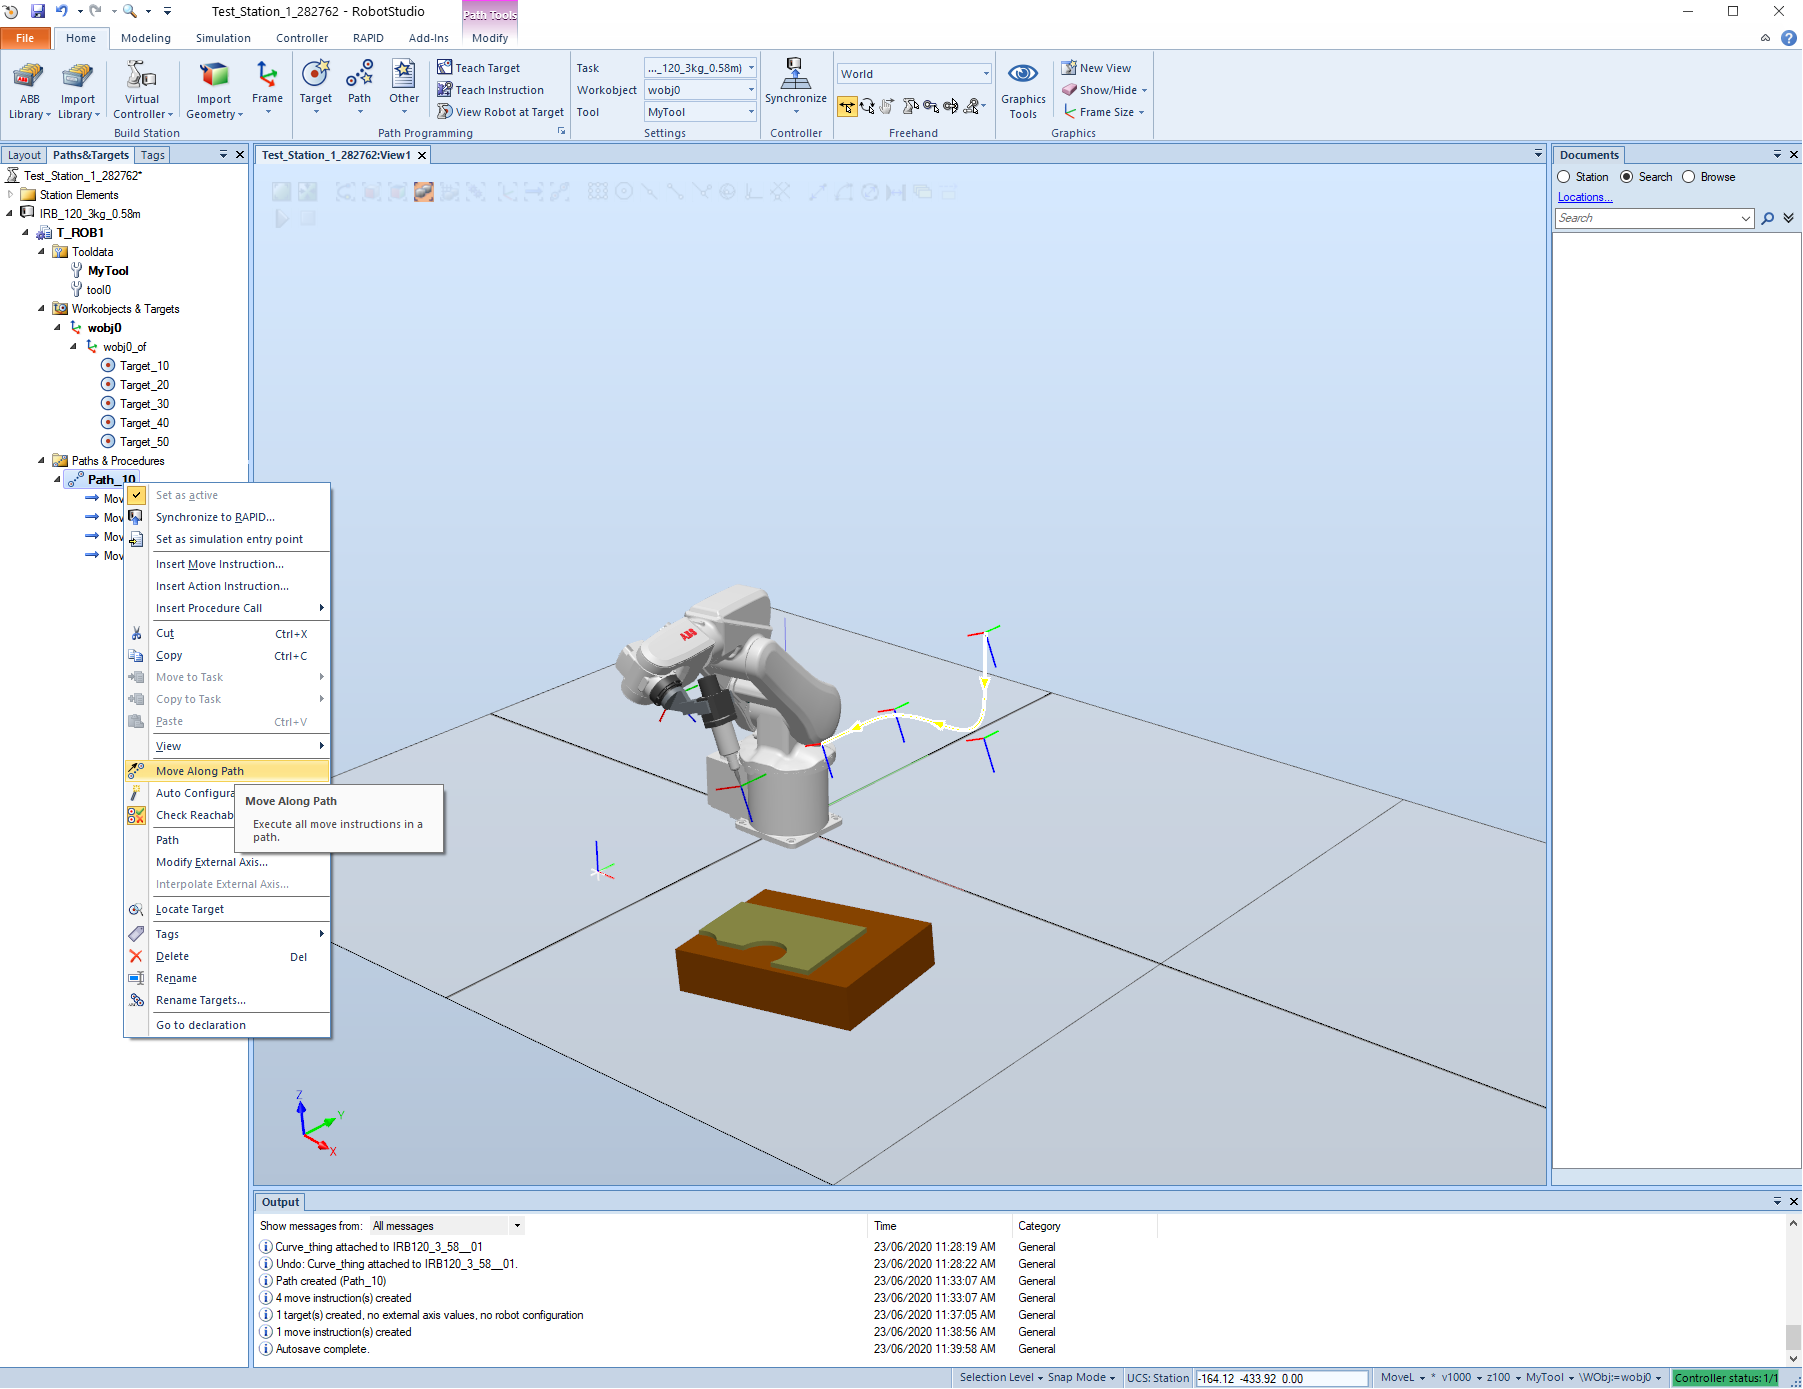
Now that we have a path we can click on the path and Move along the Path
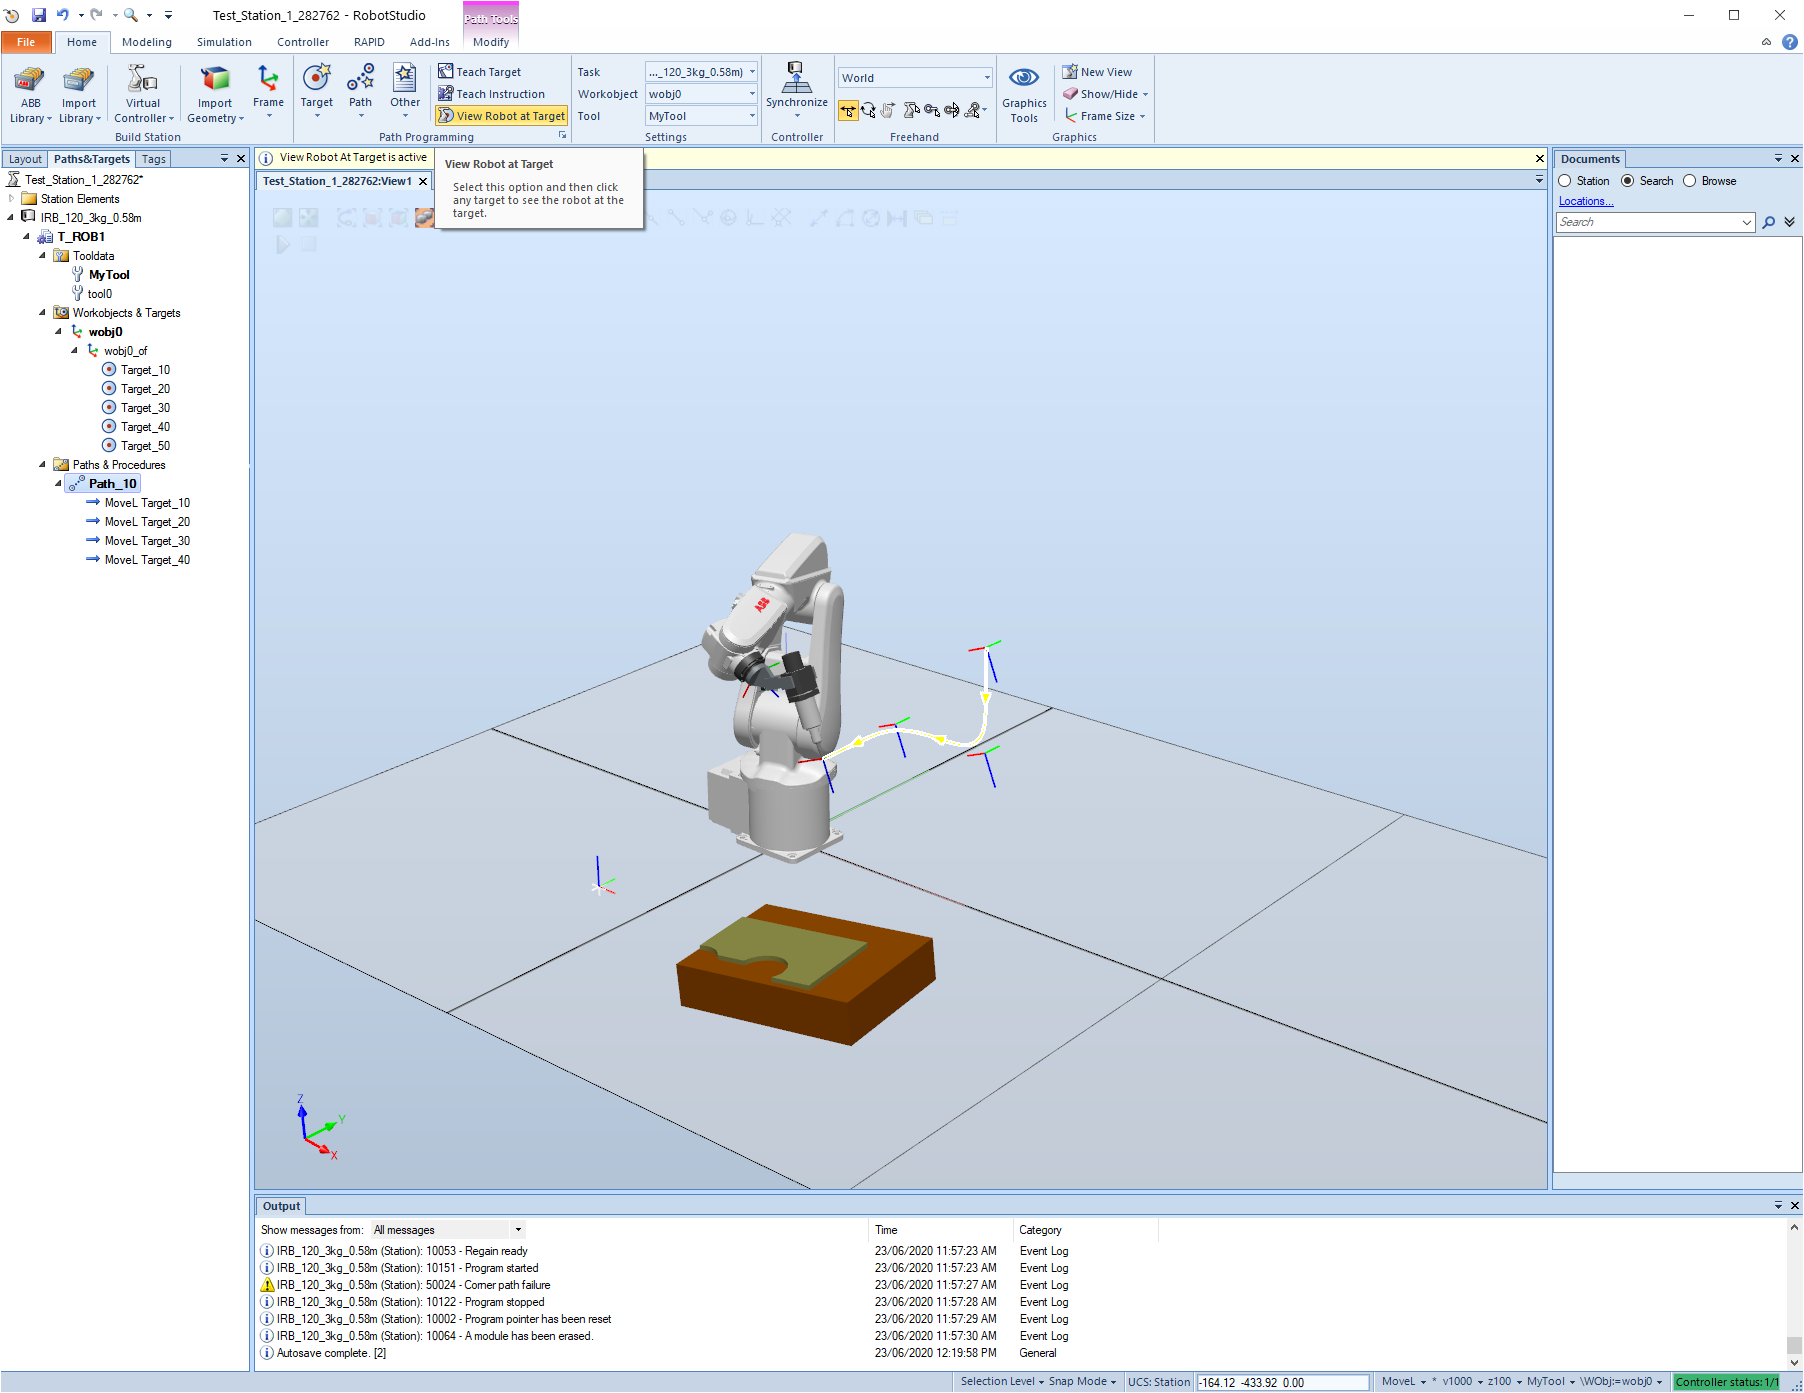
We can also click on the view the robot at target button and when we click on the targets the robot will go there.
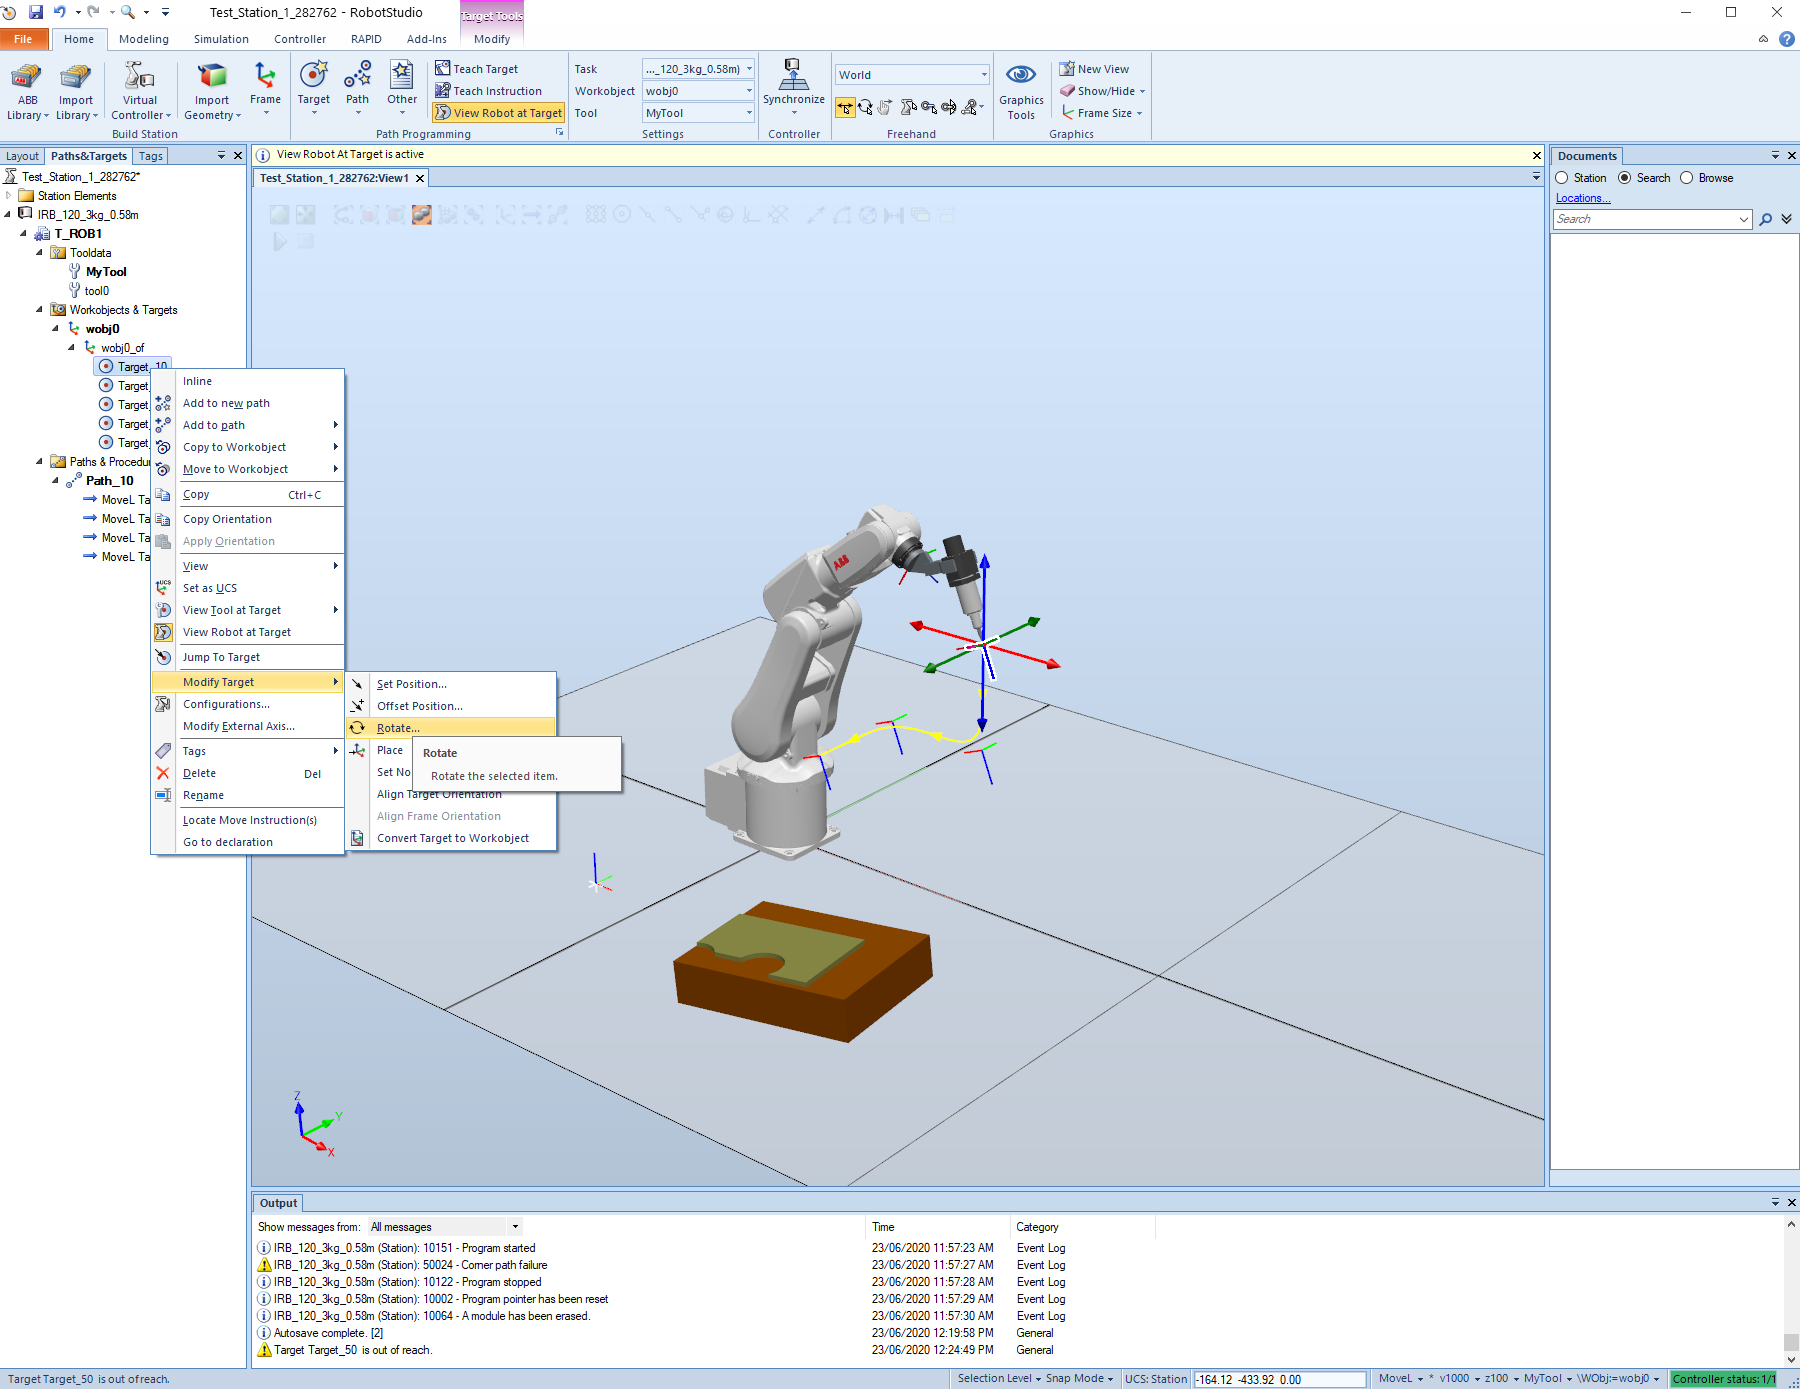
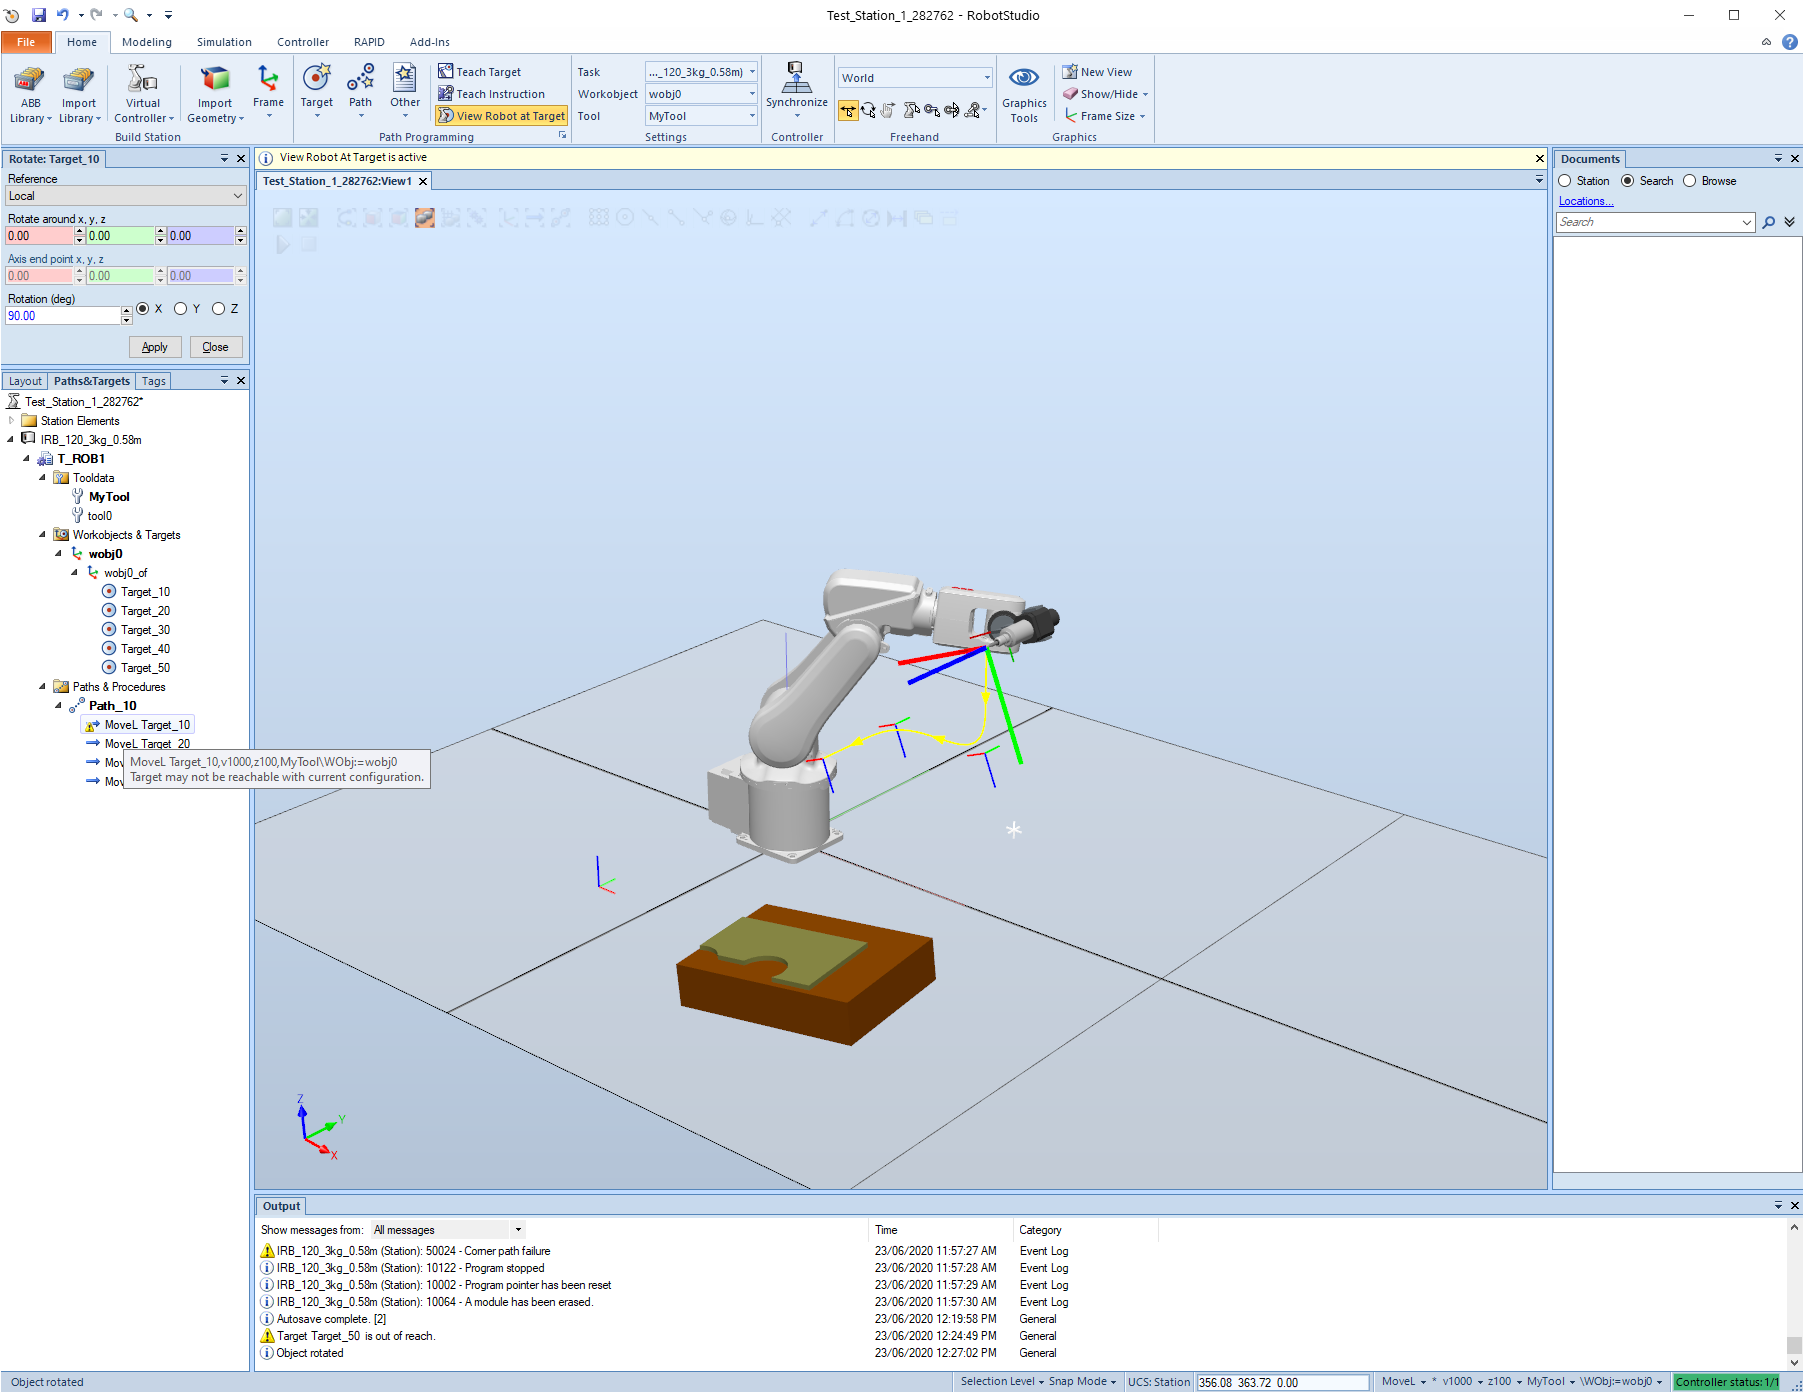
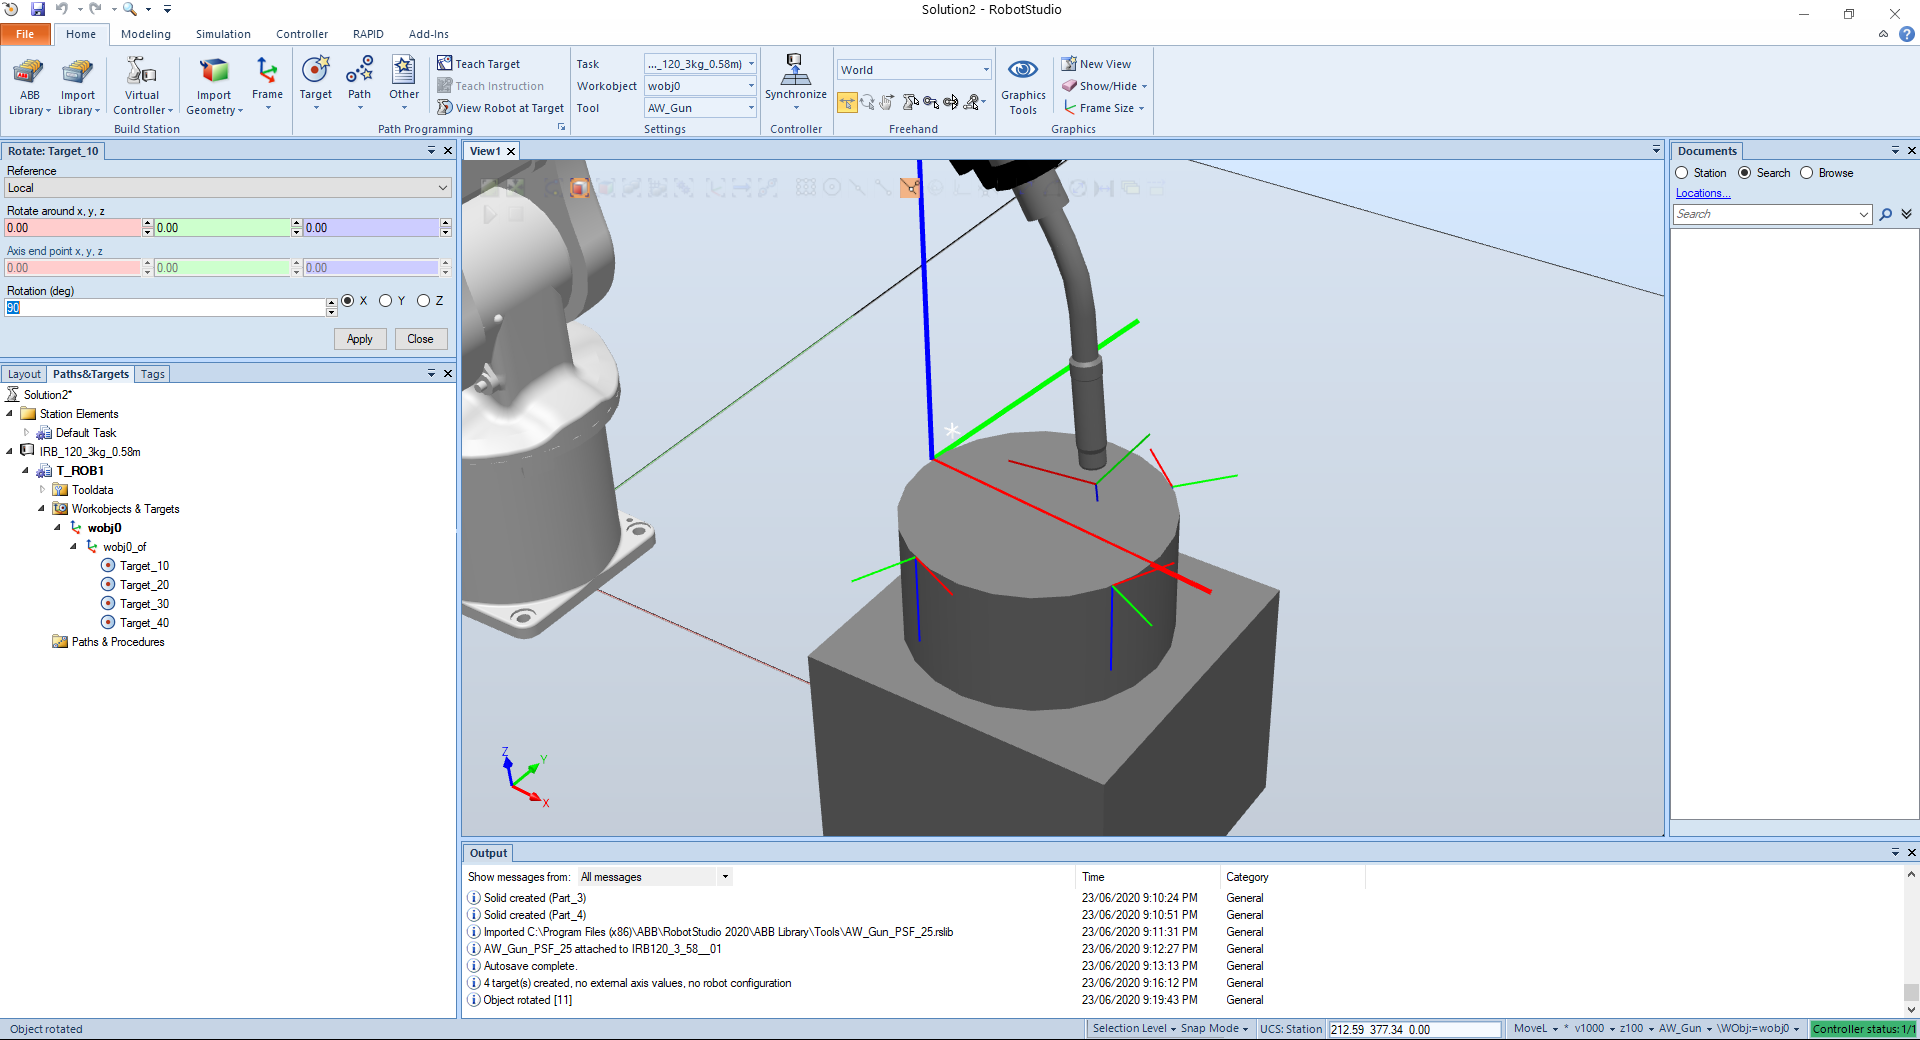
We can change the target, for example rotate around an axis.
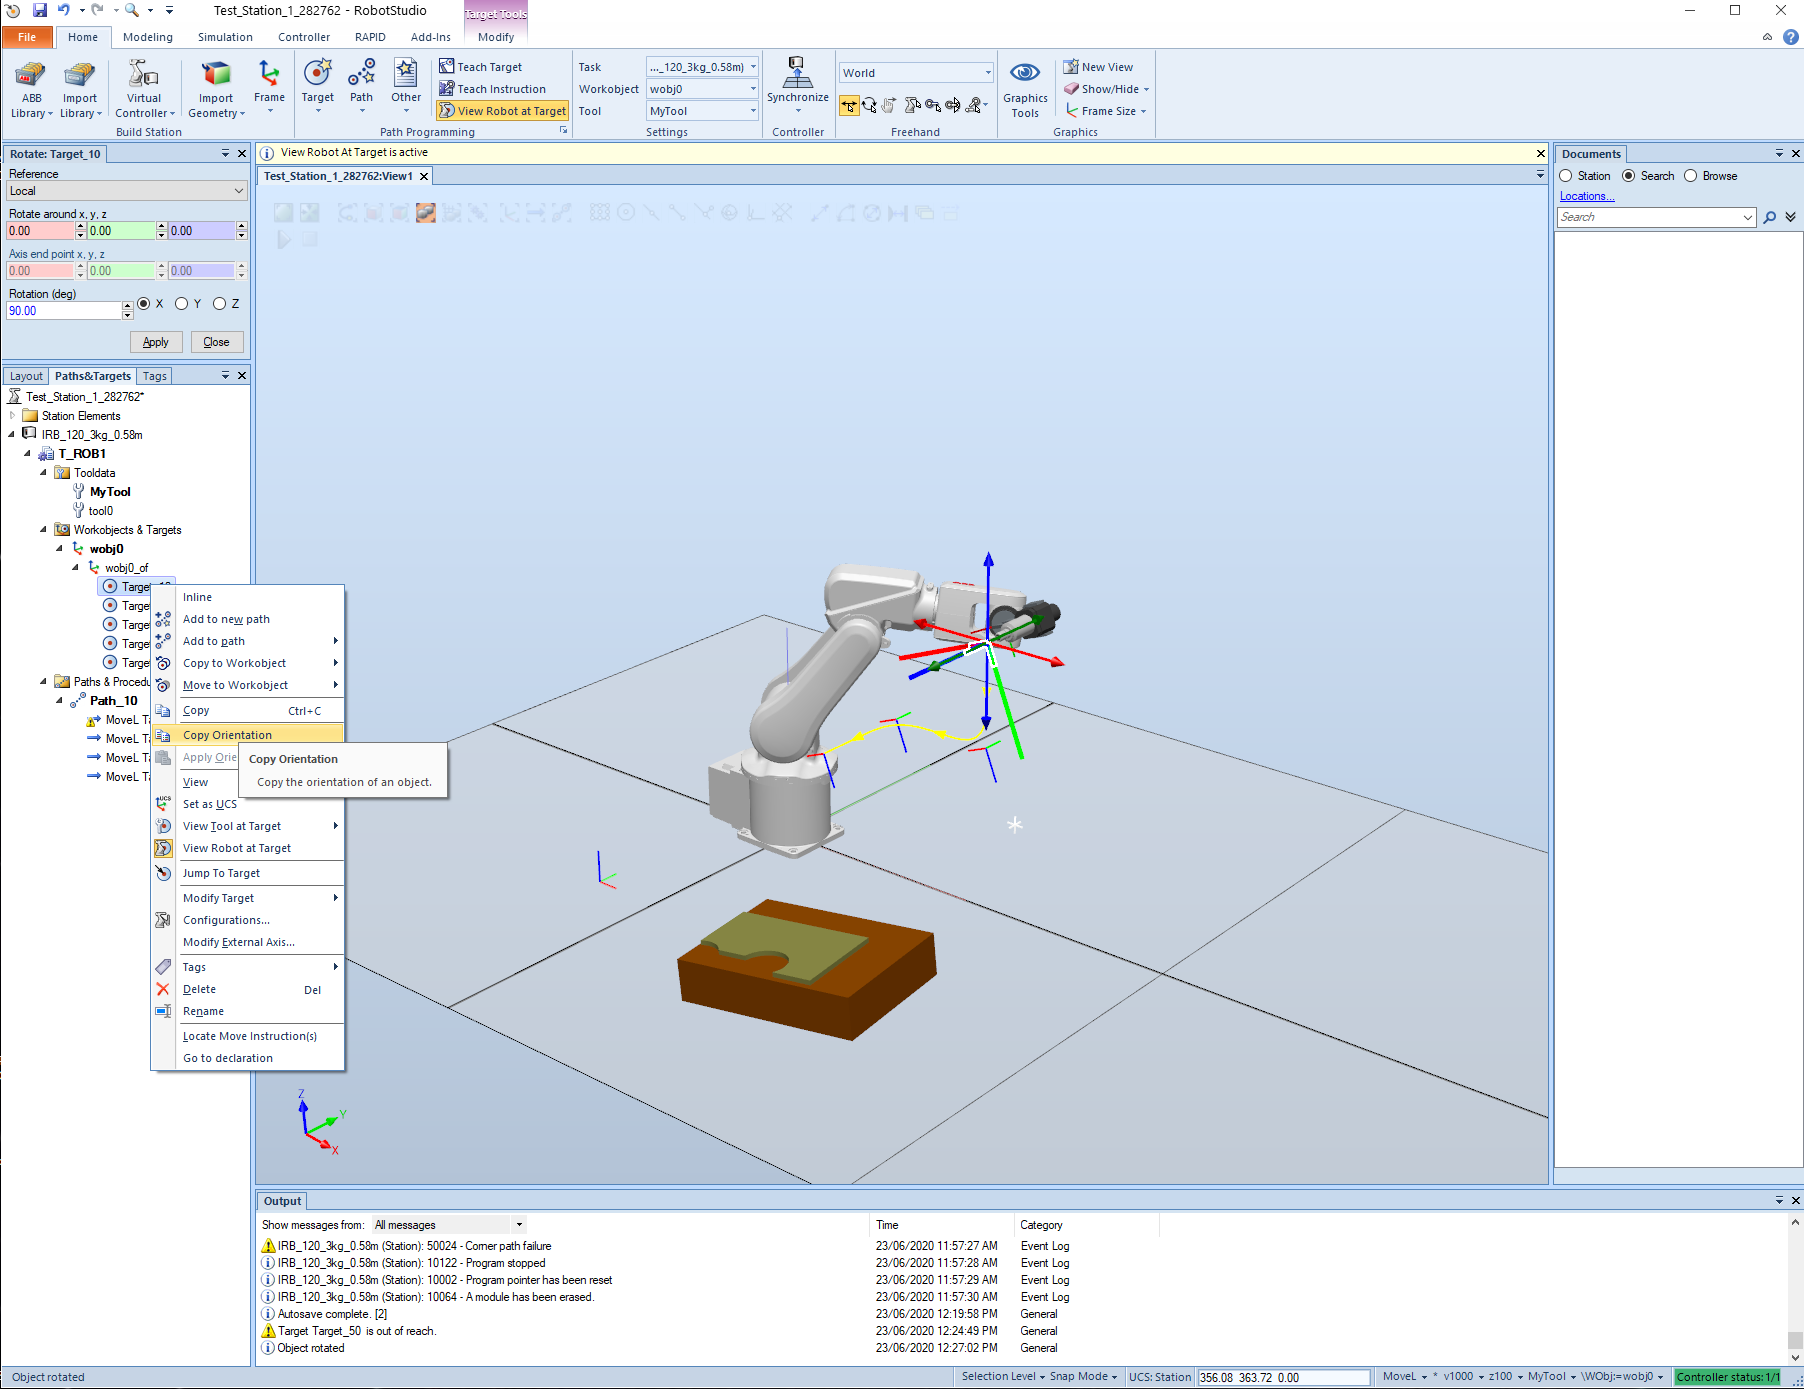
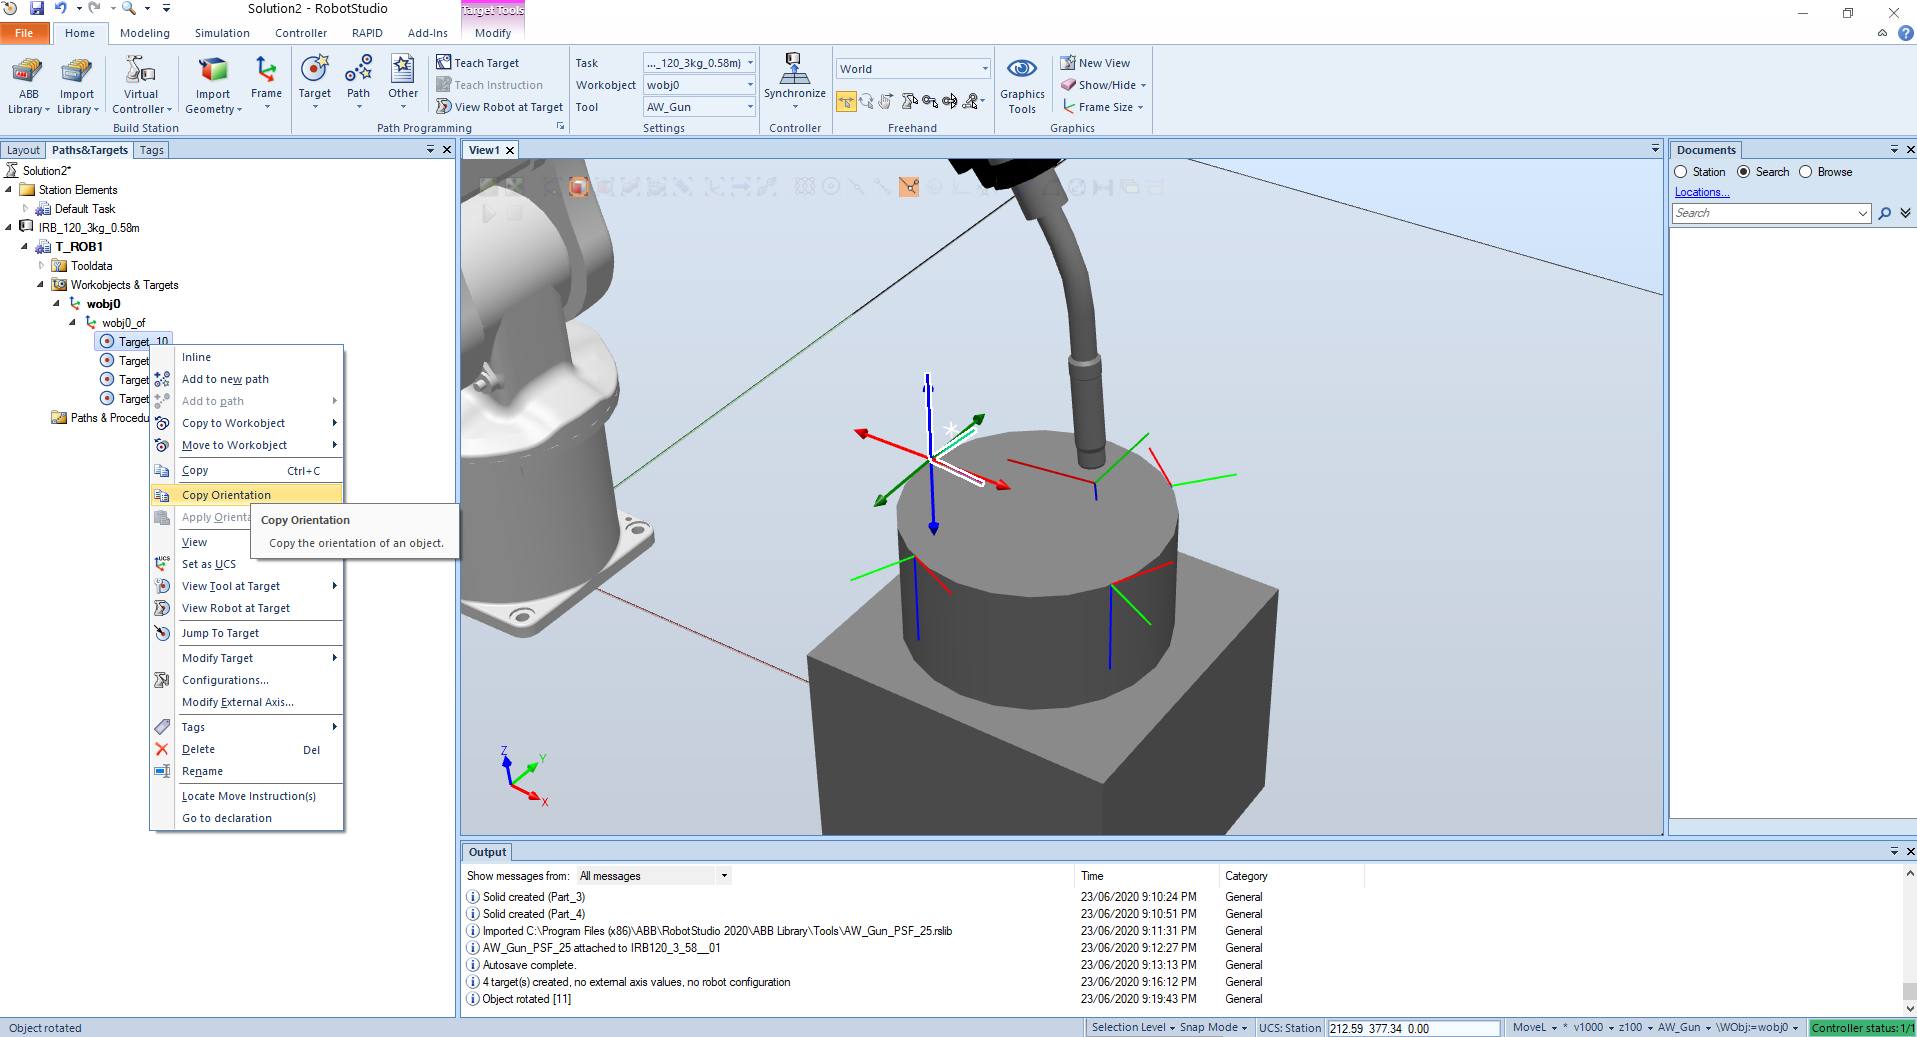
One can also copy the orientation from one target and apply orientation to the others. Also offset position and more.
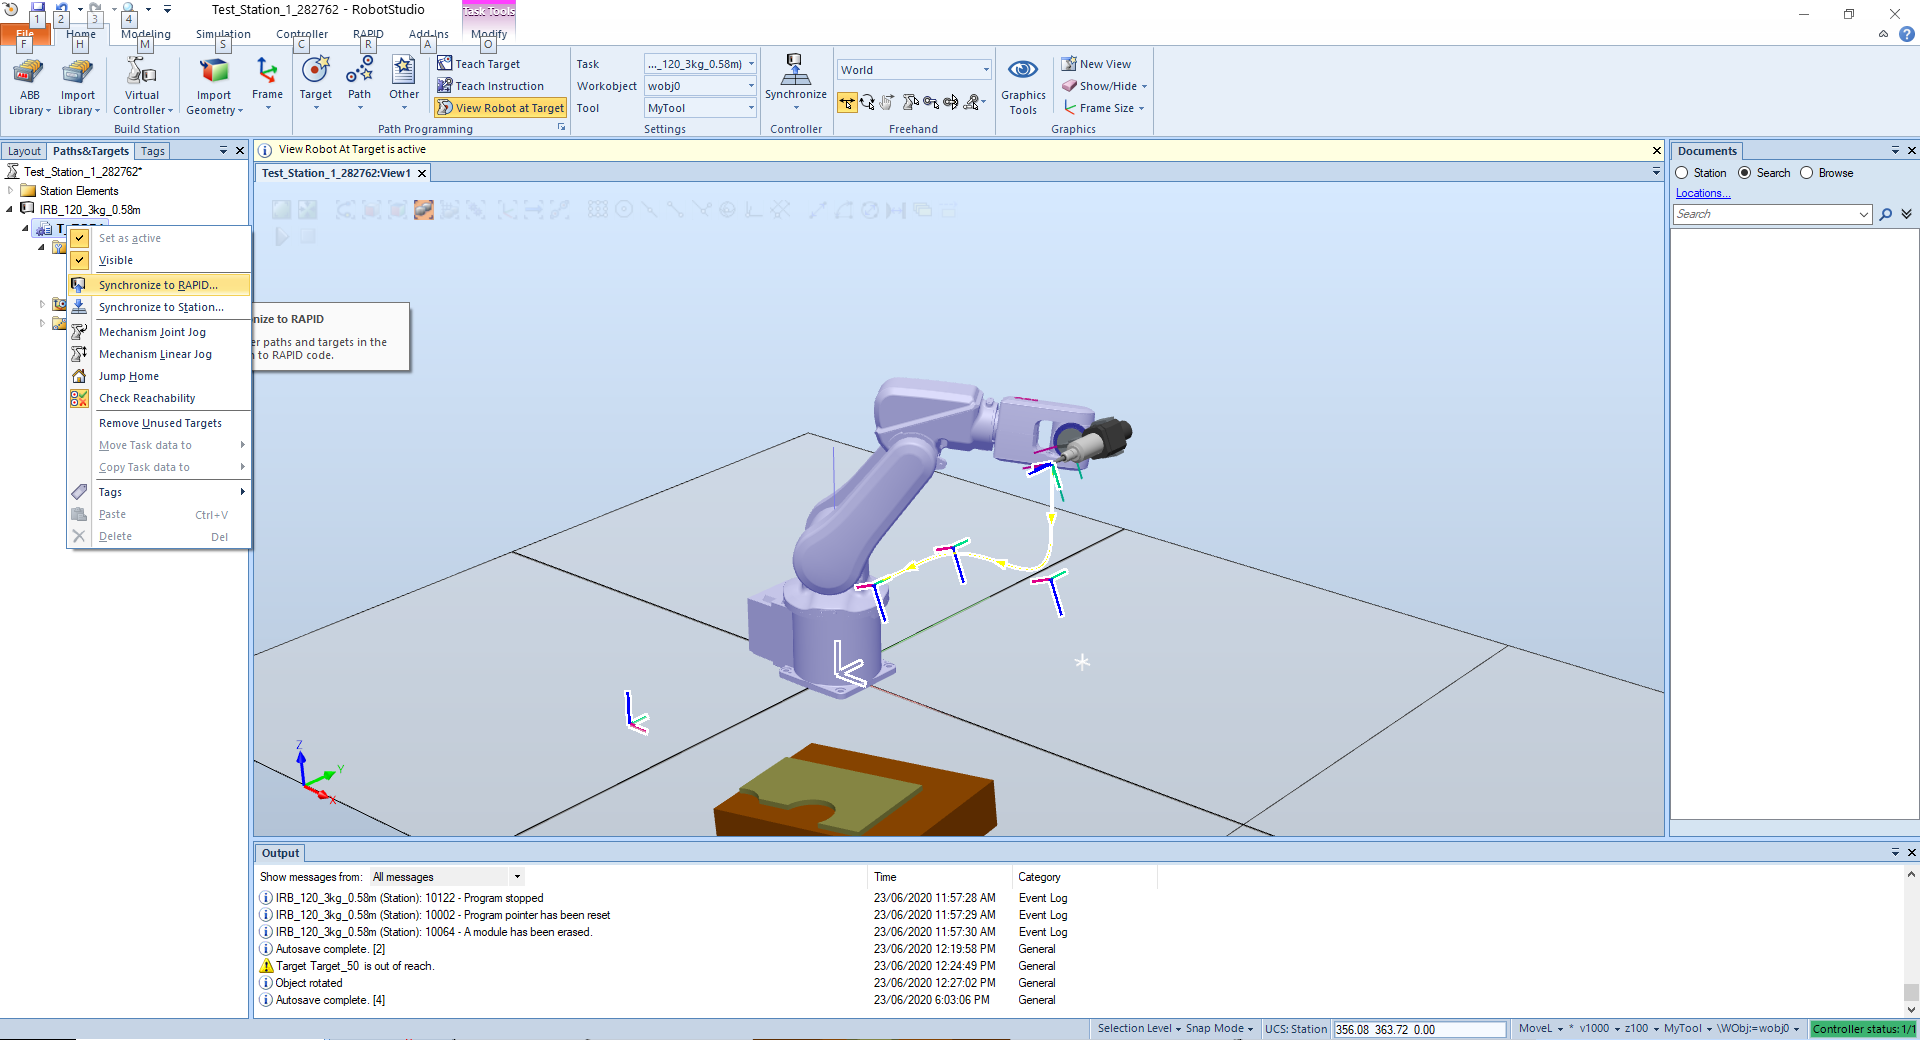
# Synchronize to RAPID
RAPID is a high-level programming language used to control ABB industrial robots. RAPID was introduced along with S4 Control System in 1994 by ABB, superseding the ARLA programming language.
Features in the language include:
- Routine parameters:
- Procedures - used as a subprogram.
- Functions - return a value of a specific type and are used as an argument of an instruction.
- Trap routines - a means of responding to interrupts.
- Arithmetic and logical expressions
- Automatic error handling
- Modular programs
- Multi tasking
If we create a new target and add to a new path,
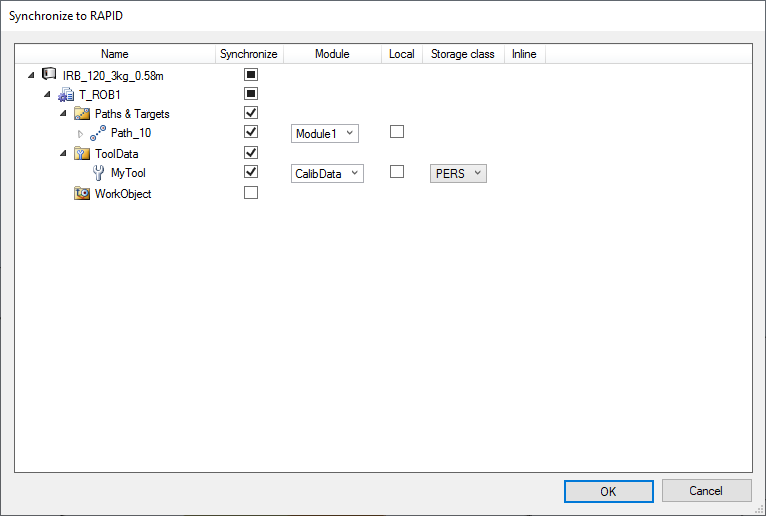
We have to update the RAPID synchronization.
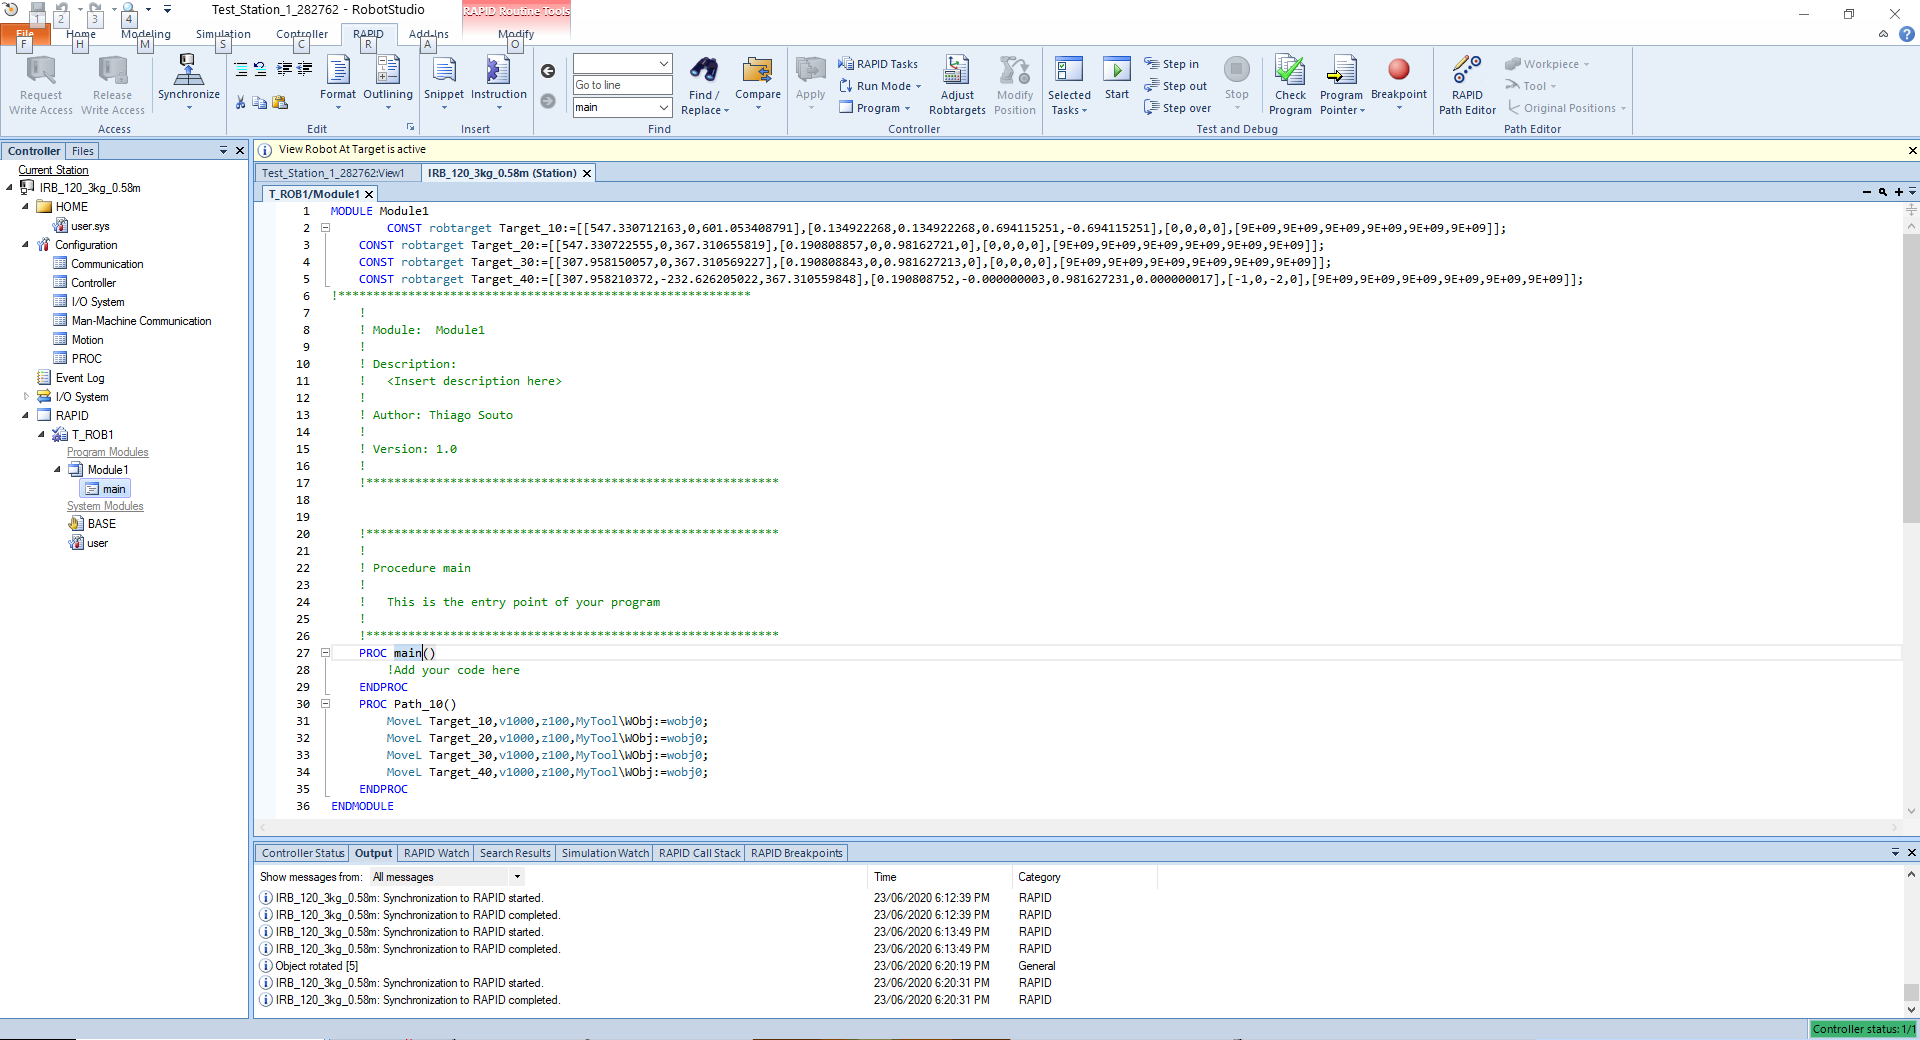
The minimum program need is the Module1, with the targets and every path added we have a new "function" in the program.
# Action Instruction
By selecting a position at the path we can insert an action instruction:
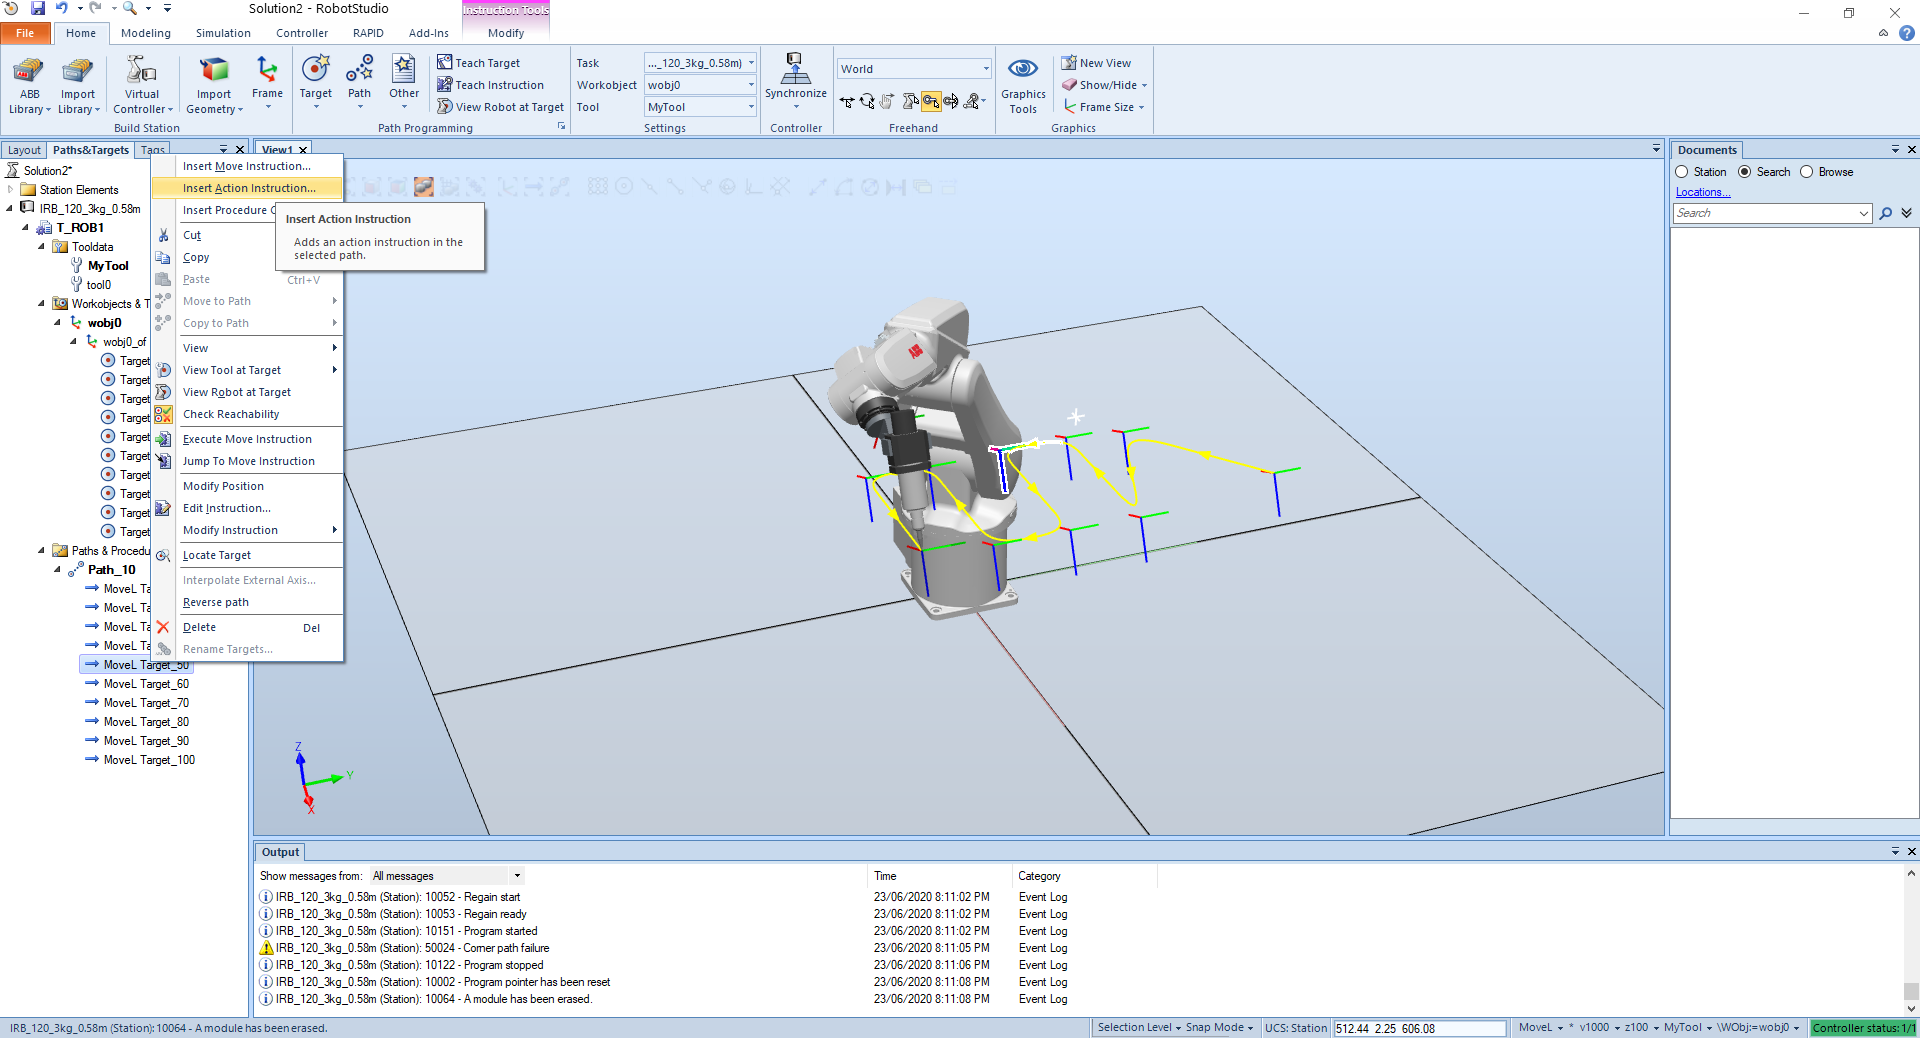
In this case we are going to insert a waiting action in the middle of the path.
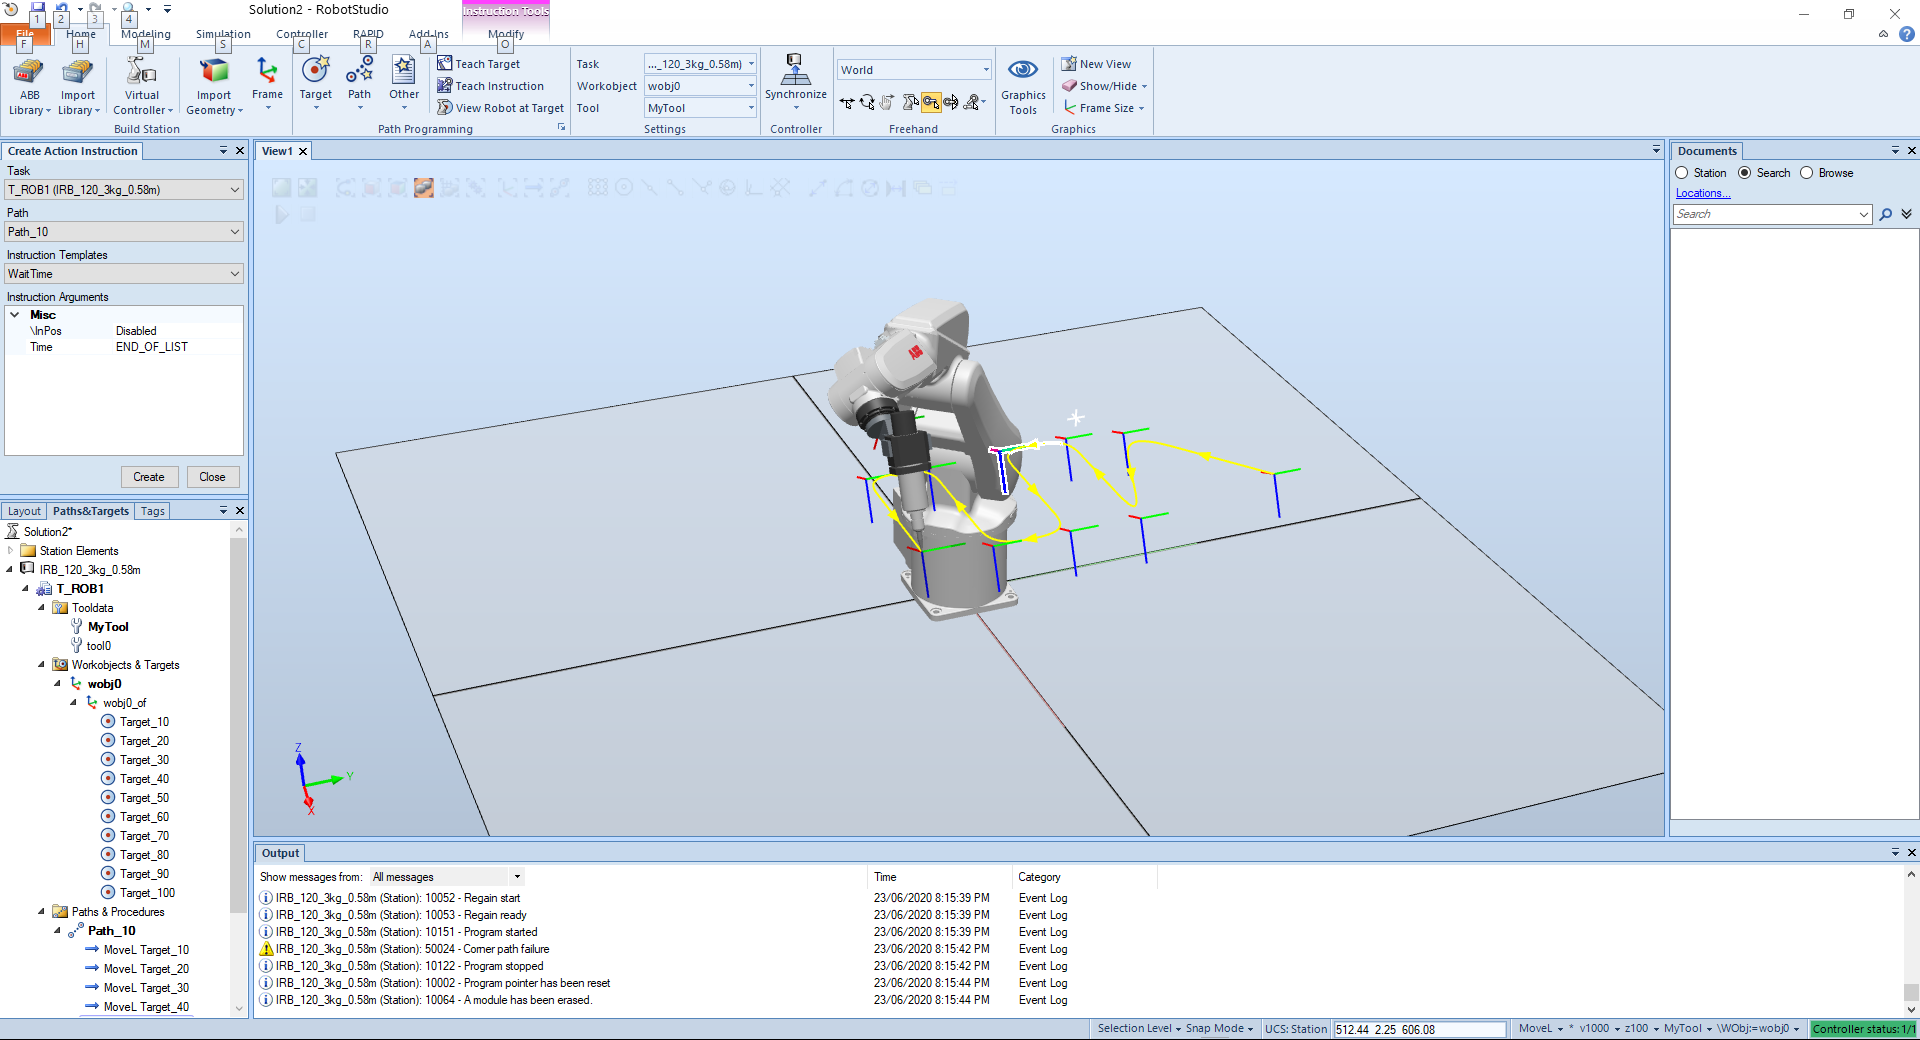
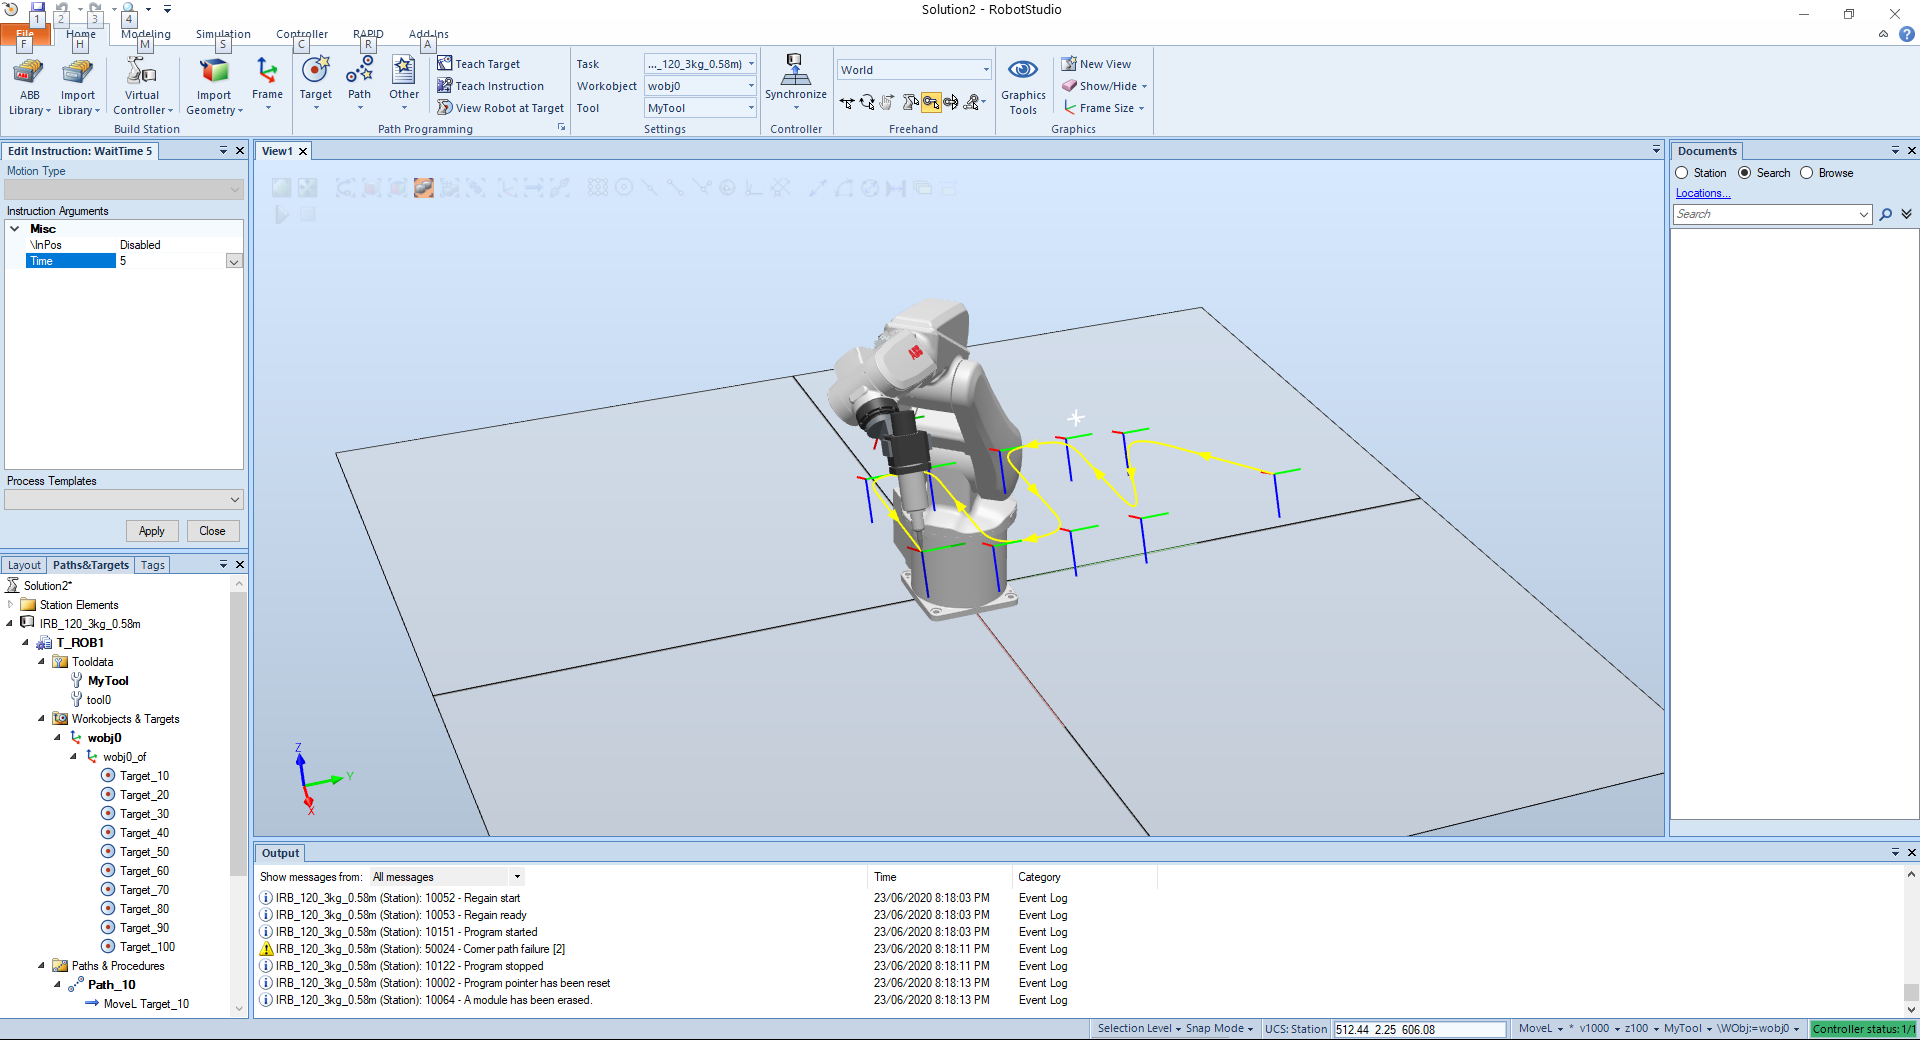
If we edit the wait time to be equal to 5 the robot will wait 5 seconds before continue the path.
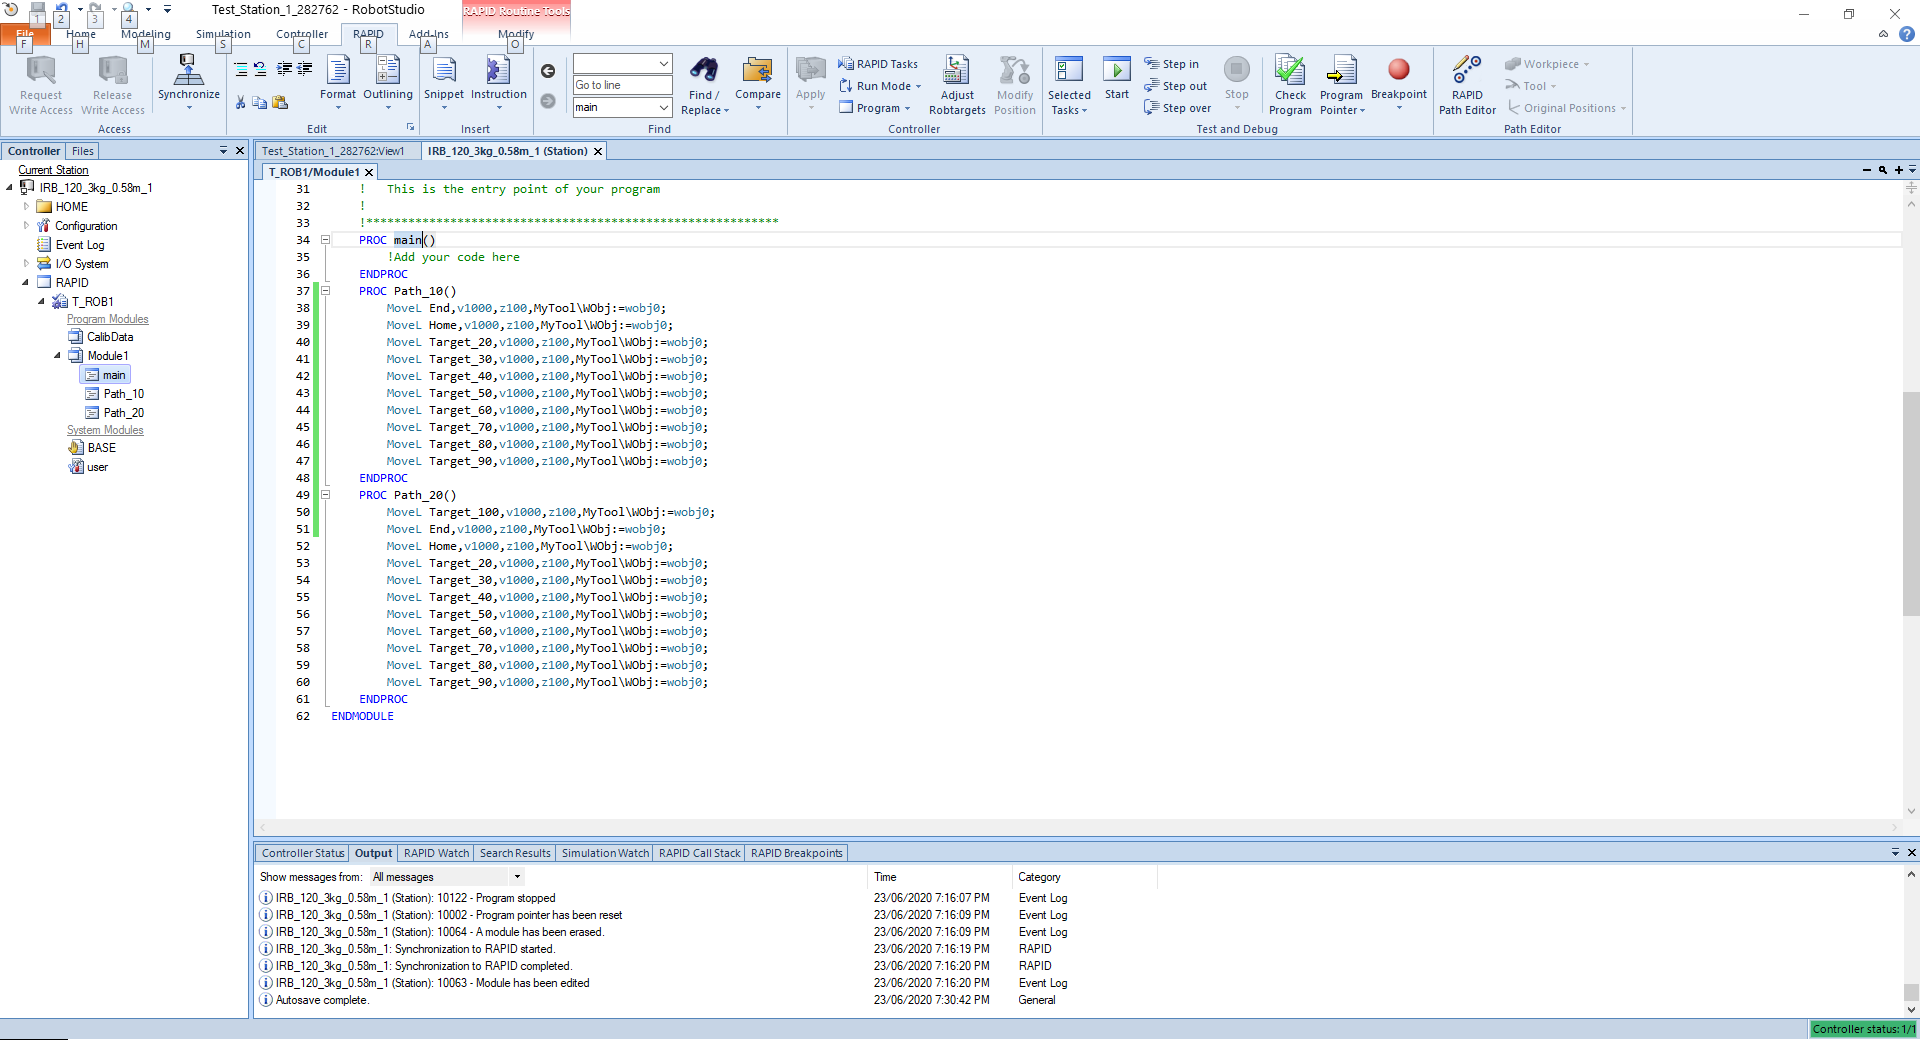
At RAPID the path will look like this:
PROC Path_10()
    MoveL Target_10,v1000,z100,MyTool\WObj:=wobj0;
    MoveL Target_20,v1000,z100,MyTool\WObj:=wobj0;
    MoveL Target_30,v1000,z100,MyTool\WObj:=wobj0;
    MoveL Target_40,v1000,z100,MyTool\WObj:=wobj0;
    MoveL Target_50,v1000,z100,MyTool\WObj:=wobj0;
    WaitTime 5;
    MoveL Target_60,v1000,z100,MyTool\WObj:=wobj0;
    MoveL Target_70,v1000,z100,MyTool\WObj:=wobj0;
    MoveL Target_80,v1000,z100,MyTool\WObj:=wobj0;
    MoveL Target_90,v1000,z100,MyTool\WObj:=wobj0;
    MoveL Target_100,v1000,z100,MyTool\WObj:=wobj0;
ENDPROC
2
3
4
5
6
7
8
9
10
11
12
13
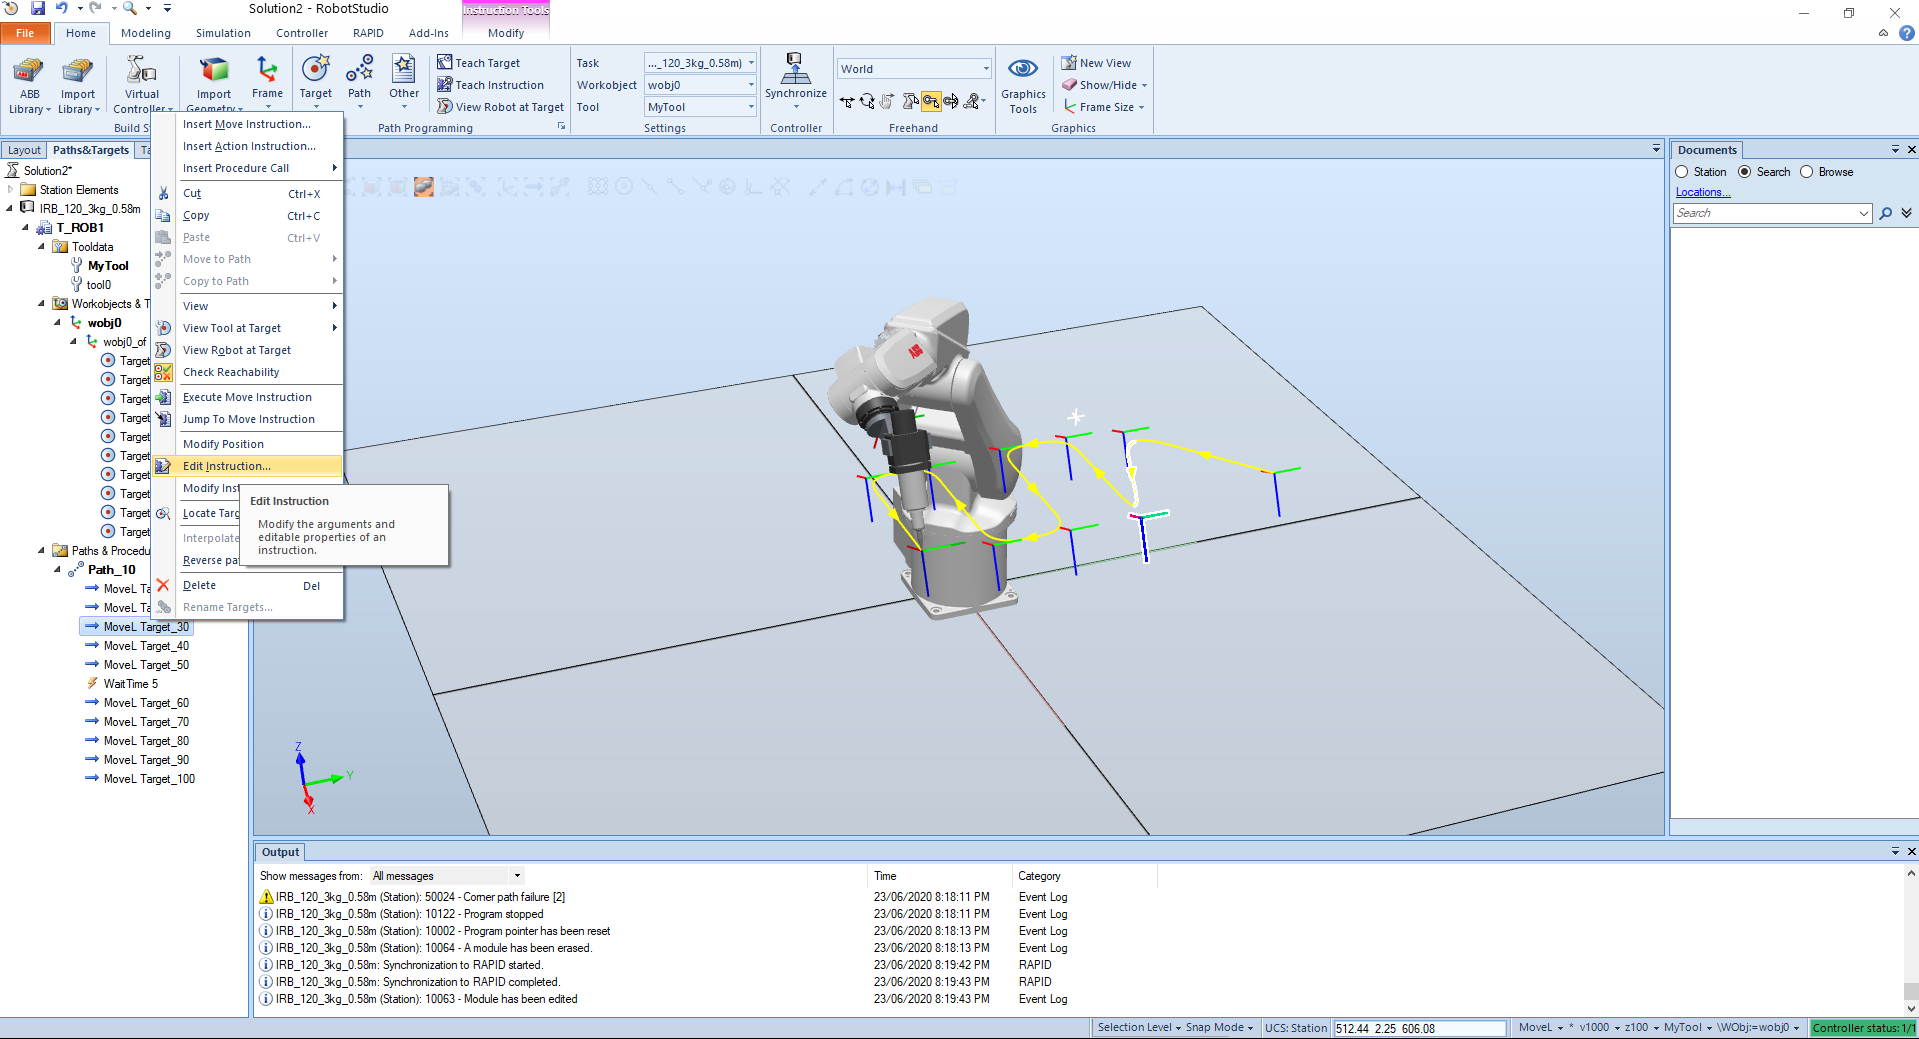
We can also edit the instructions
# Another Features
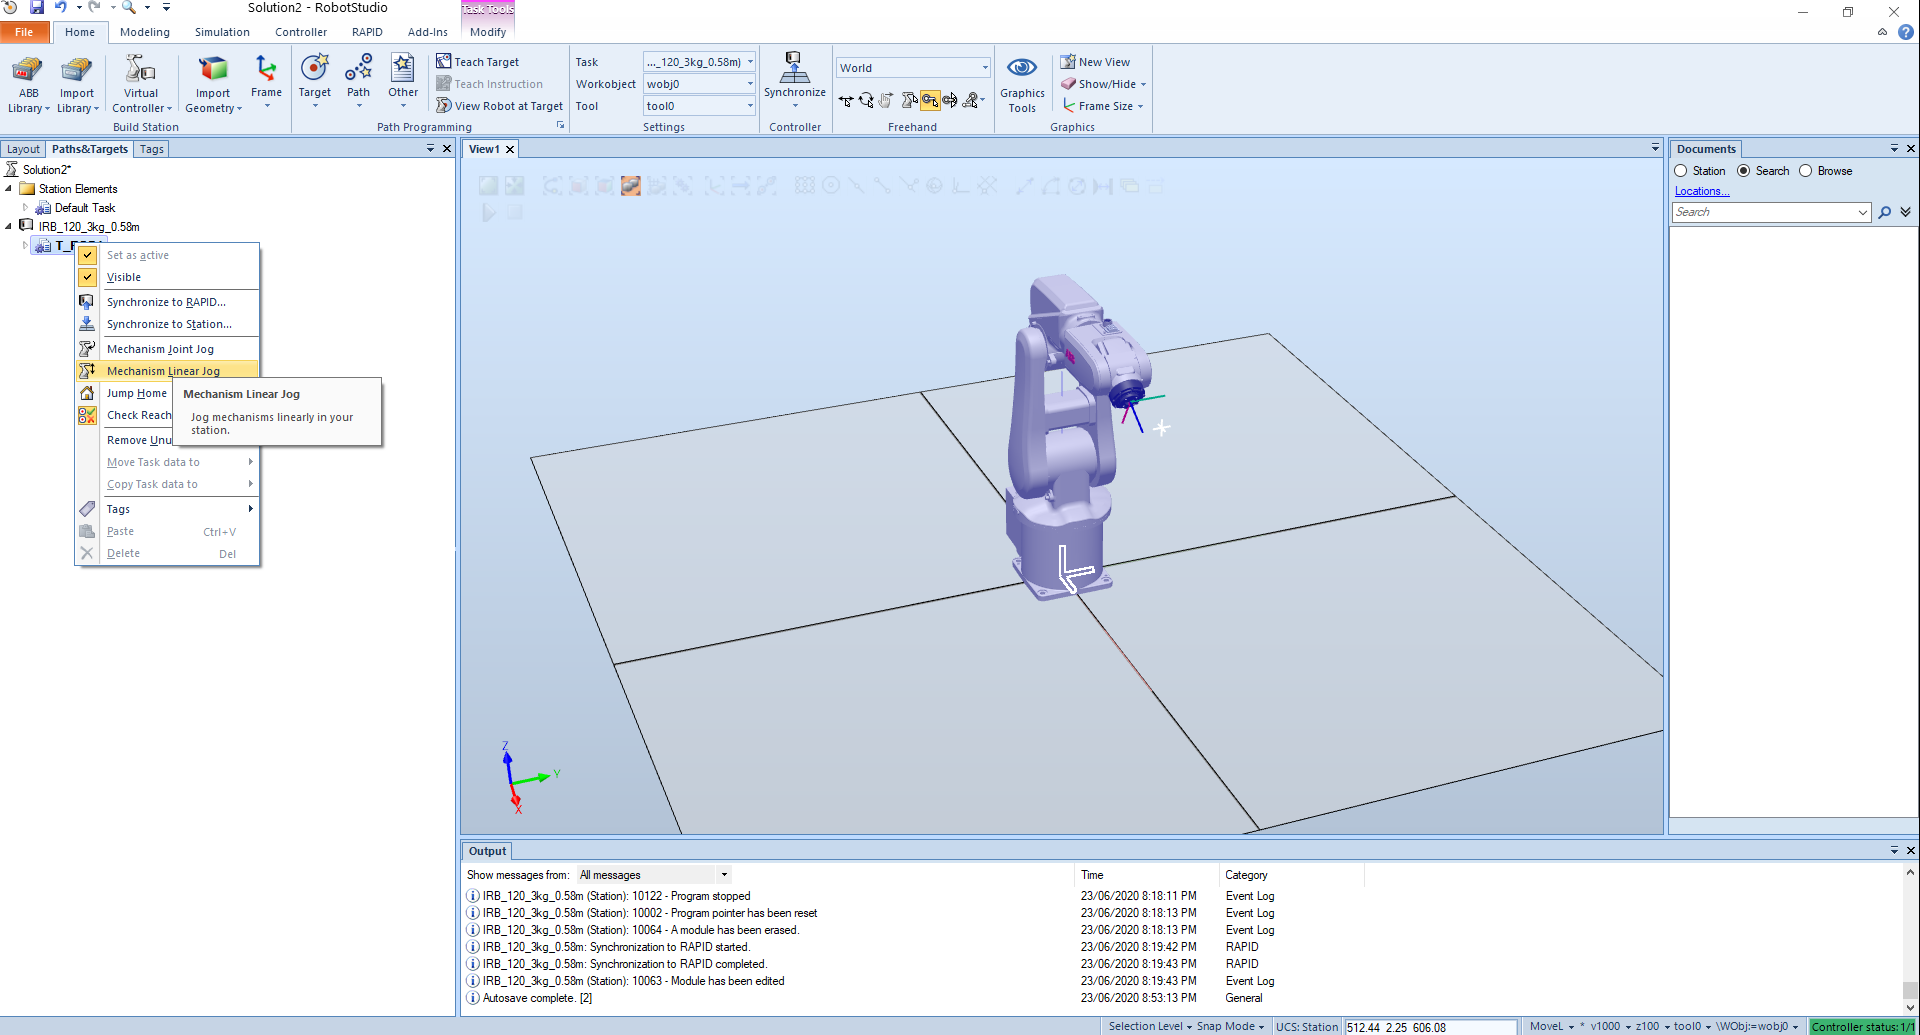
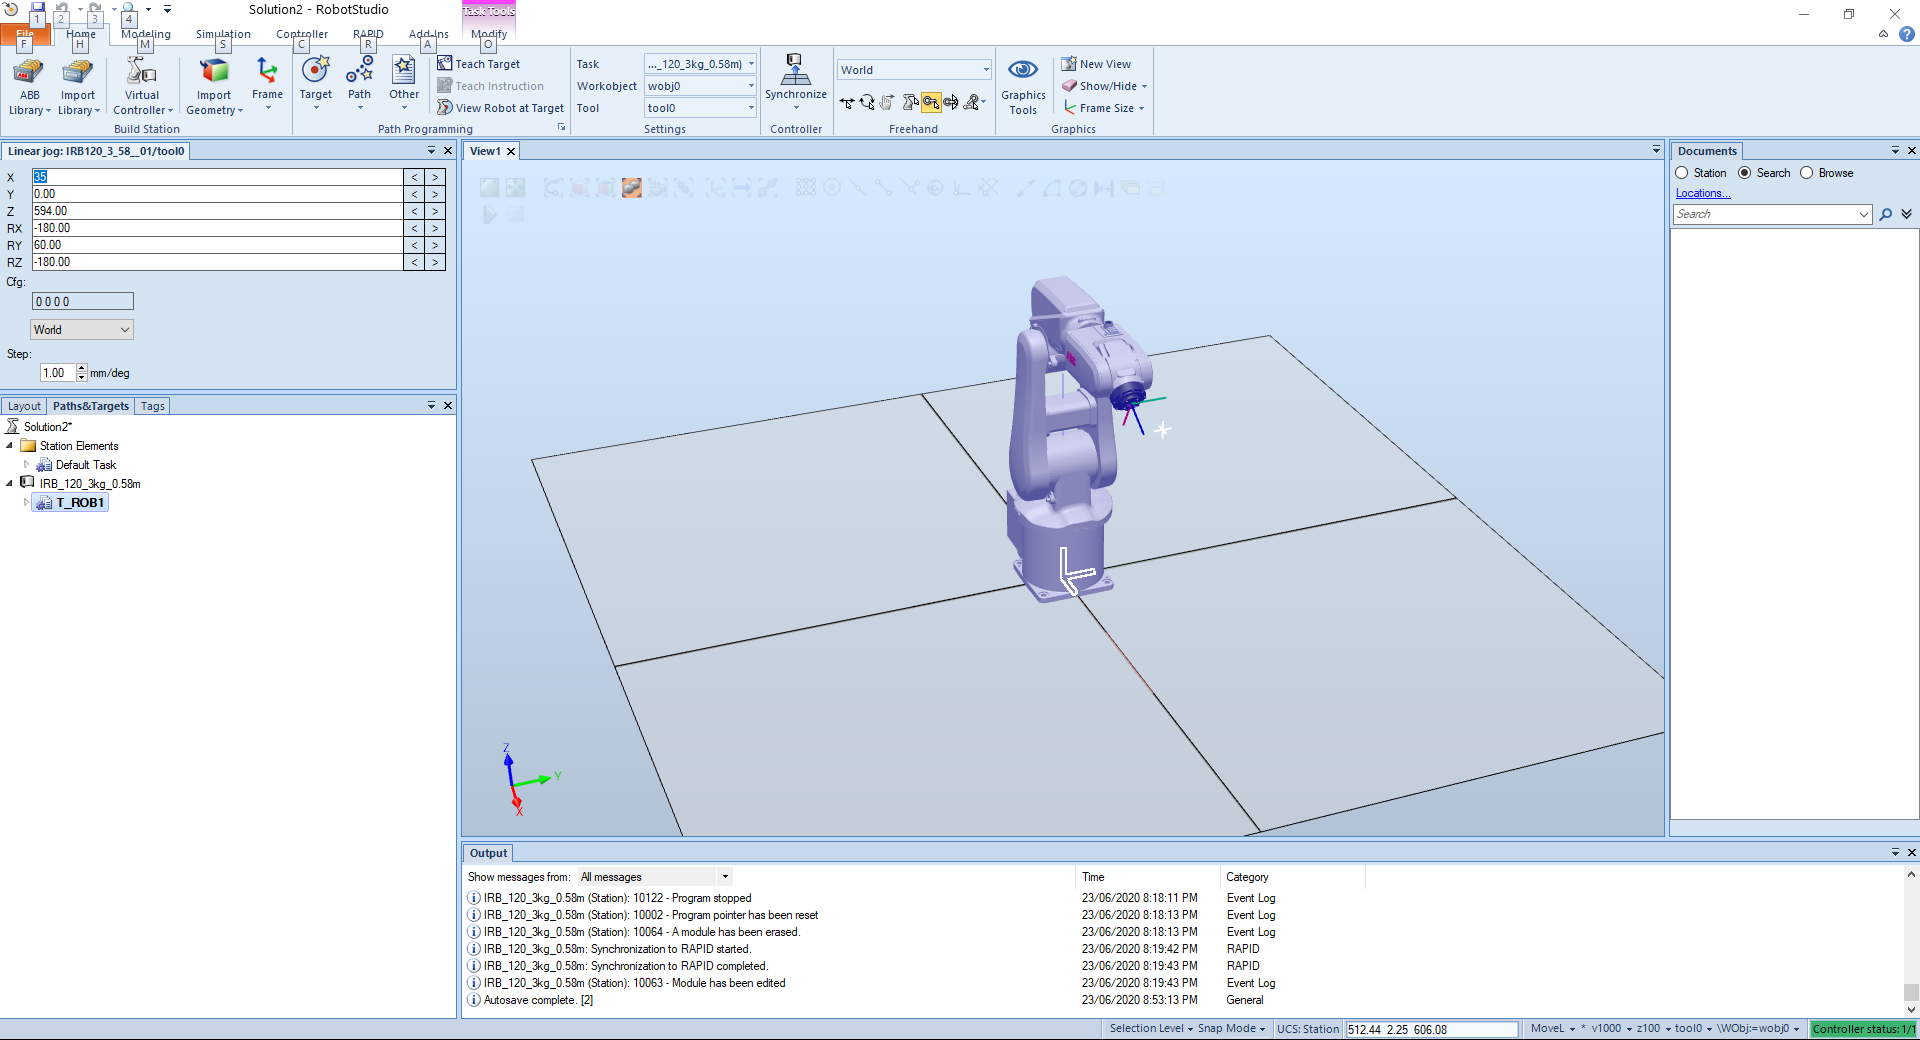
# Linear Jog
This is more like a control window where we can enter precise and exact measurements.
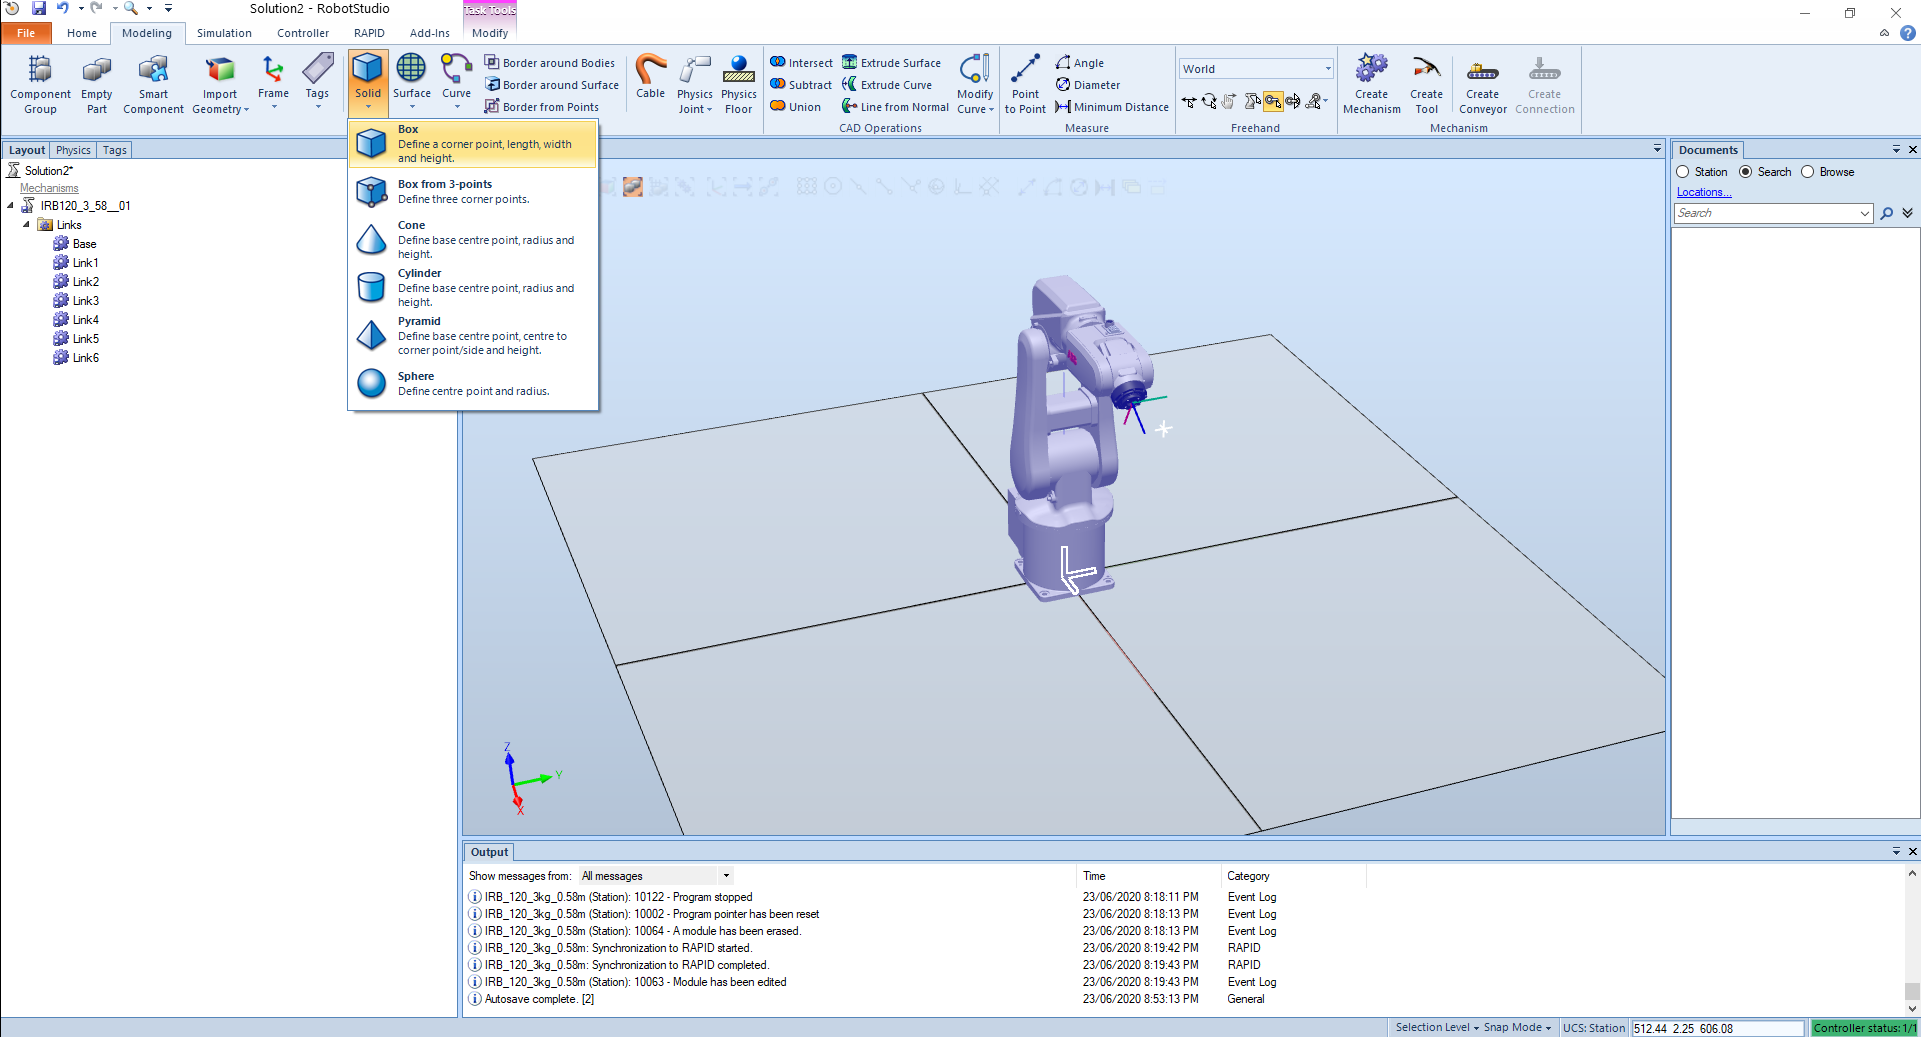
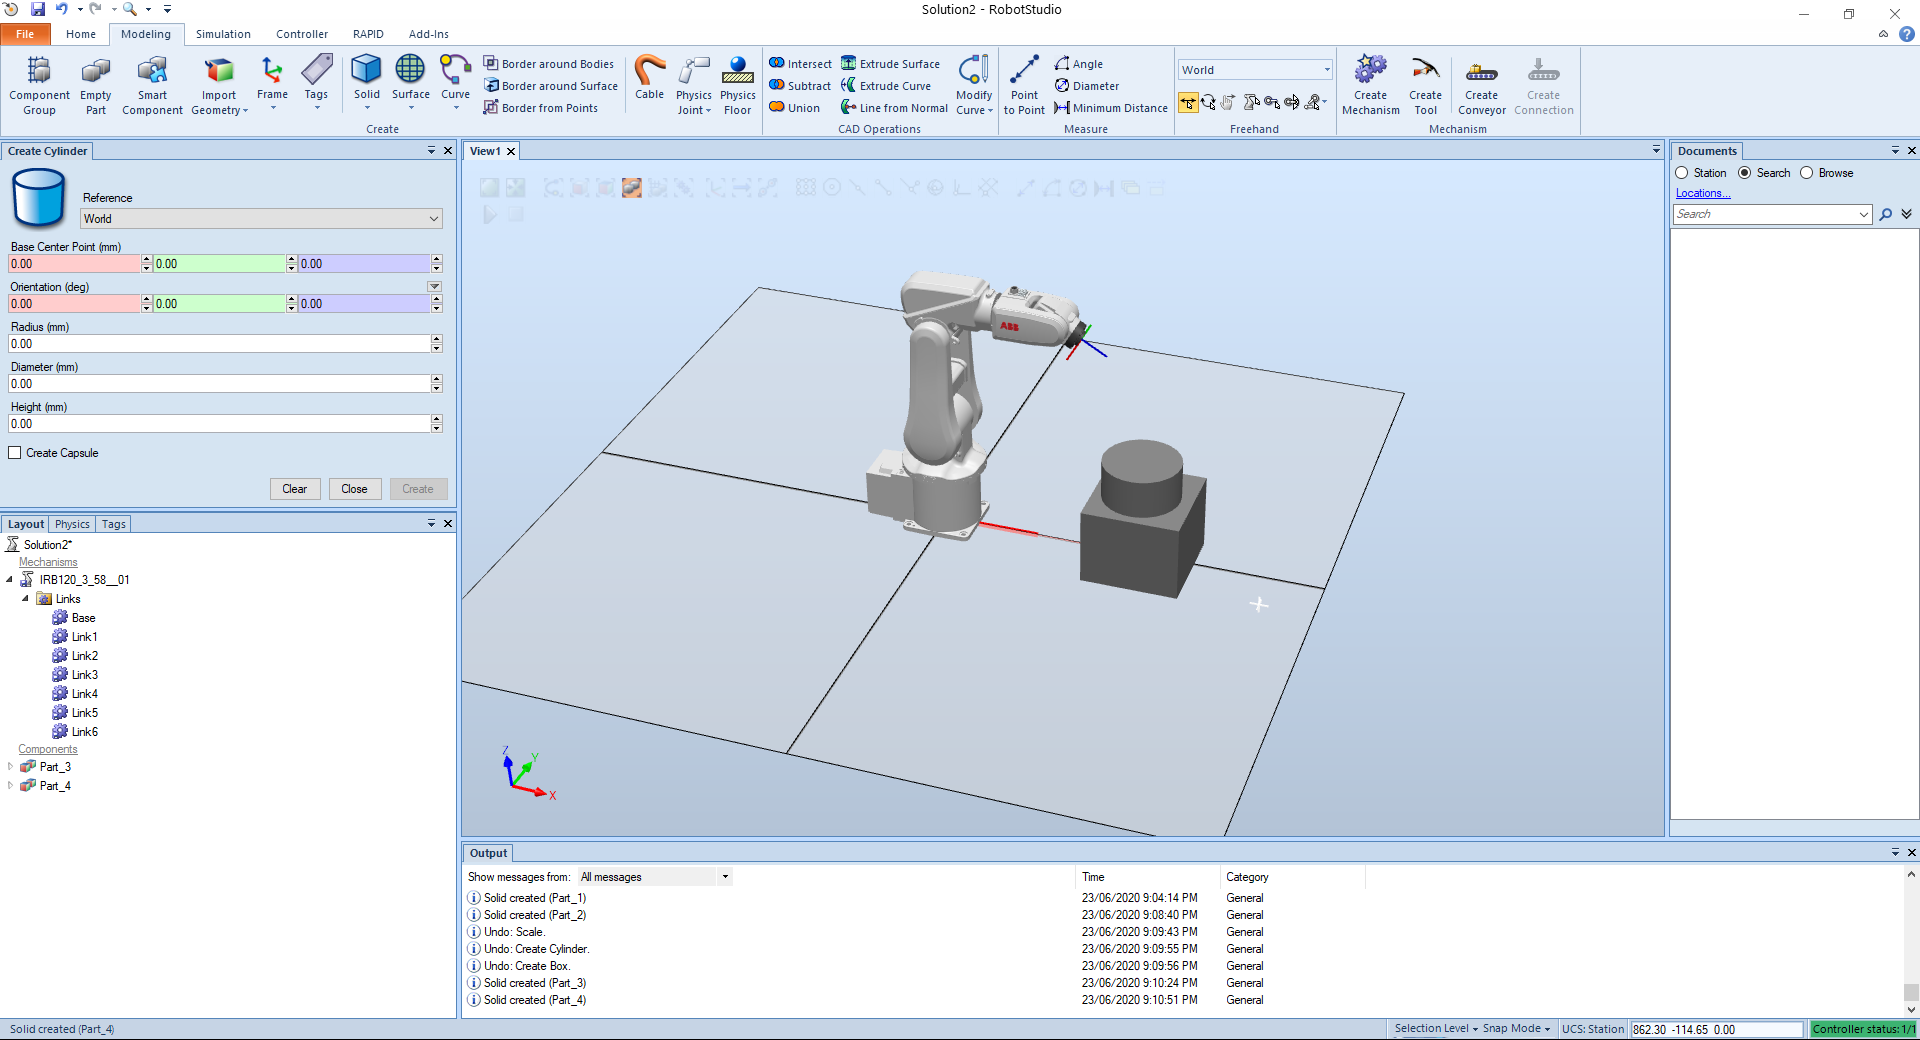
# Modeling
There is a basic modeling tool on Robot Studio, and of course it can be moved around. There are more solids as well.
Also, tools like Union, to combine two solids together.
# Trying other tools
By adding a welding gun we can position the tool accordingly in relation to the object.
We can go on target and target on the edge.
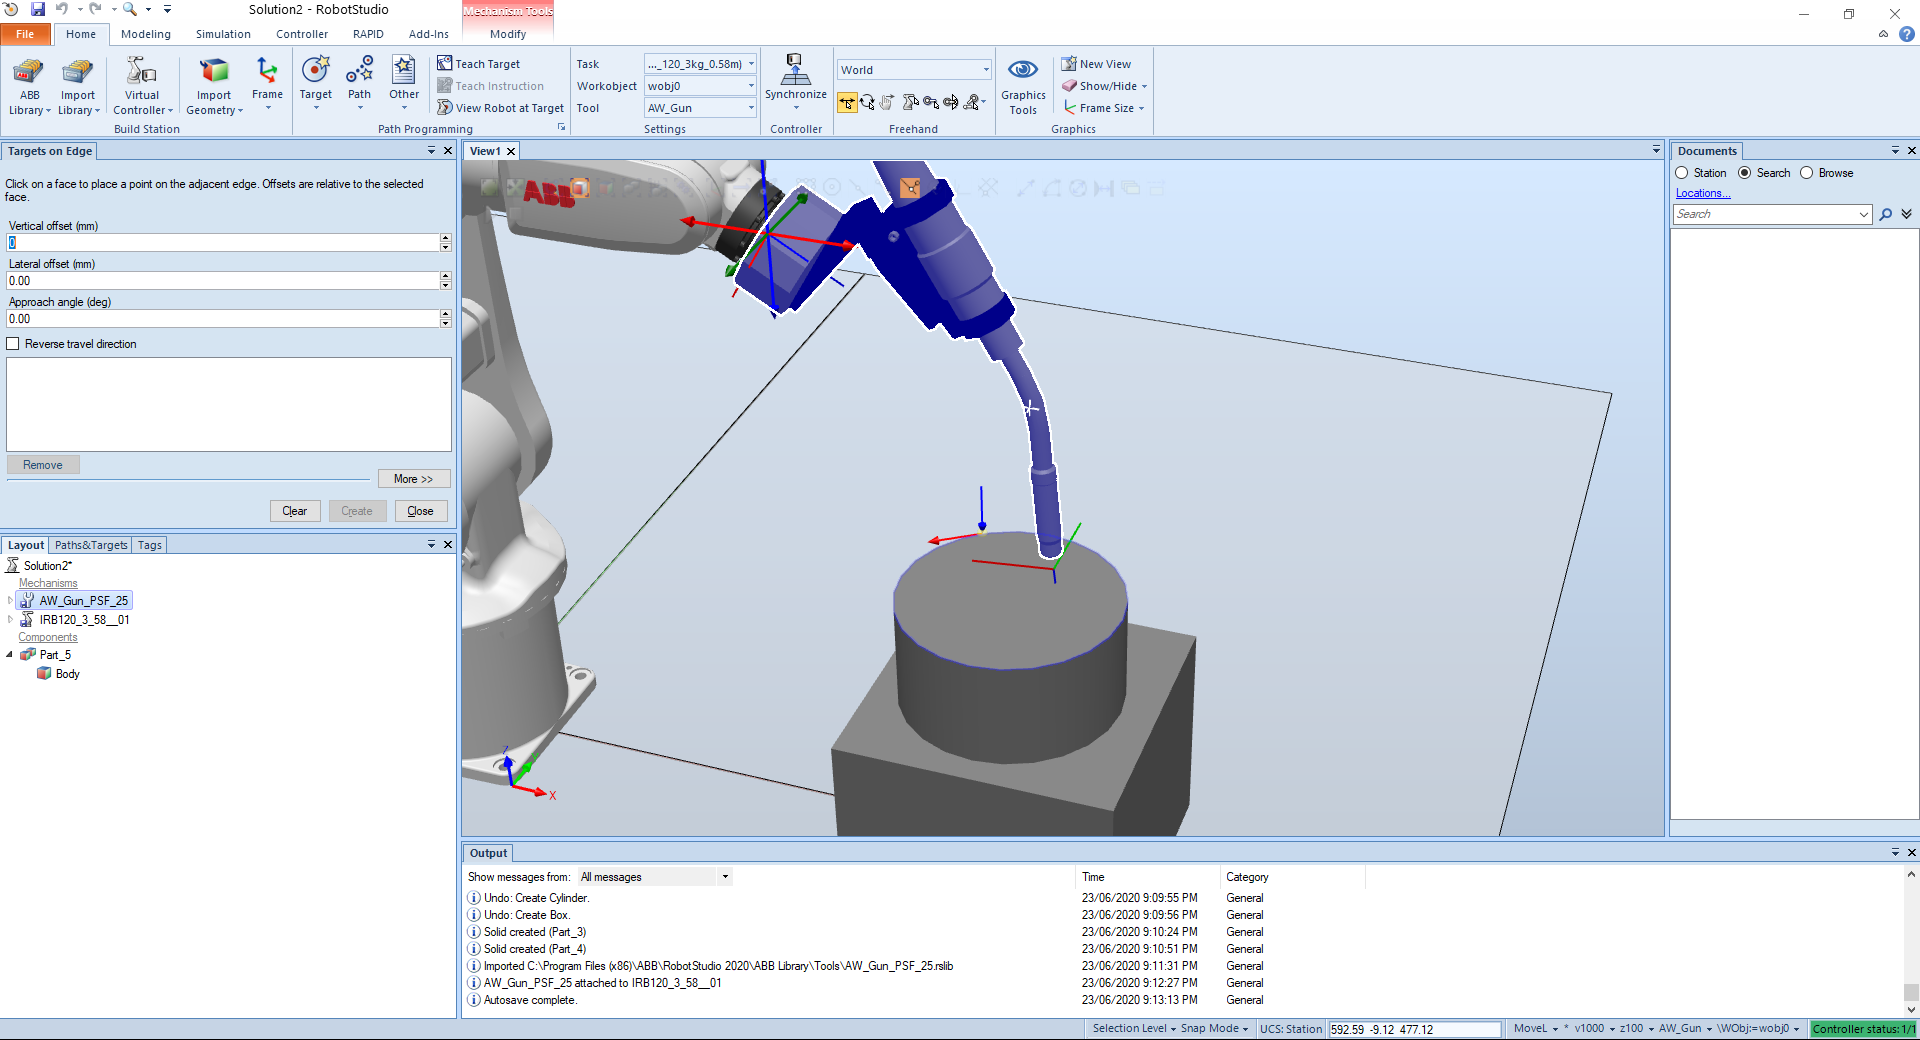
The targets are created although the orientations are not valid. So we have to correct that.
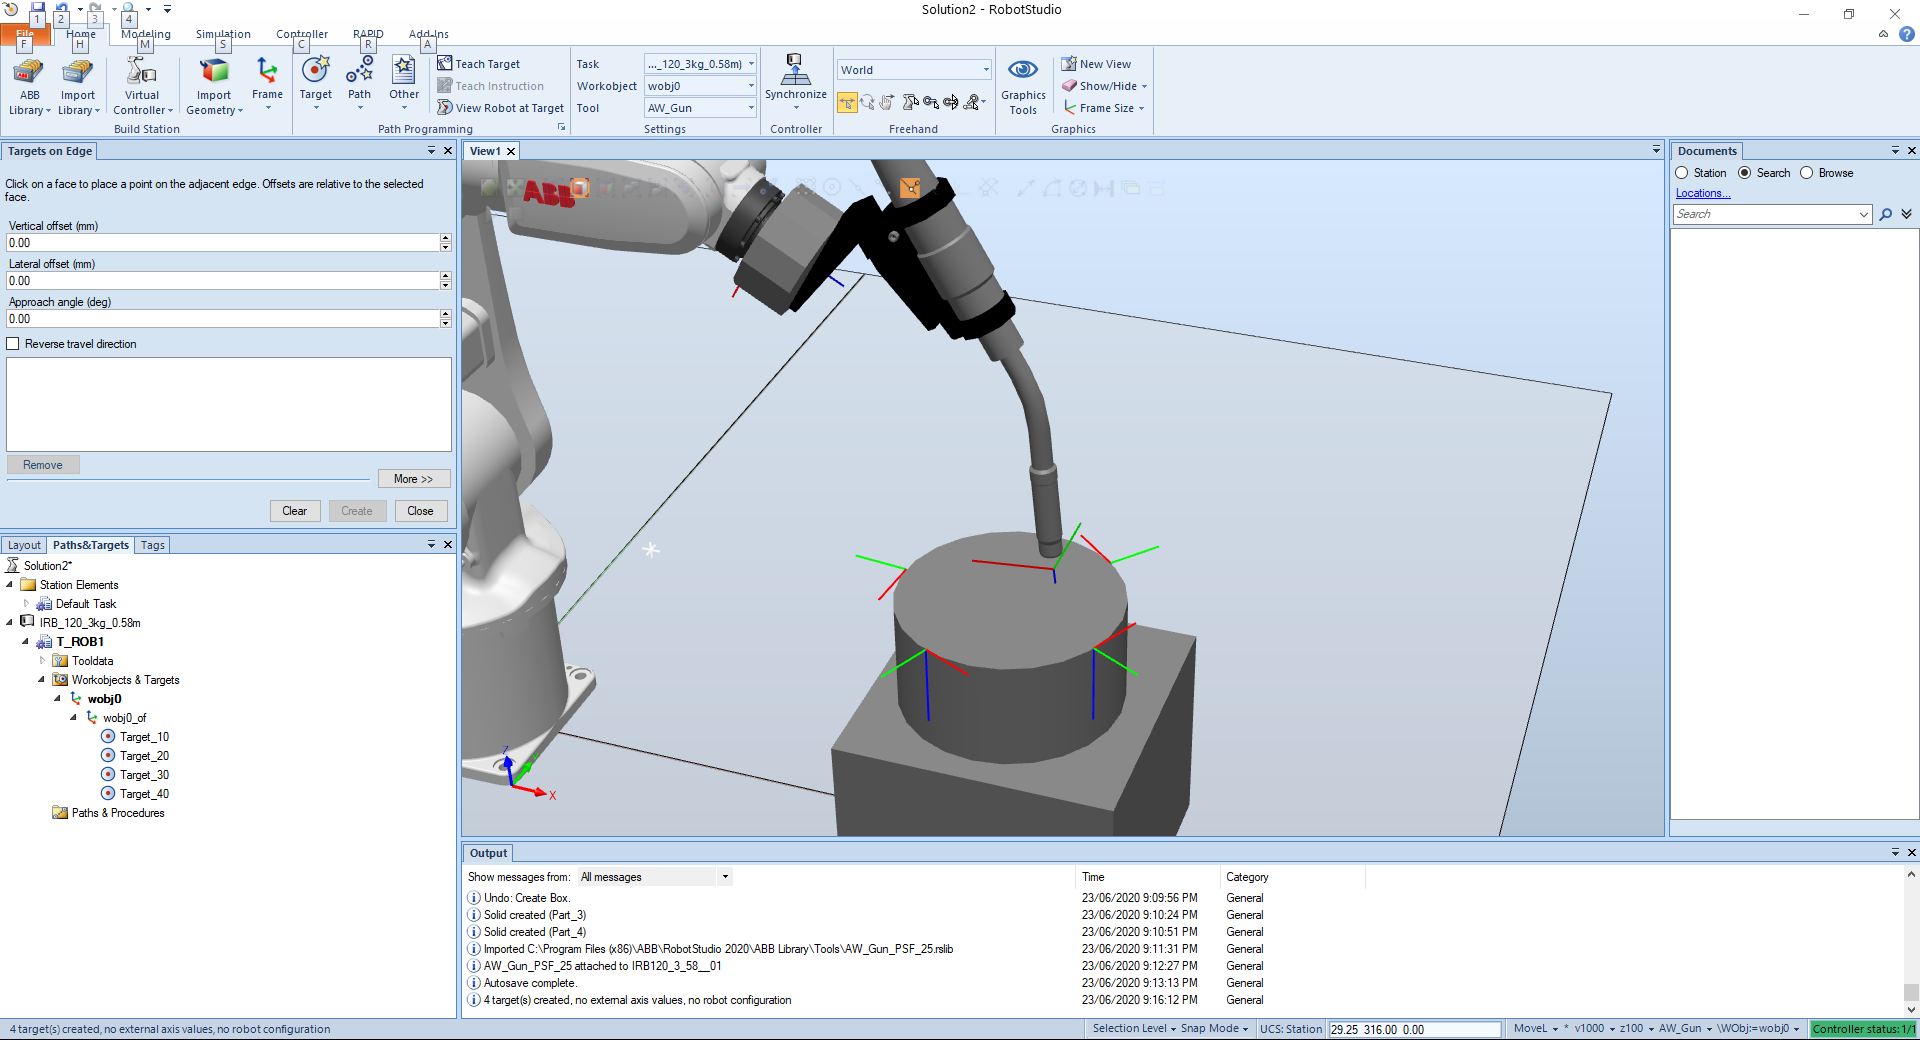
By rotating the angles I can correct the orientation and apply the changes on the other targets.

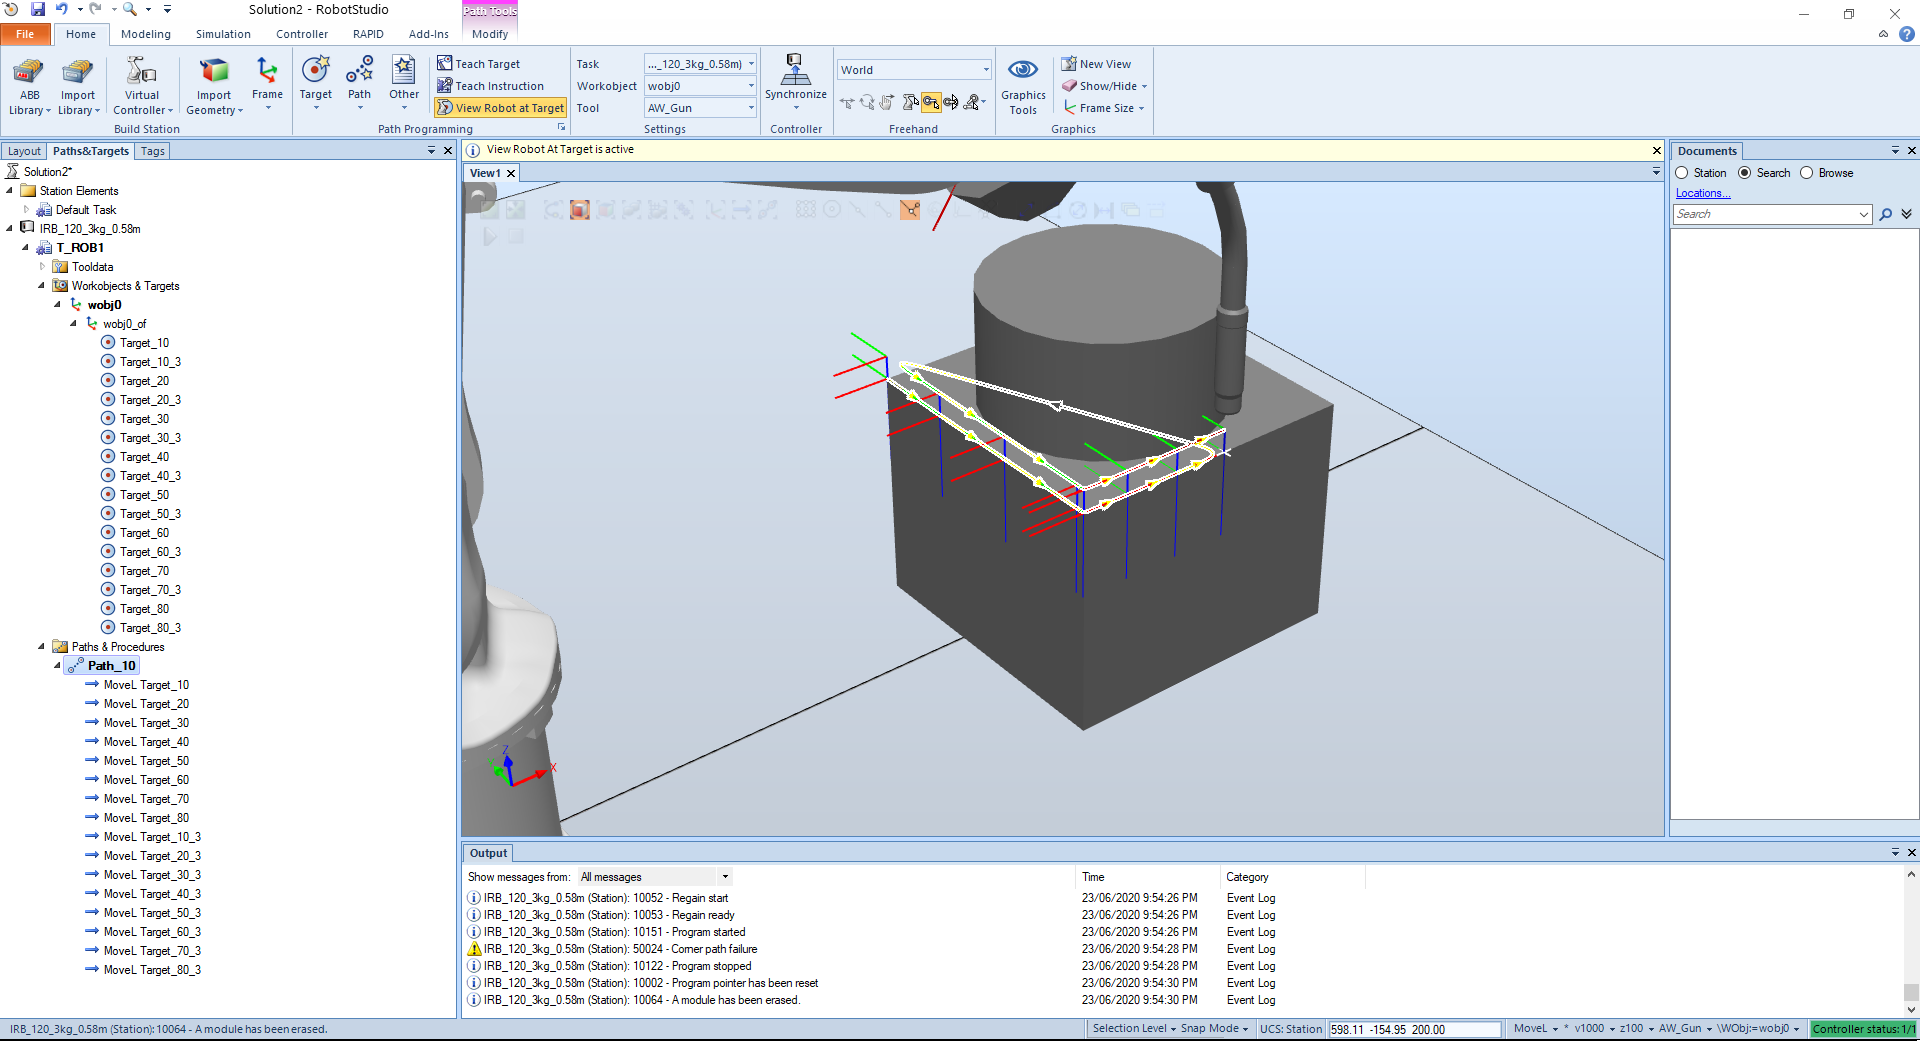
Making the orientation along the corner of the box we have:
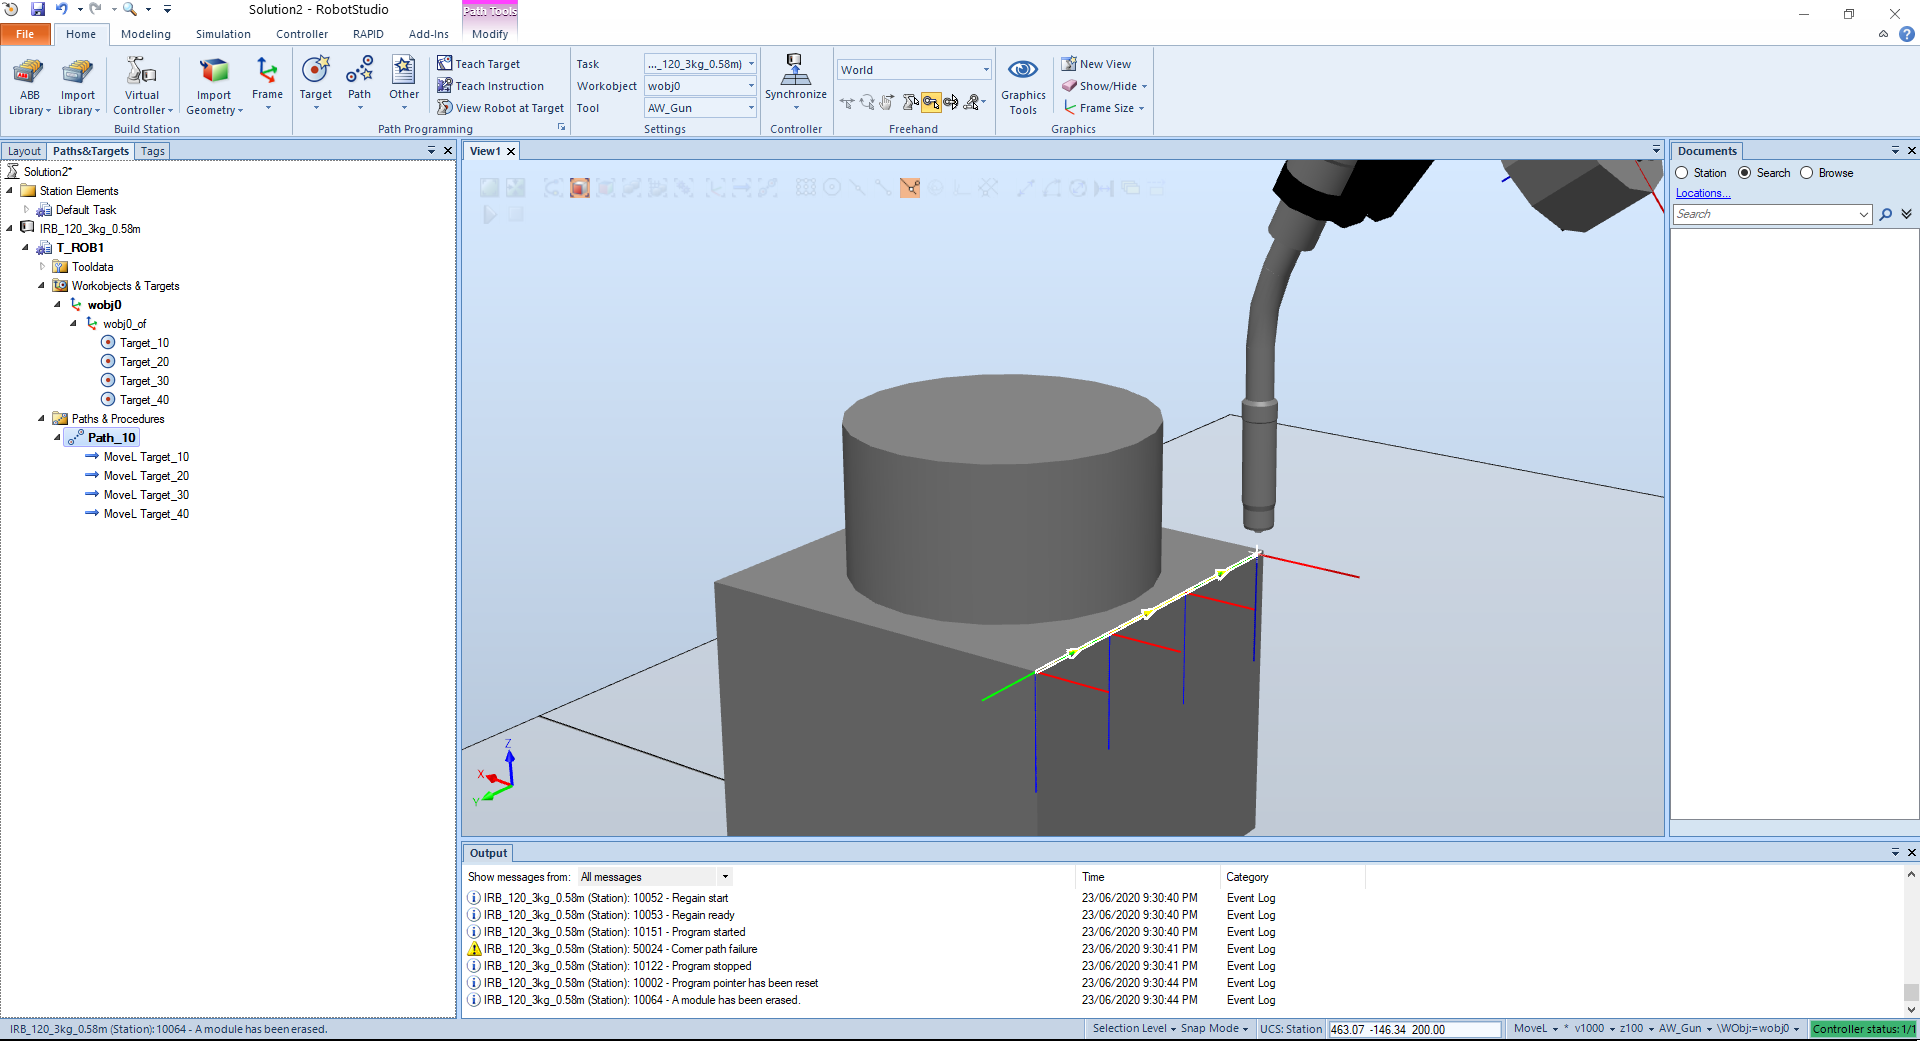
As can be seen, specially on the round corner, the path is not entirely correct.
If we add some more points then duplicate the points and offset them 20 we have:
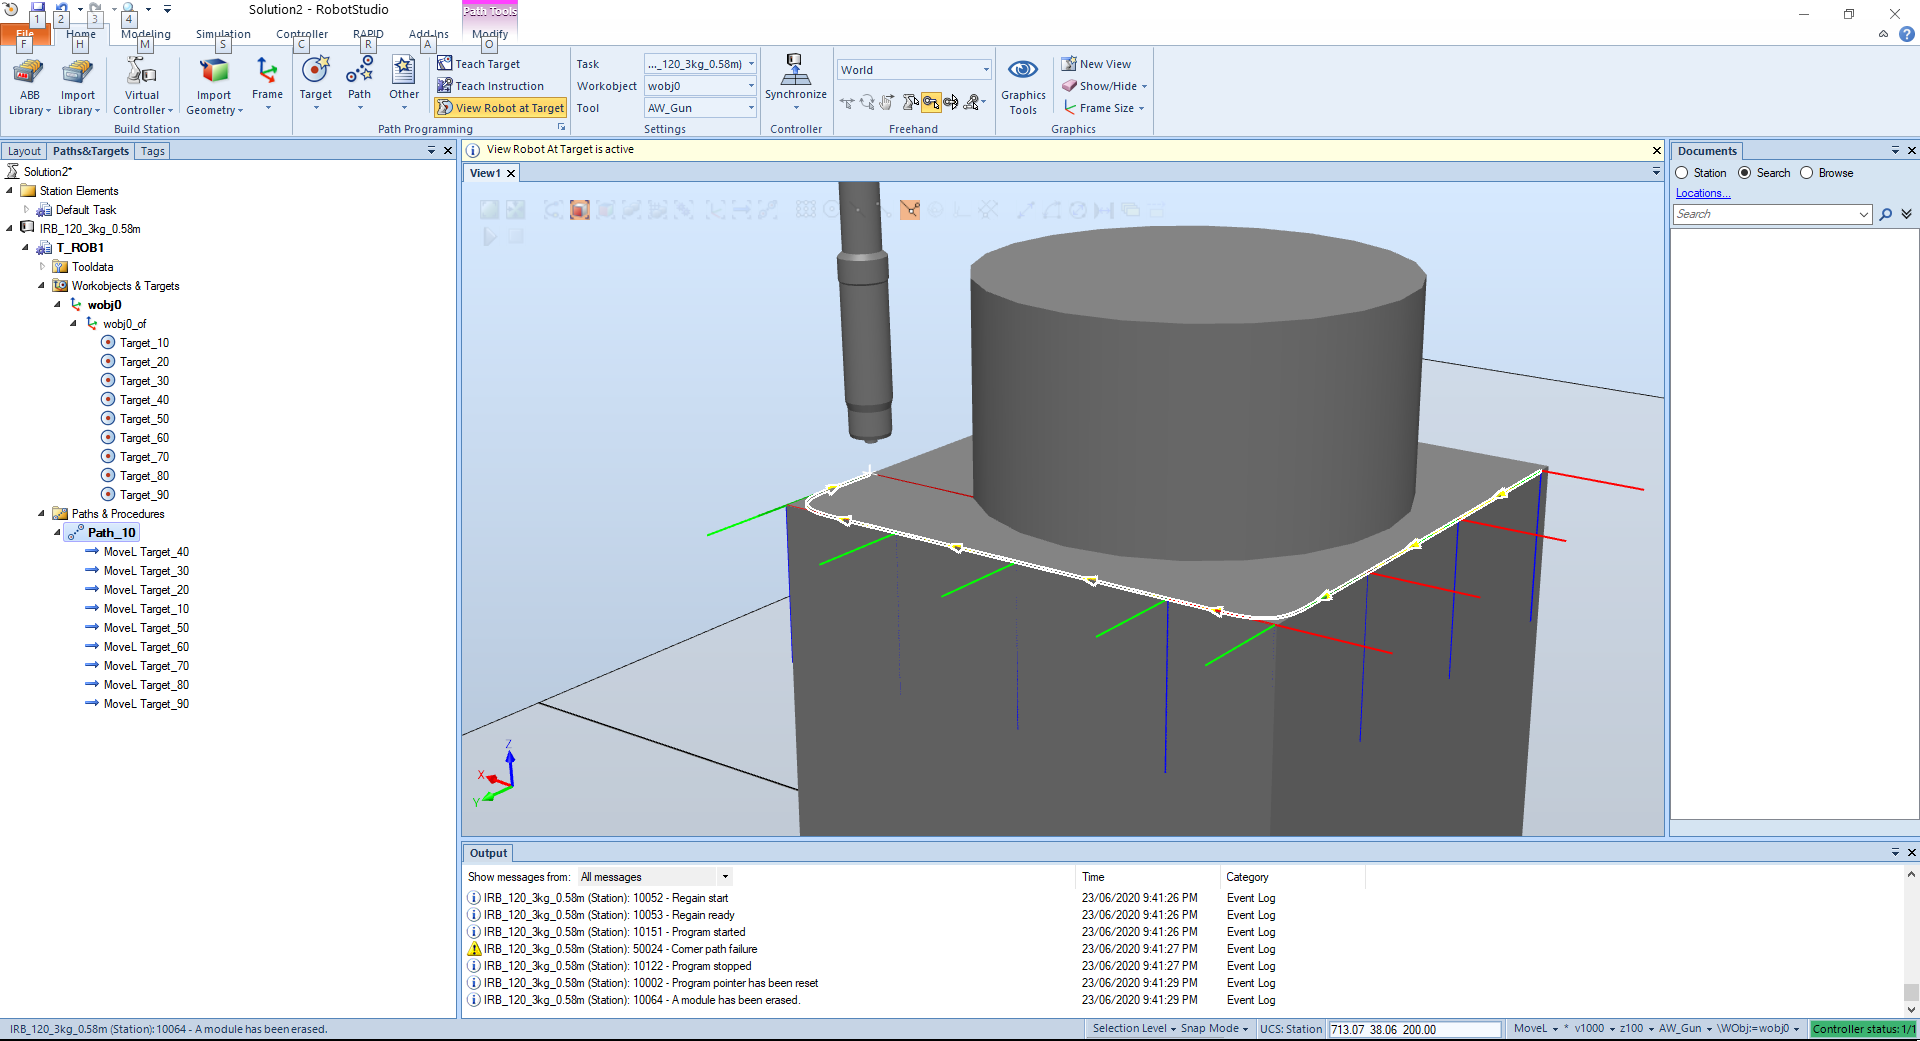

Now we can move the points to path at last.
TIP
I had to rebuild the points because of the order, now looks good.
We can also add a waiting time between the paths and now the tool waits 5 seconds before the second pass, 20mm offset.
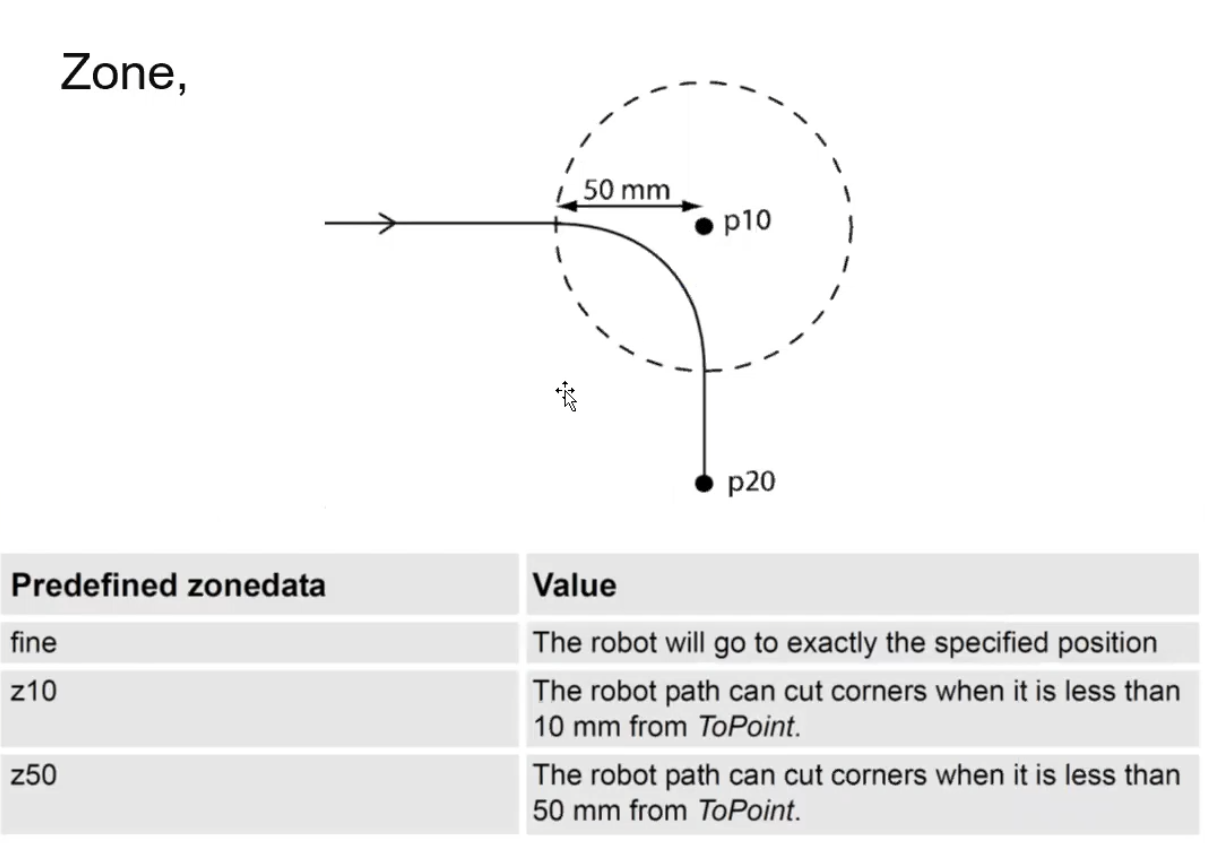
TIP
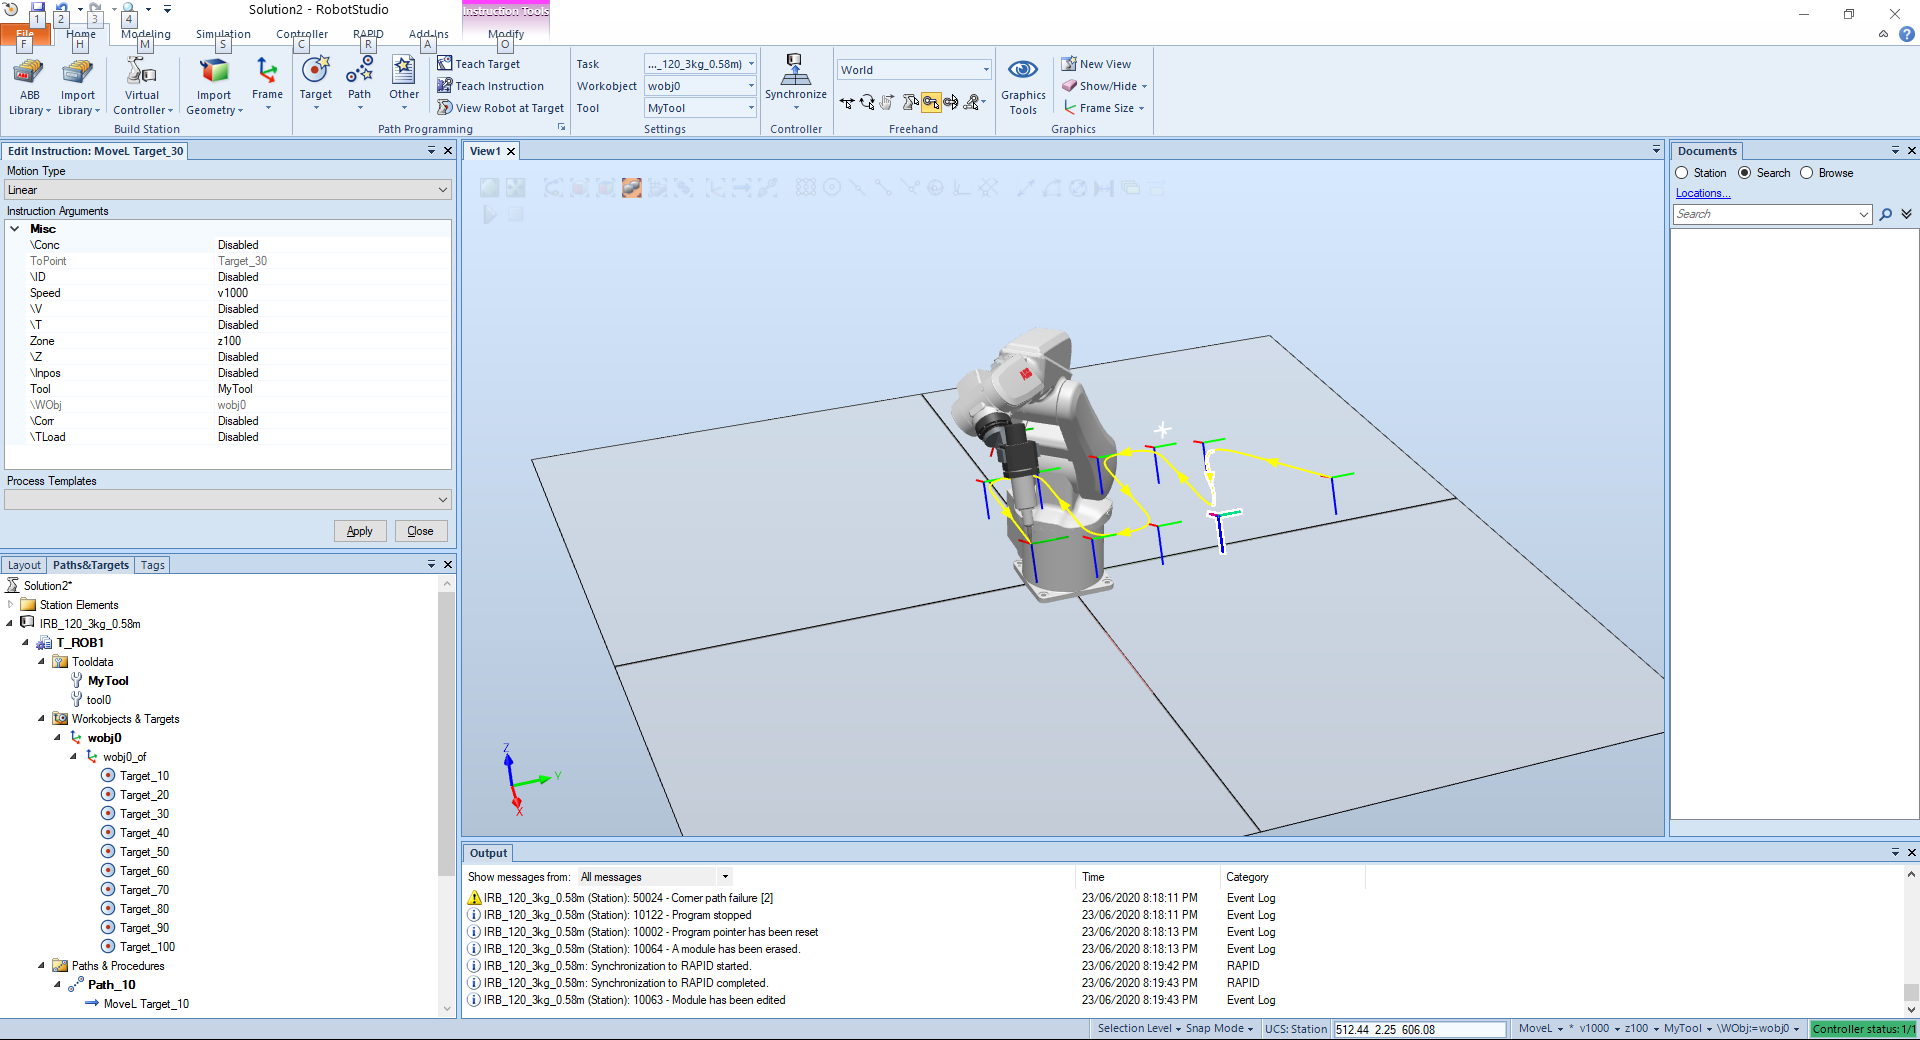
To follow the path closer we can go to edit instruction and edit the characteristics. The Zone Setting is the one responsible for that.
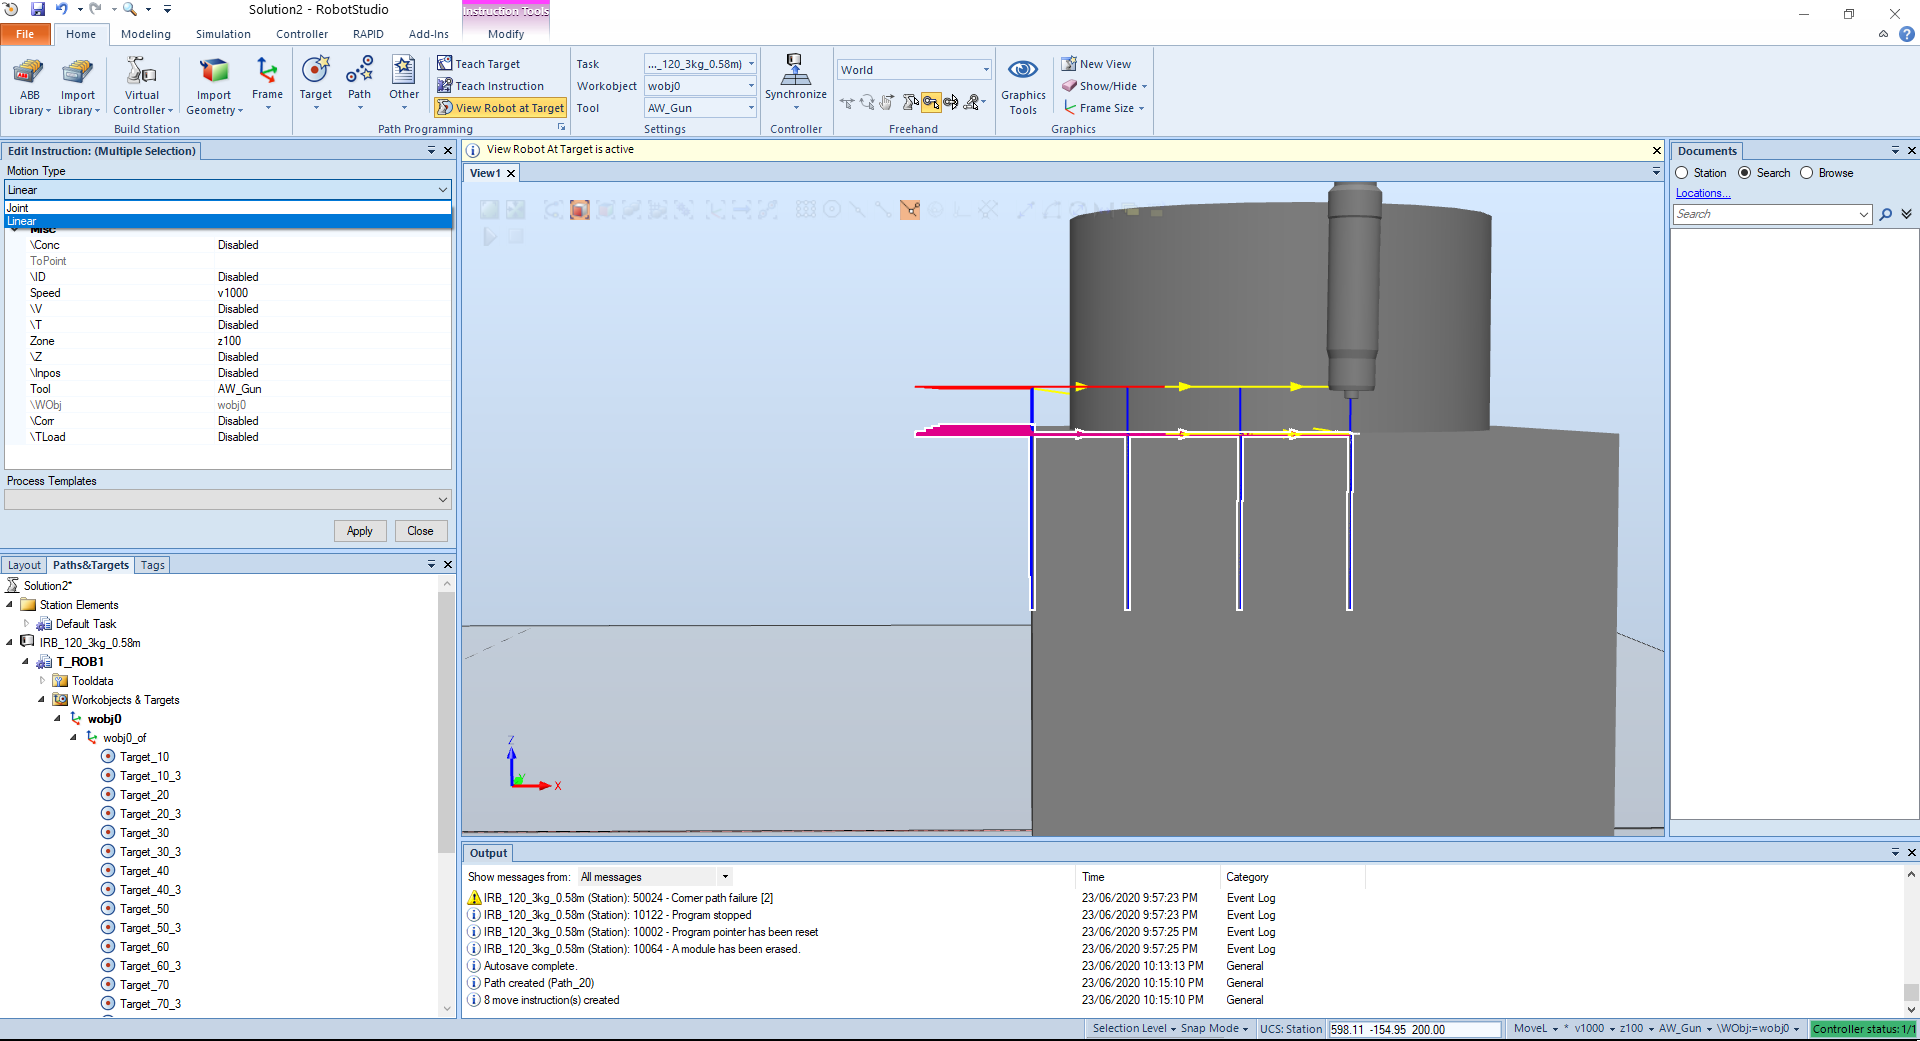
# Motion Type
When we select multiple instruction and go Edit instruction the motion type dictates how we want to go from point to point.
The linear means whatever the joint position is necessary, go along a straight line.
The joint motion type it goes from point to point with whatever best joint configuration. This would not be used for straight line applications like welding or 3d printing.
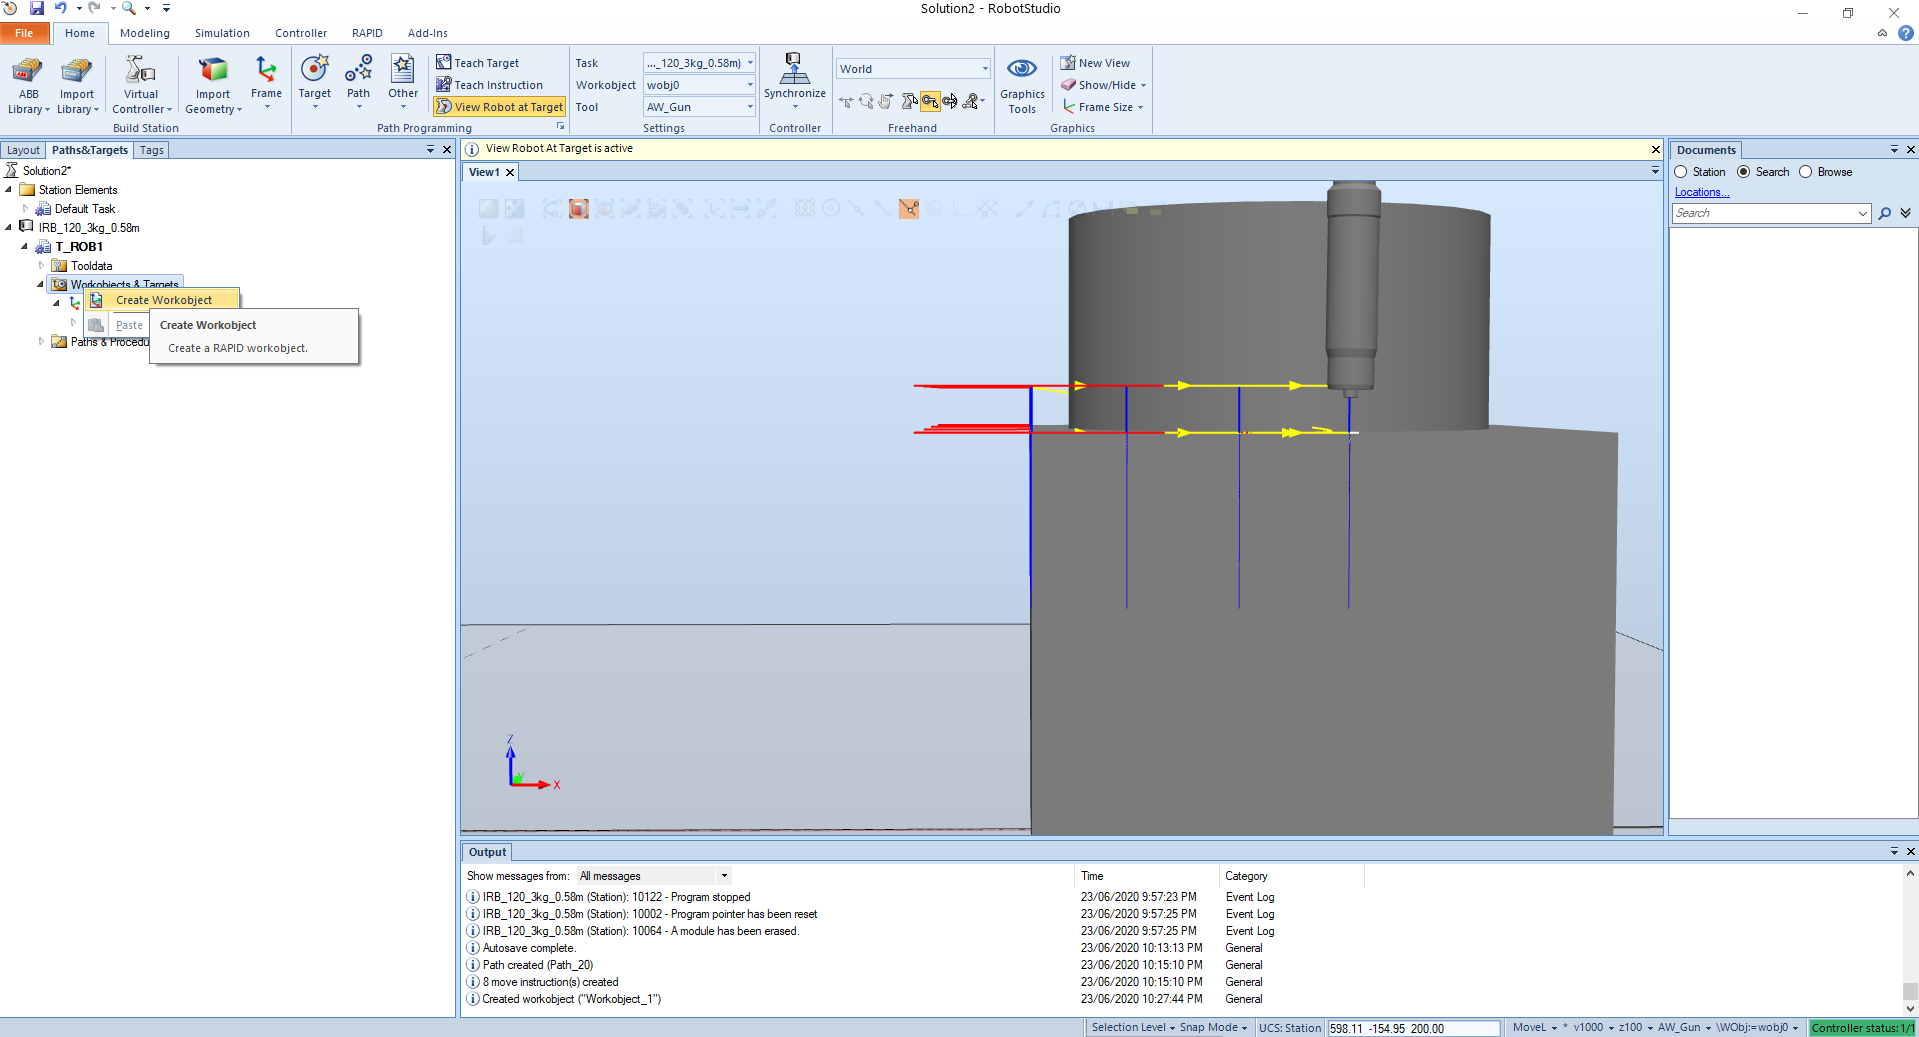
# Creating a new working object
We can create another working object like so:
Then we can move the target points to the new object.
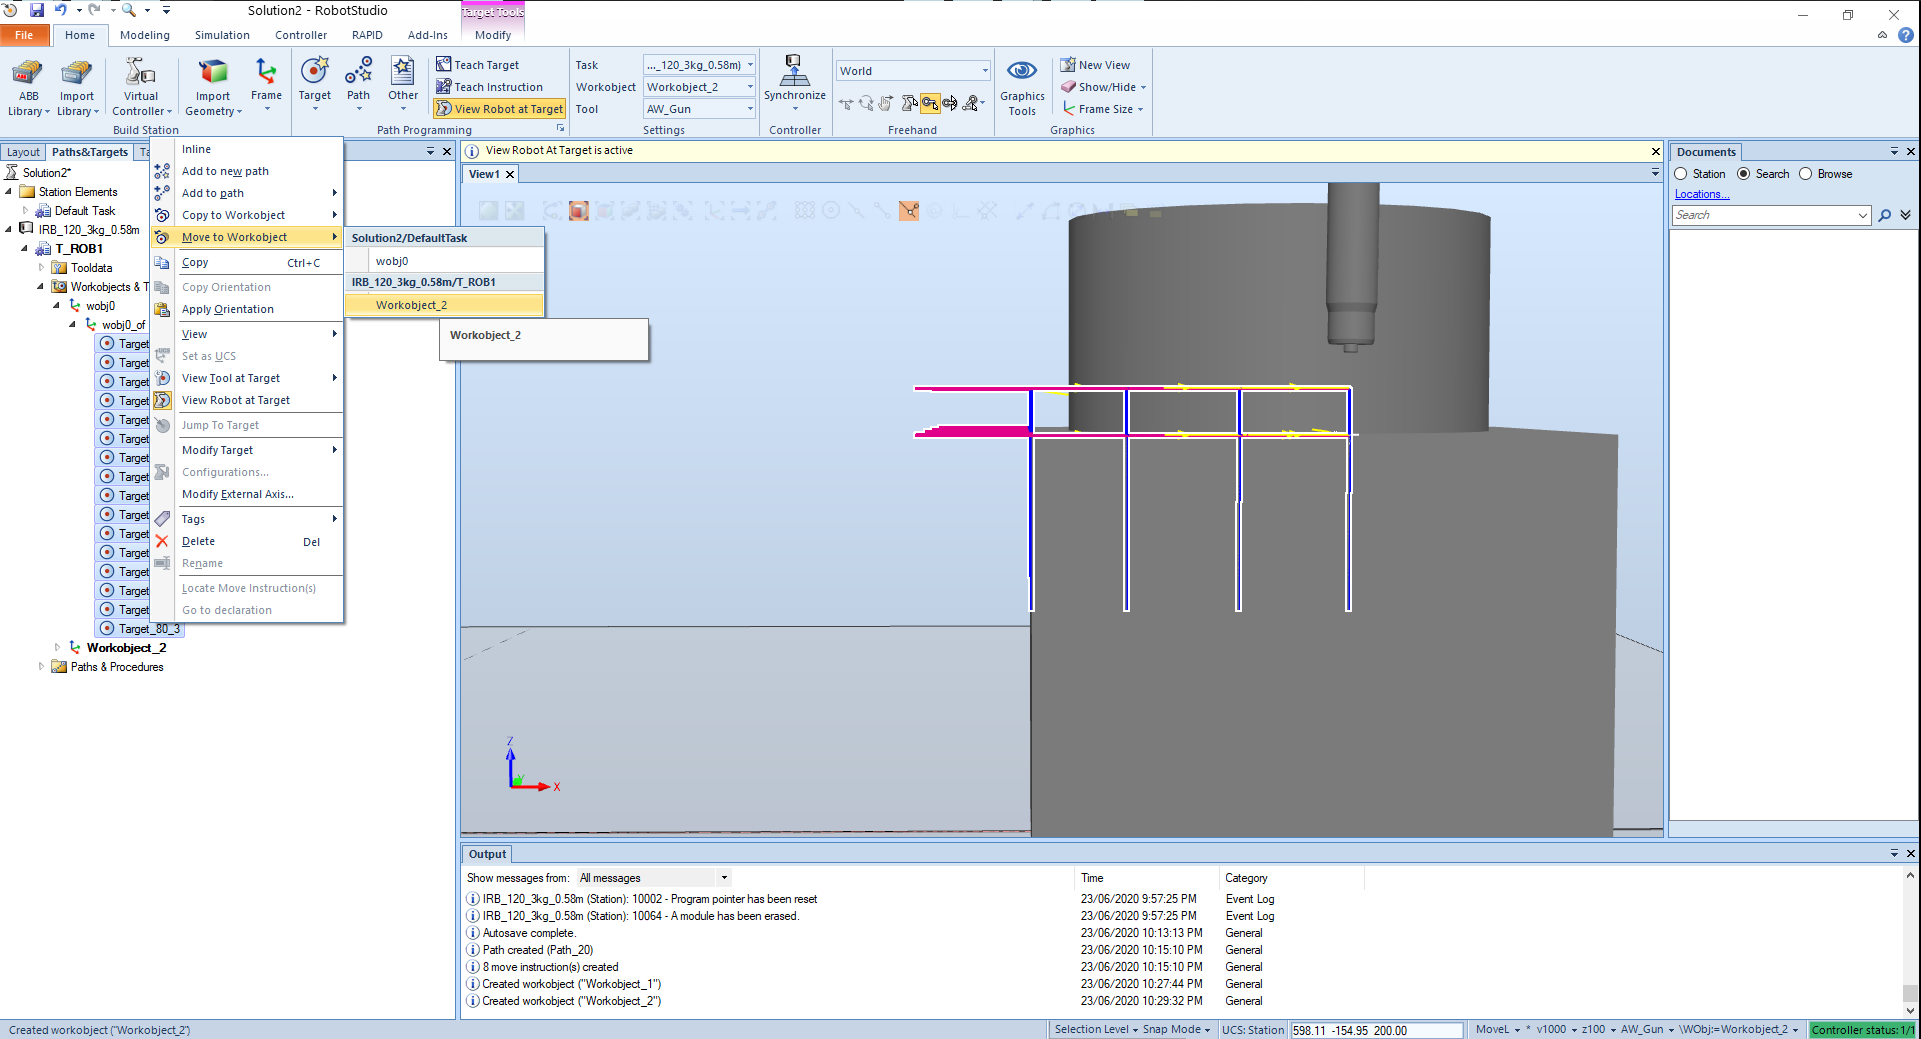
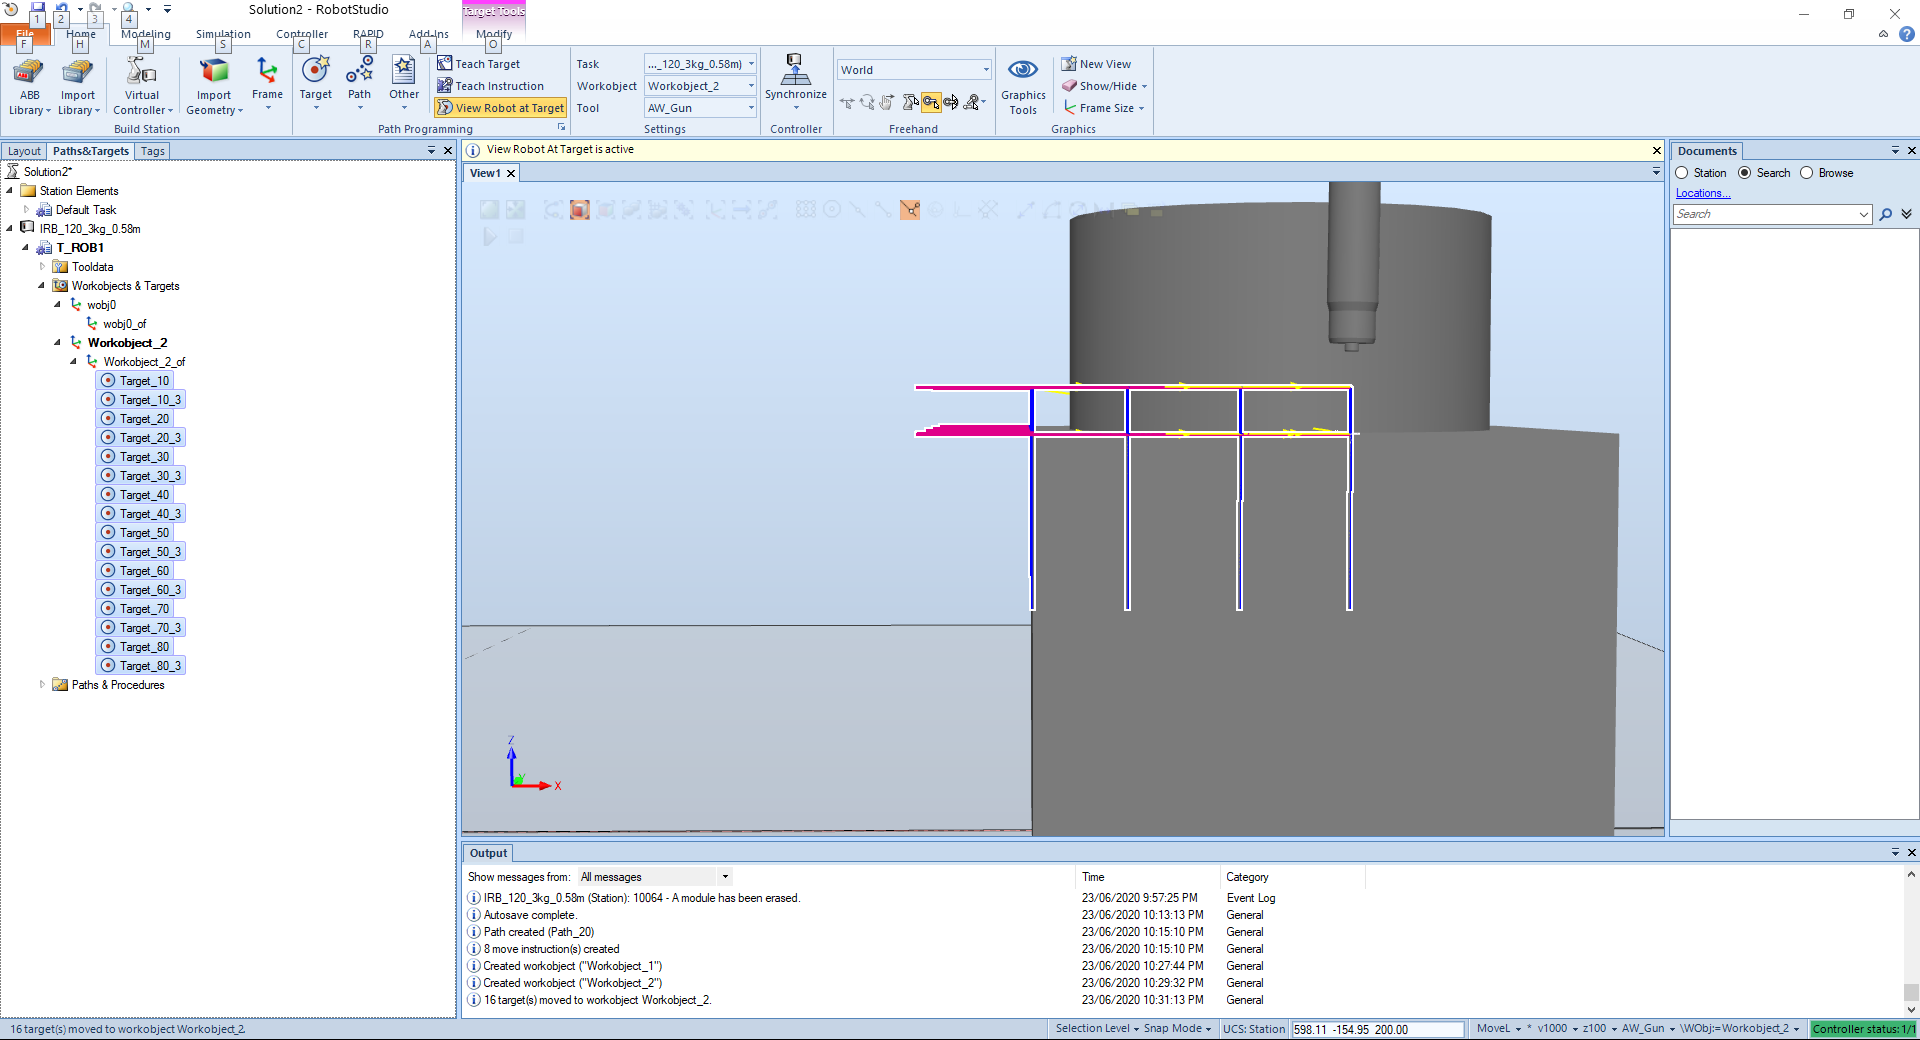
TIP
The new workobject can be make active and then all the coodinates will be calculated in relation to the new active working object.
# Adding code the RAPID
If we change the ru mode to continuous the program will run in a loop. Then we can add something to the main function.
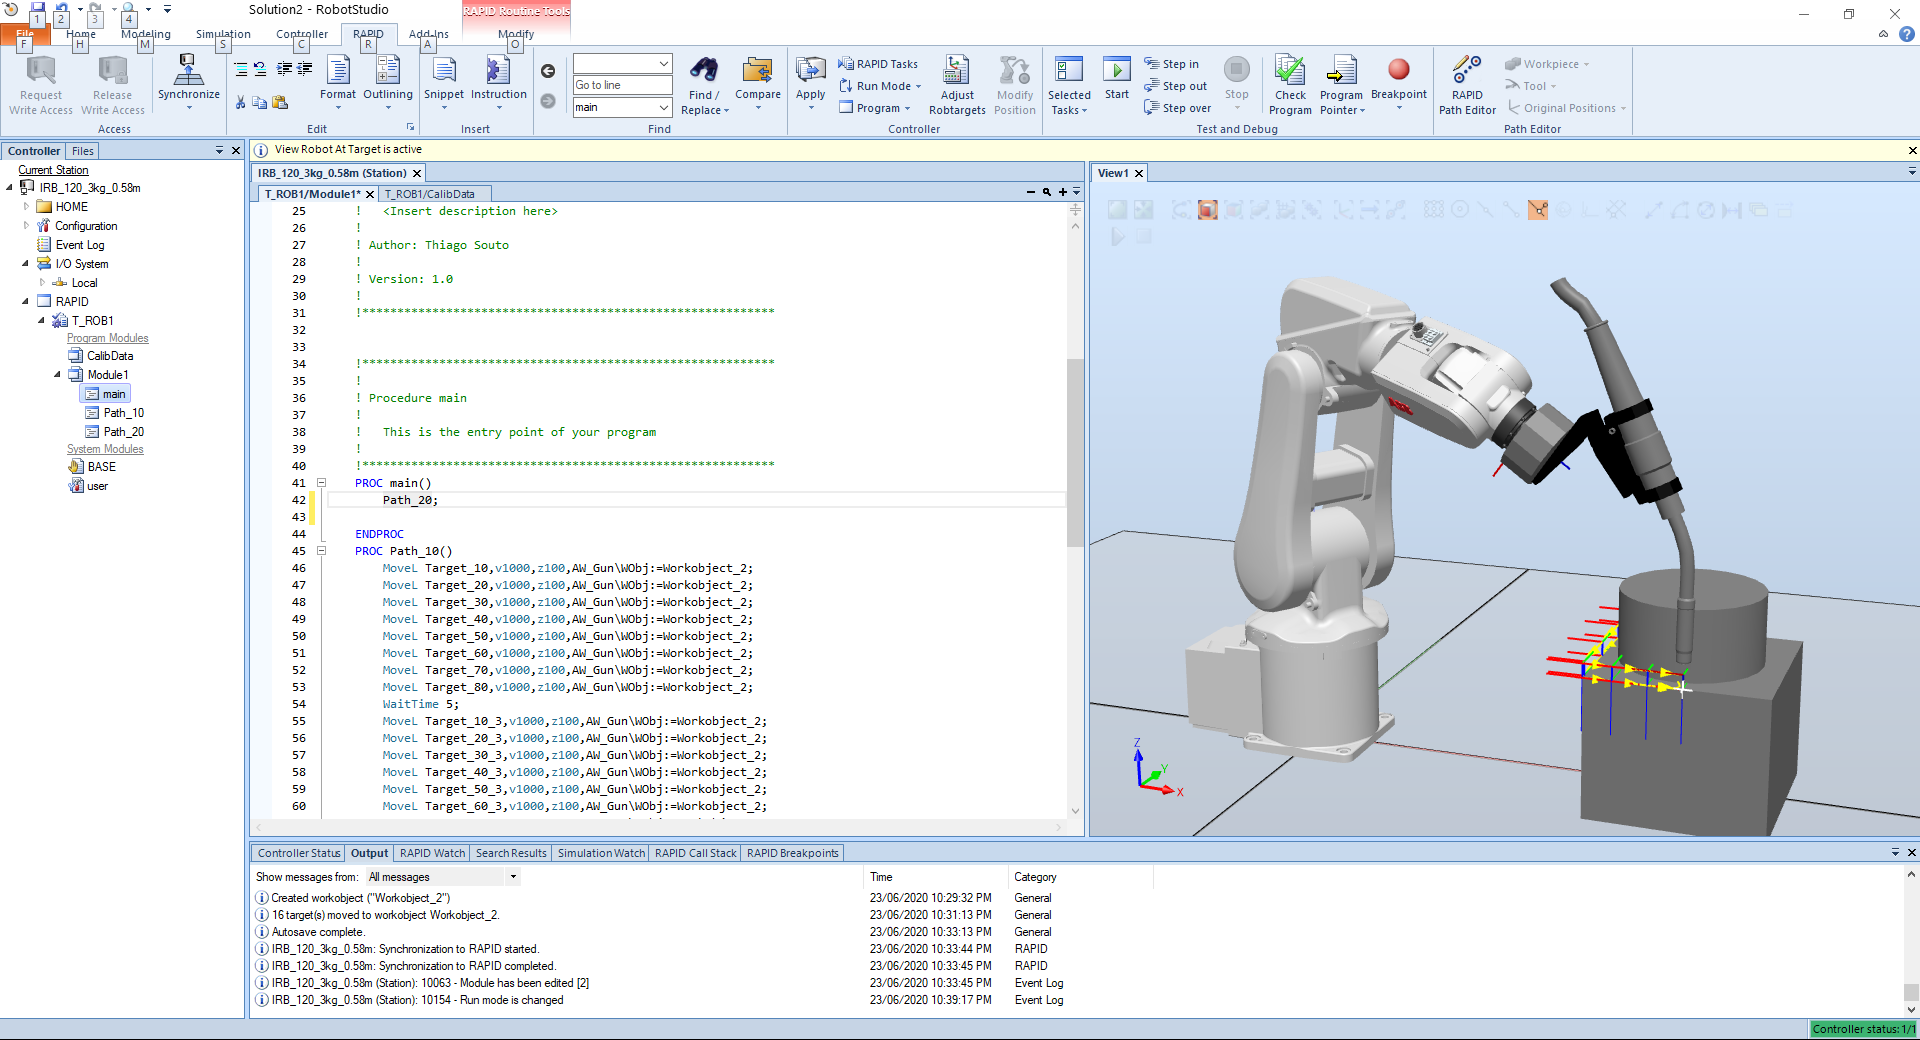
TIP
We can split screens
# RAPID Data editor
The main data are the robot targets.
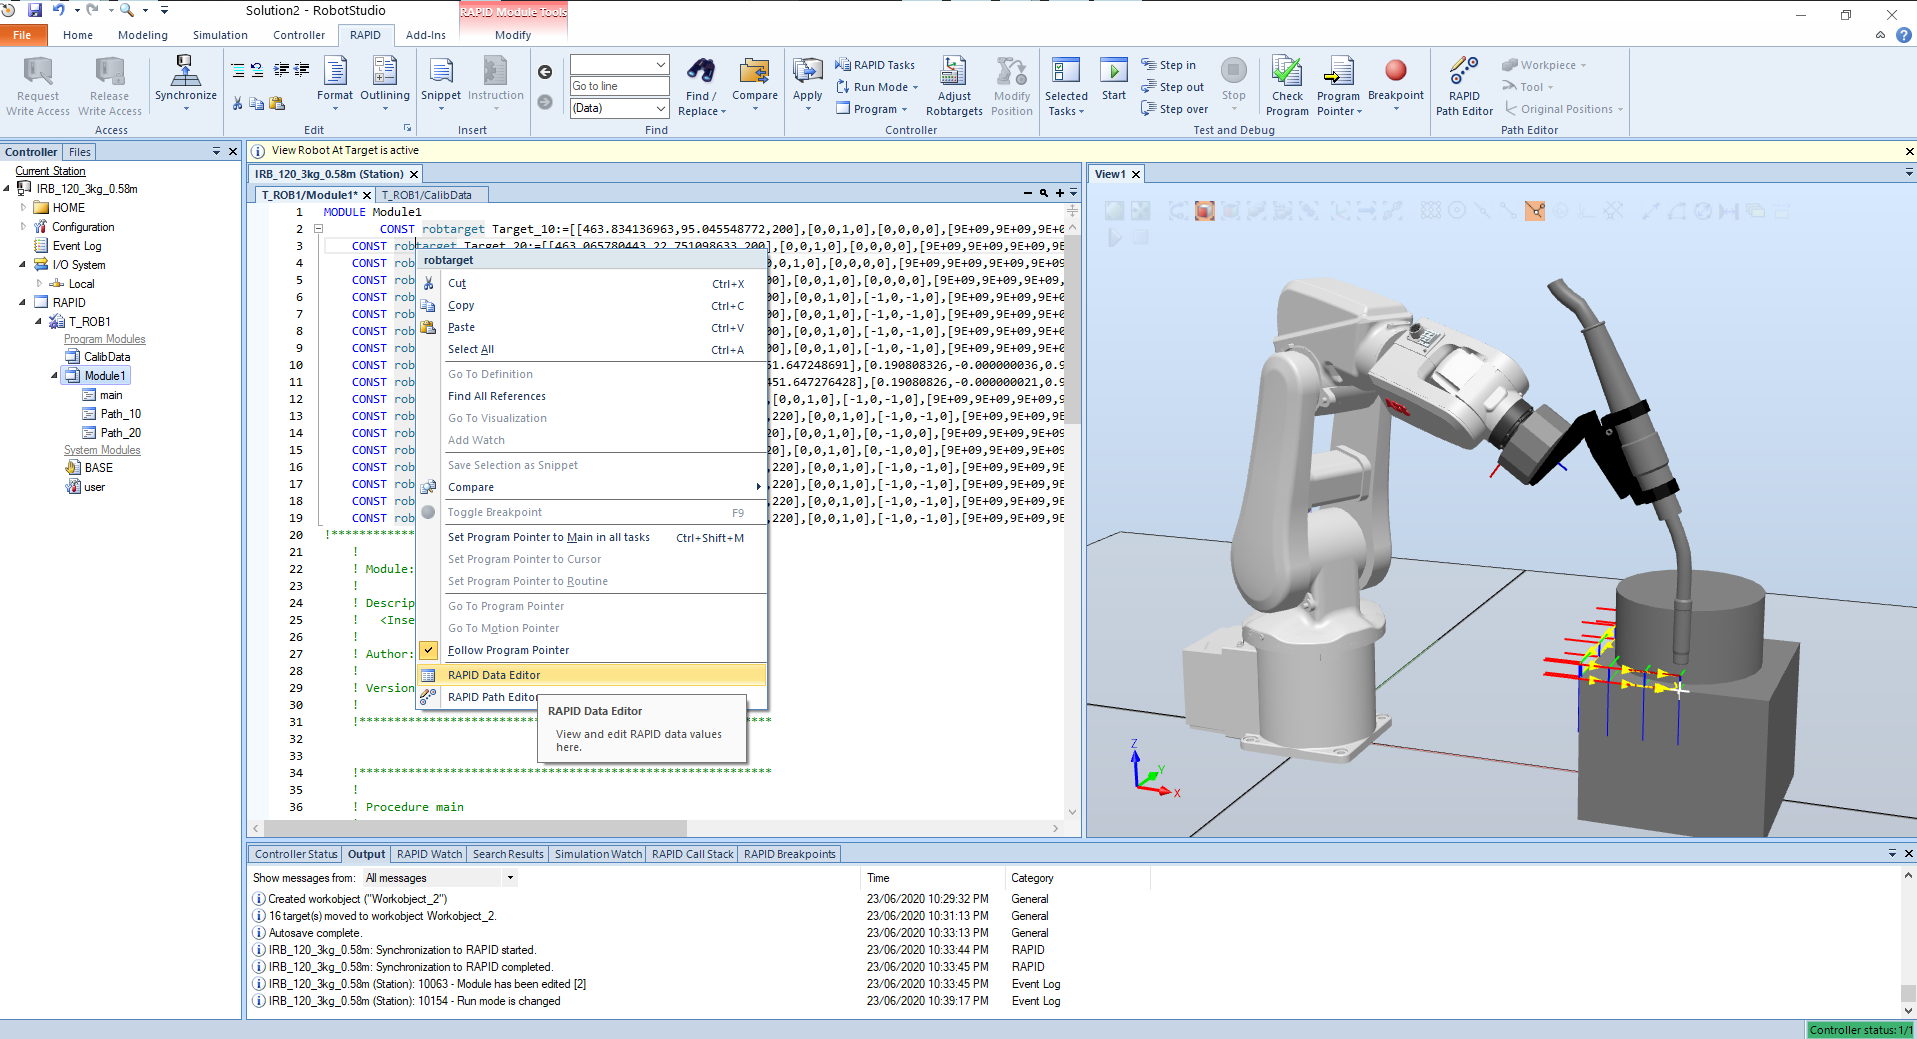
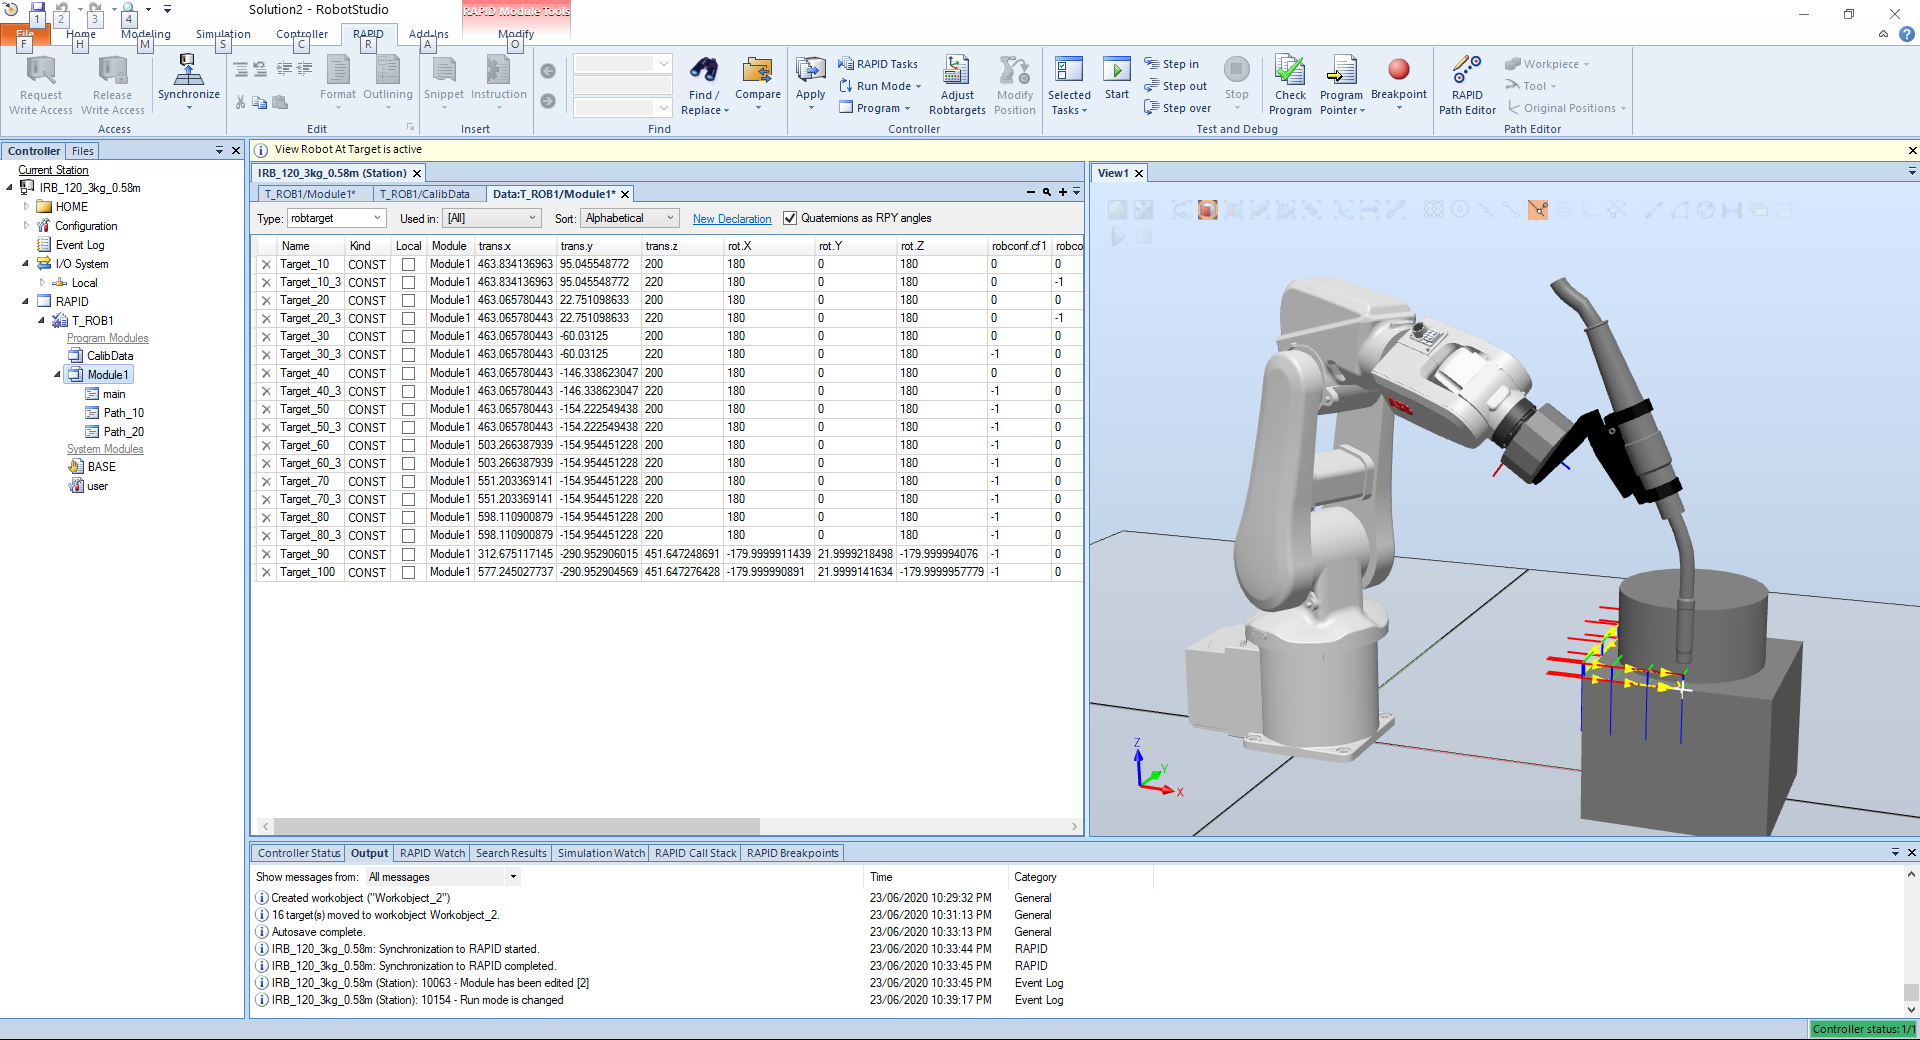
With this capability we can create the data for the targets in another program and import to RobotStudio.
TIP
When selecting objects in the view window, take into consideration the snap tool
# Working on a working object
First let's create a controller and attach a tool to the robot.
Now we create a simple part on Solidworks and import into RobotStudio.
Another aspect is to look from the target point of view, we can choose from the tool point of view.
# Robot target
WARNING
Copy from class 6-page PDF
# Robot arm configuration
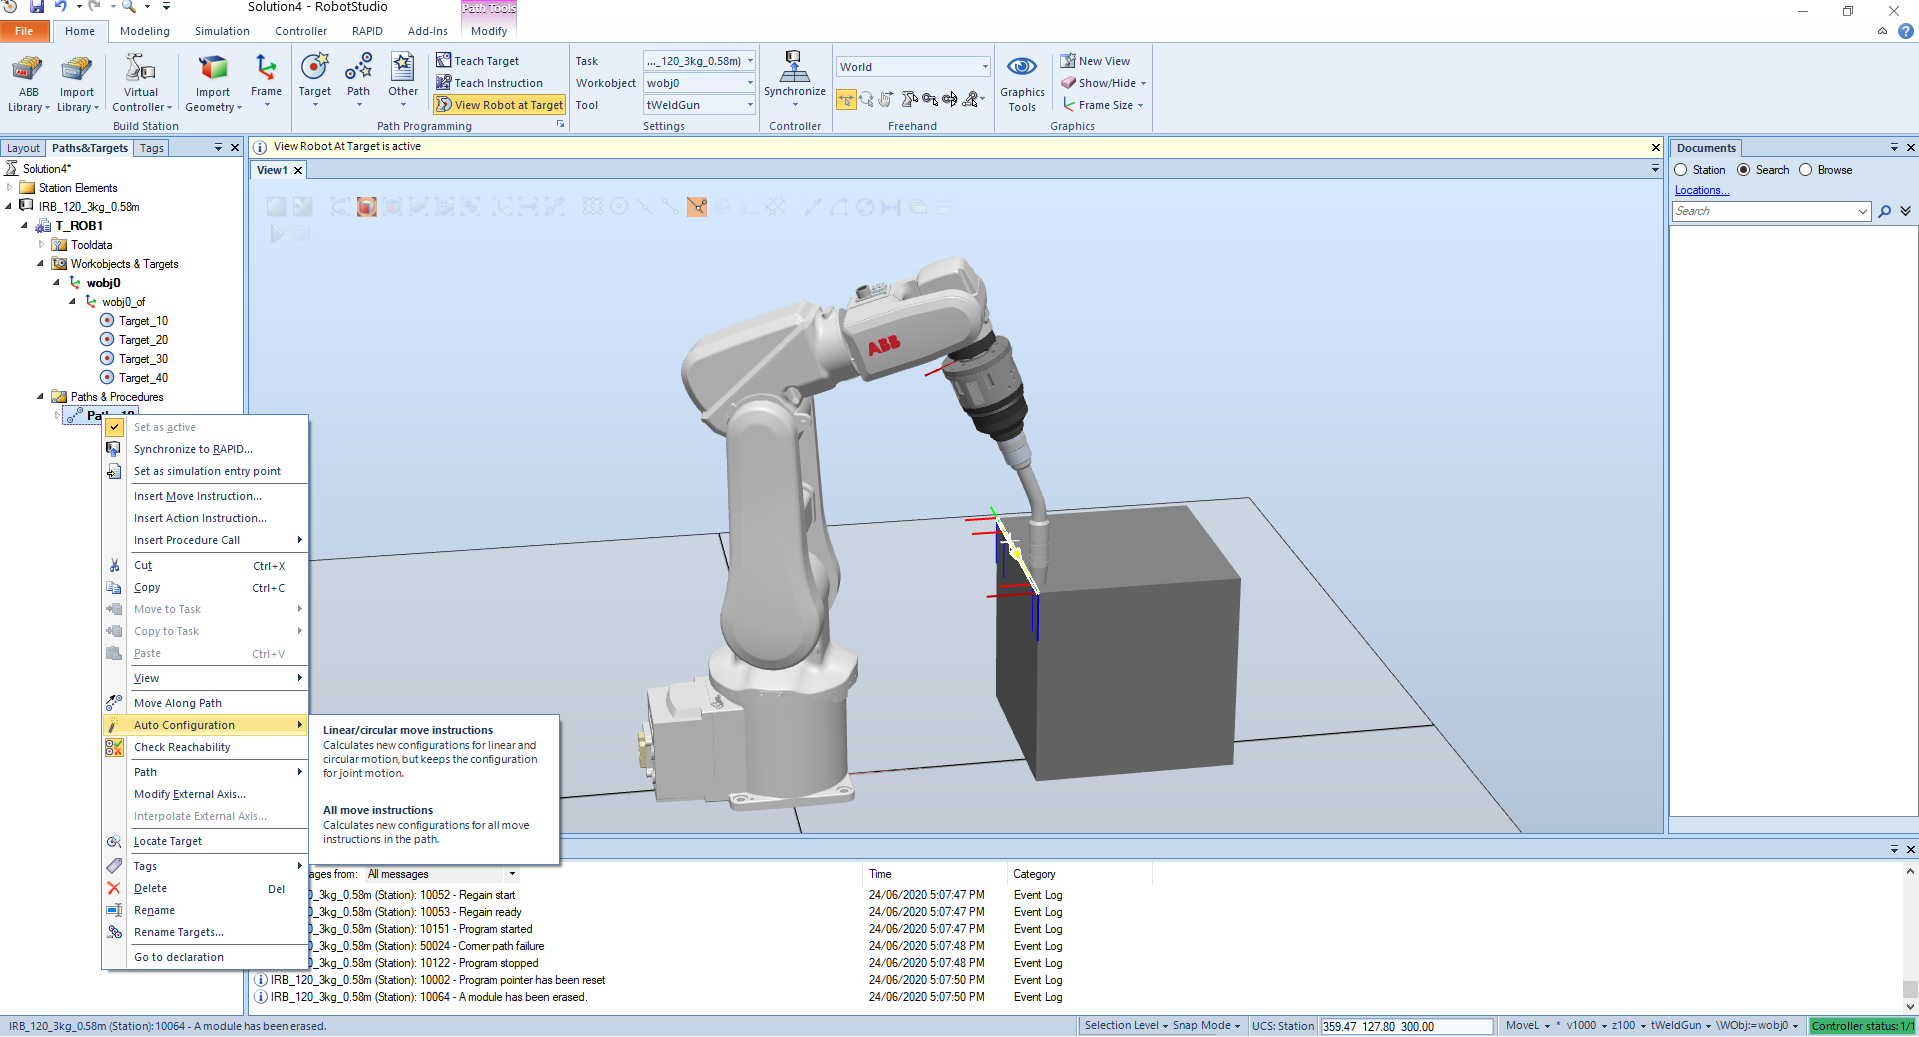
By selecting the target -> configurations, we can define which configuration is best for the joints of the arm to be.
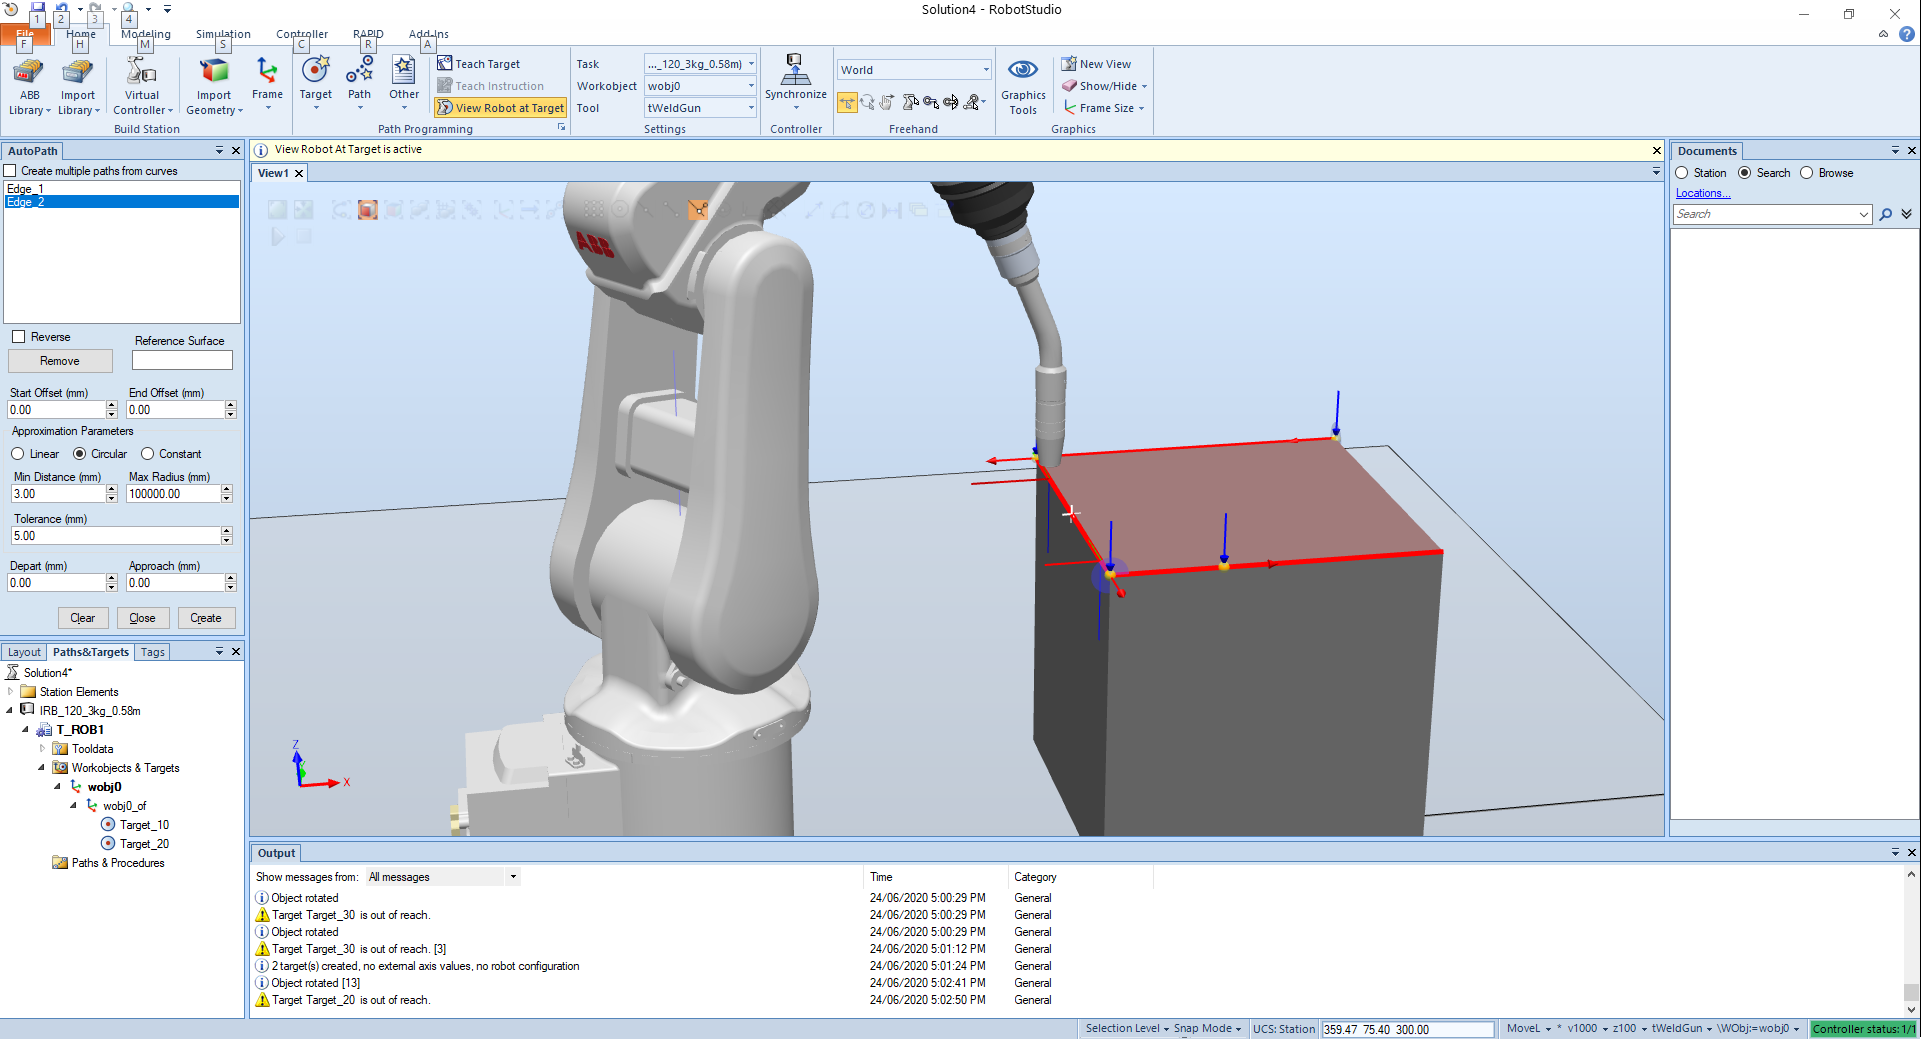
# Creating a path along the edge
We can create a path by adding targets and adding them to a path or we can create a path along an edge.
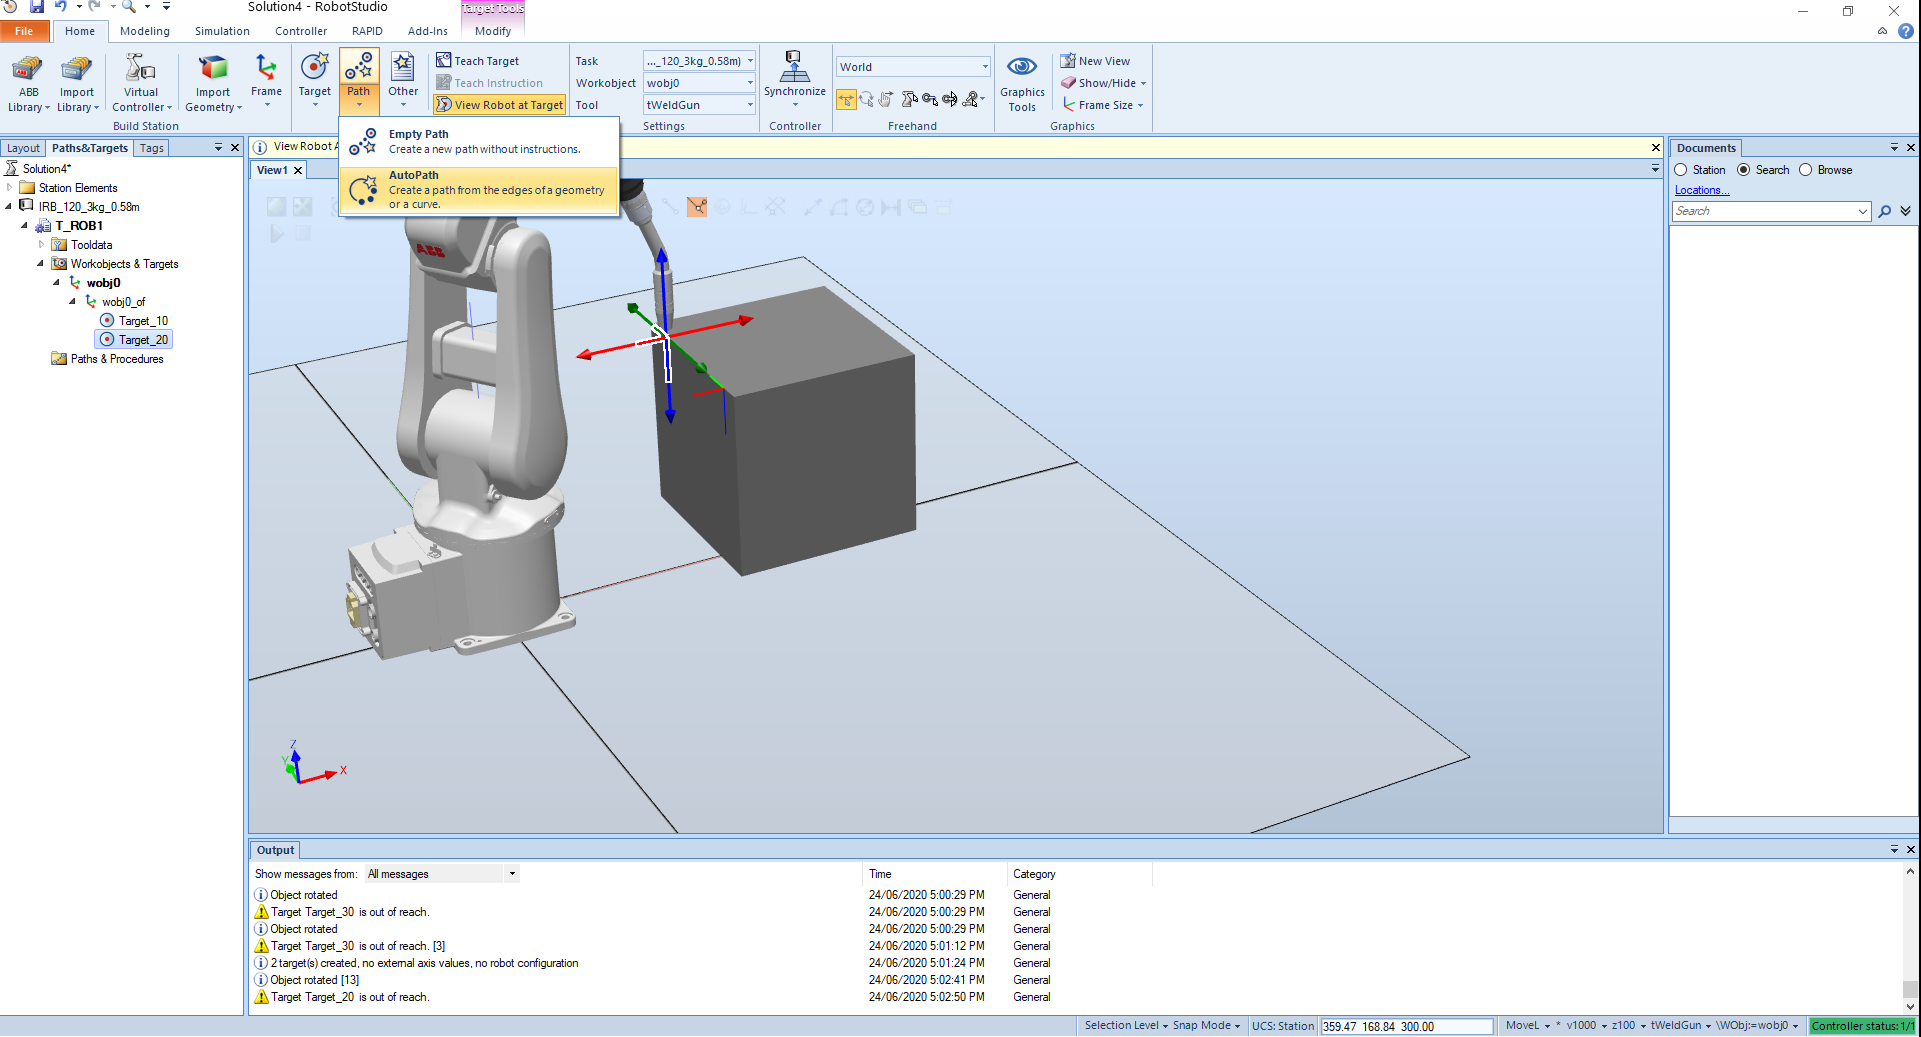
Another feature is the auto configuration where you define the path but you don't creat the points.
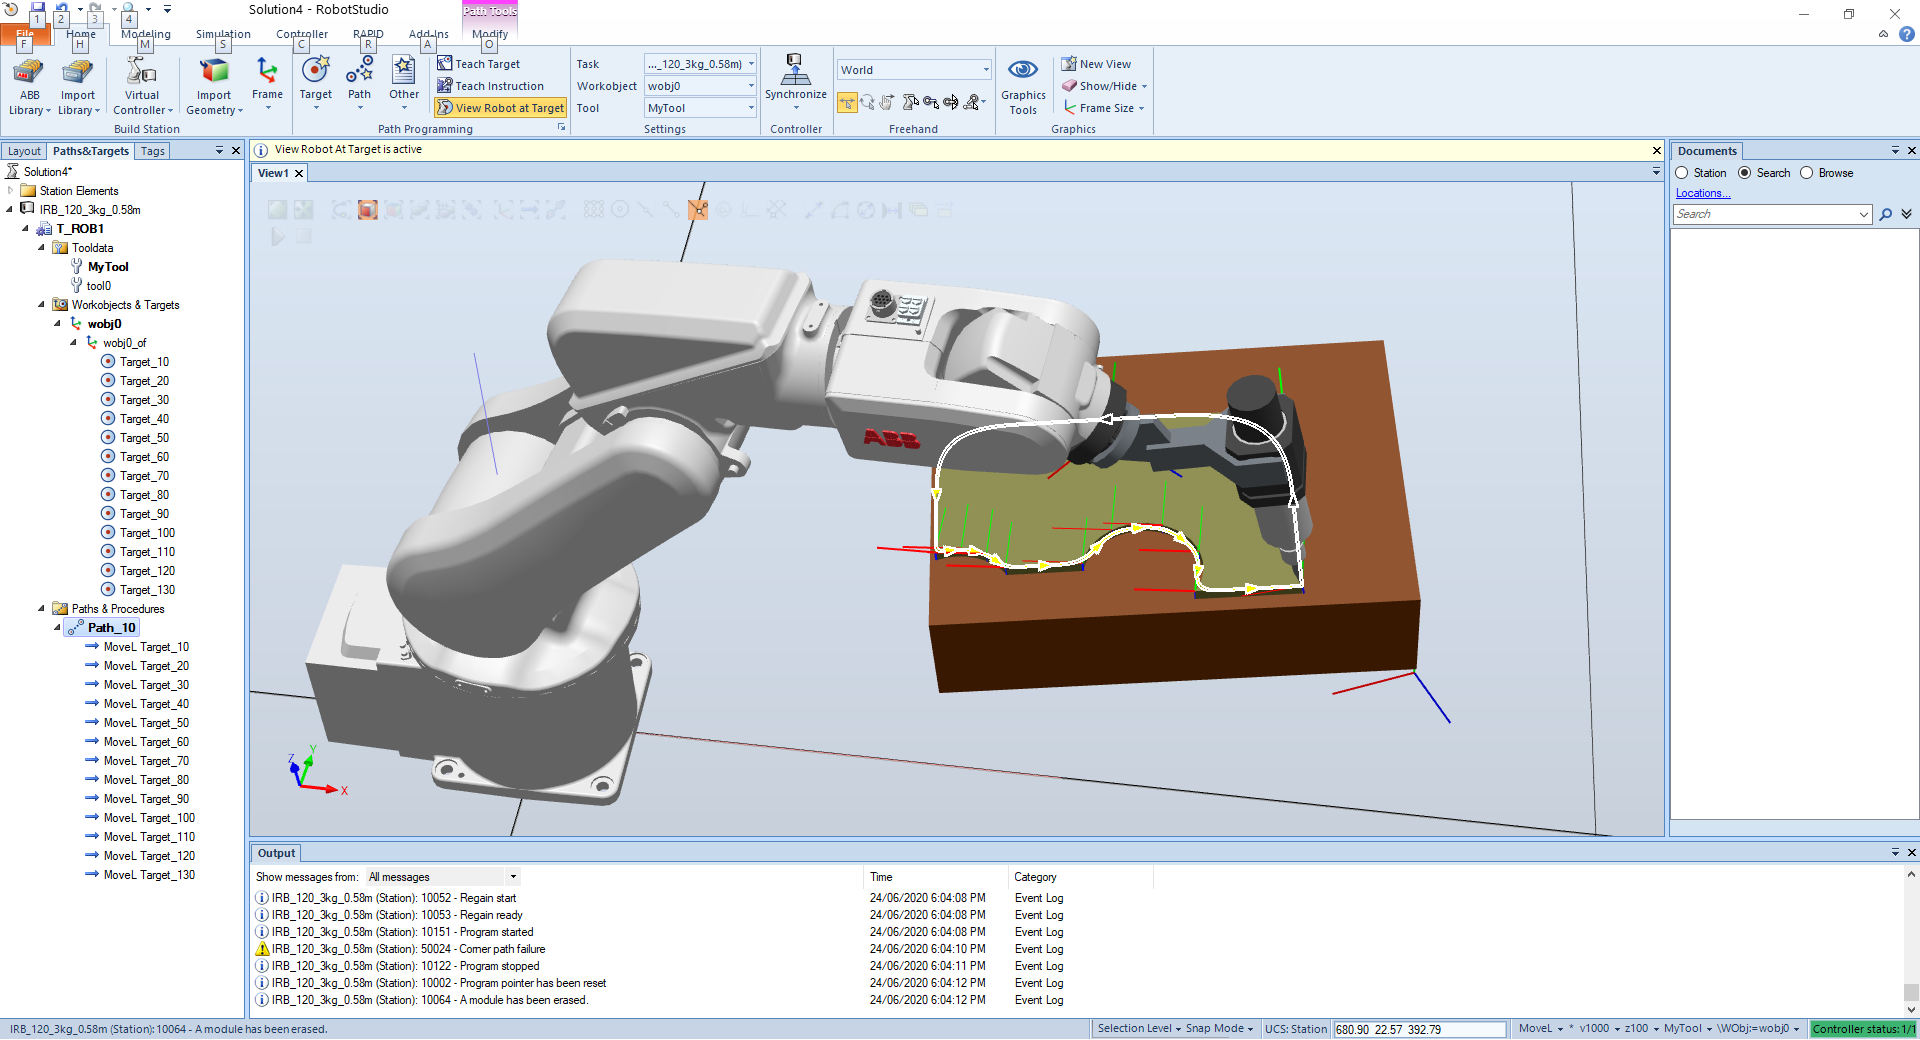
Paths can be changed with many options like reverse.
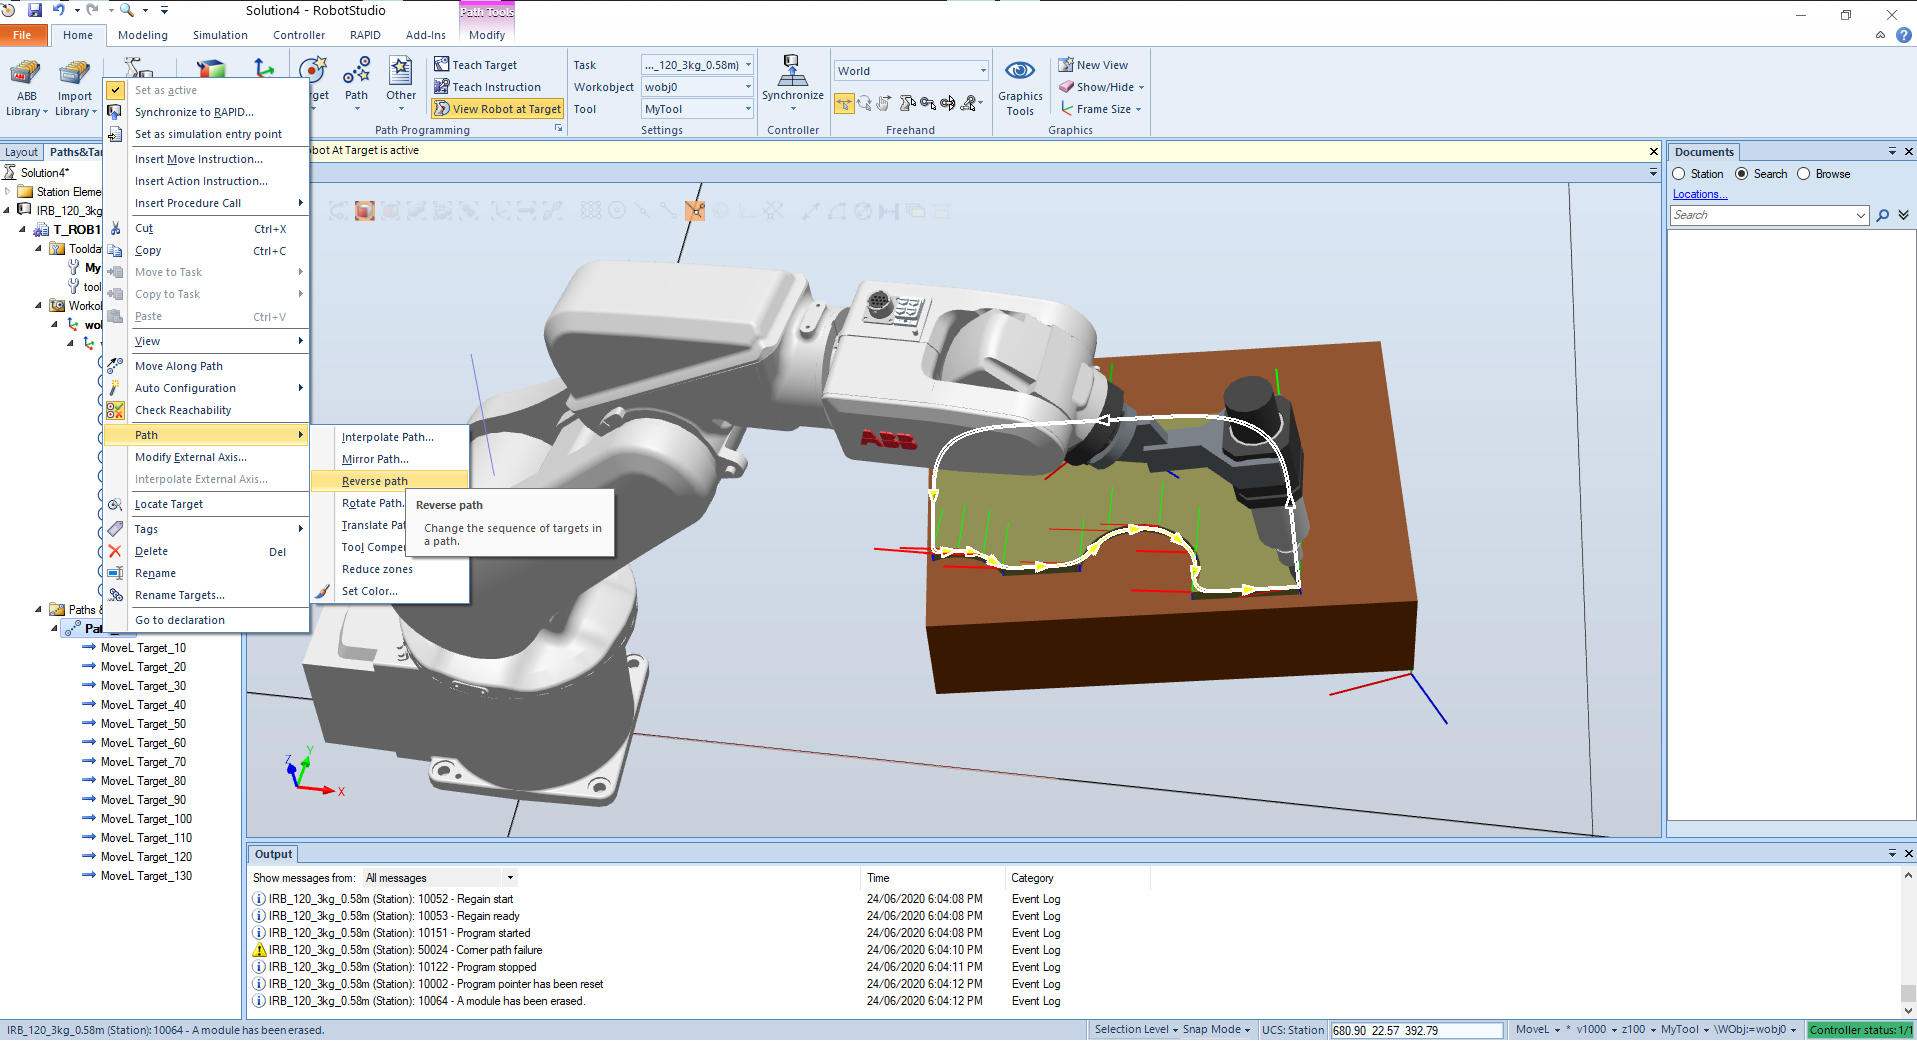
# Move
# Assignment 4 - Setup and Simulate the ABB IRB120 in RobotStudio
Thiago Lima Souto - Mat.: 19044686
Professor Dr. Khalid
Masters of Engineering - Mechatronics
Massey University - 1st semester 2020 - Auckland
Course: 282.762 Robotics and Automation
# Introduction
This assignment consist of a graphical report with simple explanation of the steps and a considerable amount of screen shots.
# Creating the project
A project was created with the name Assessment_04_Thiago_Souto